14. IoT Case 11: Kitchen Safety Flame Monitoring Alert
Level: 
14.2. Background
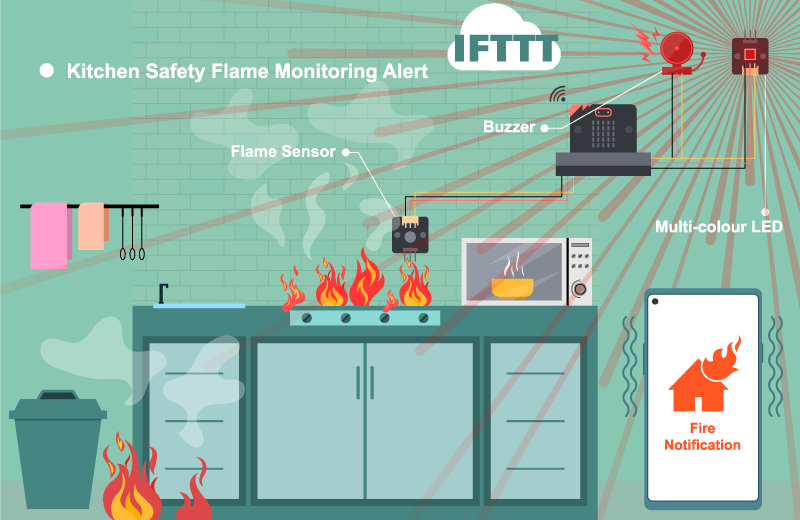
Nowadays, fire accidents always happen when the homeowner is sleeping or outside the home. It is good to install an IOT system in the kitchen or living room to alert the user on his/her phone when he/she is sleeping or in the office so that he/she will wake up and rush out from the home to prevent a terrible accident happened.
Kitchen Safety Flame Monitoring Alert Principle
By installing a flame sensor in the area, the system will trigger an alarm and blink the red LED to alert the home owner inside the home when there is fire detected. At the same time, it will send a IFTTT notification to the house owner’s phone so that can alert user when he/she is sleeping or outside the home.
14.4. Assembly step
Step 1
In this case, build the “Big Style Model” as a home base.

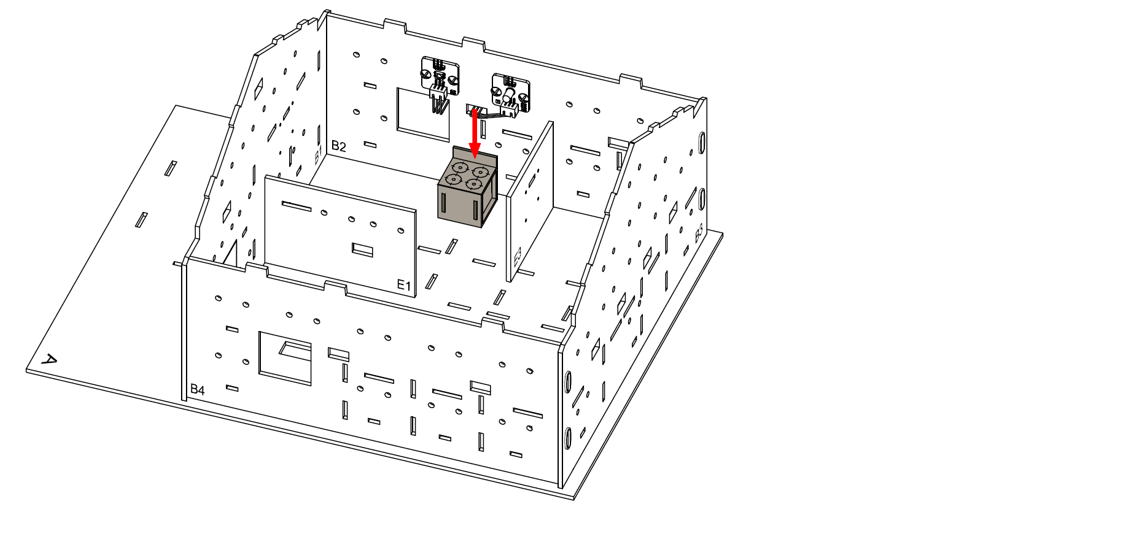
Step 2
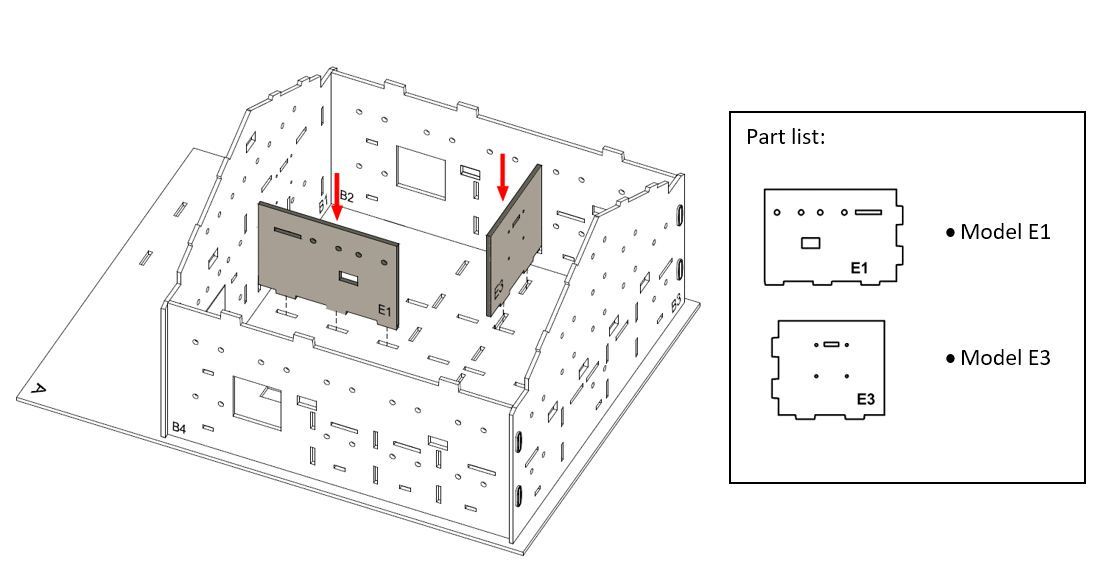
To build a kitchen, put model E3 & E1 onto model A, align with holes at model A and B2 & B1.
Step 3
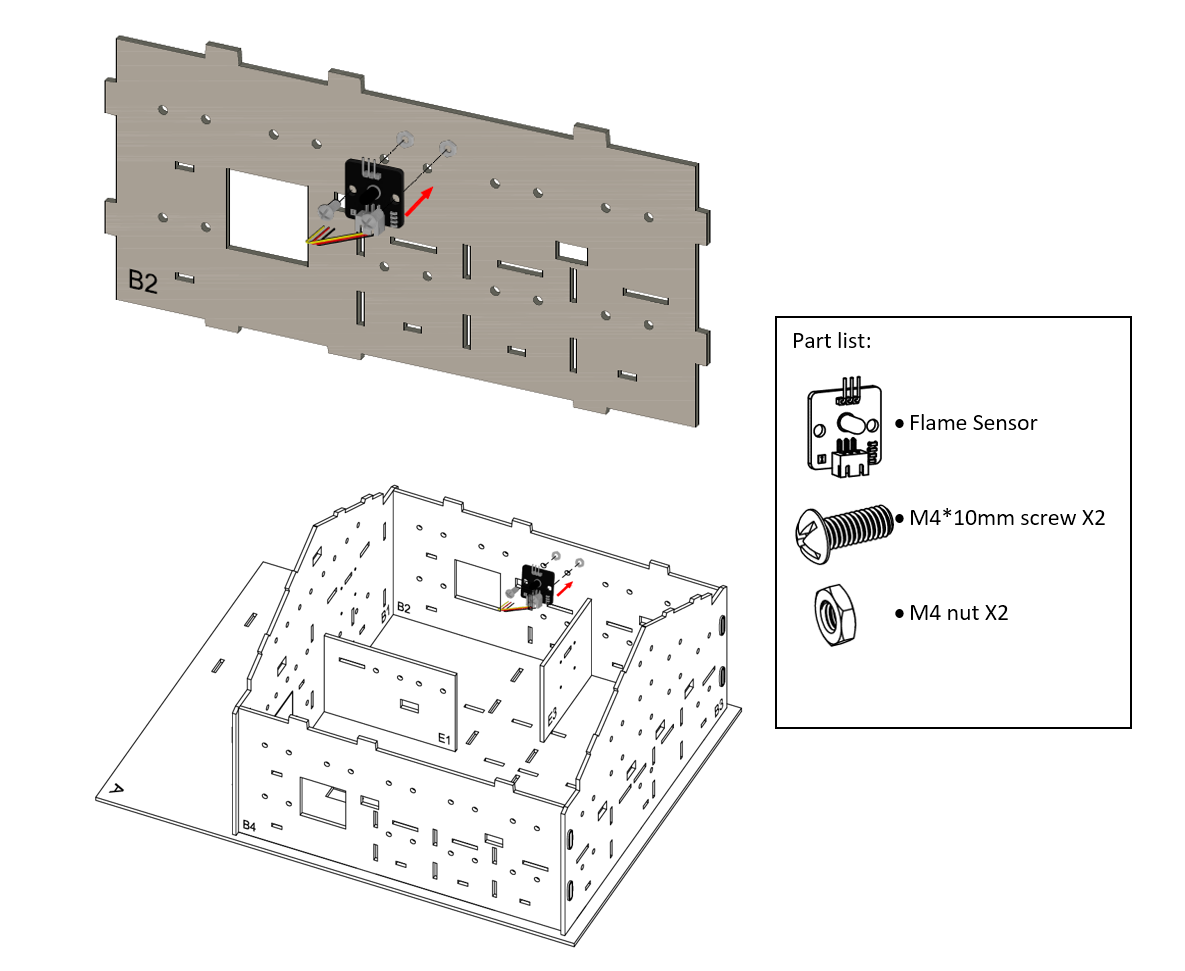
Attached the flame sensor to the model B2 using M4*10mm screws and nuts. And the connecting wire should be bended to the hole nearby.
Step 4
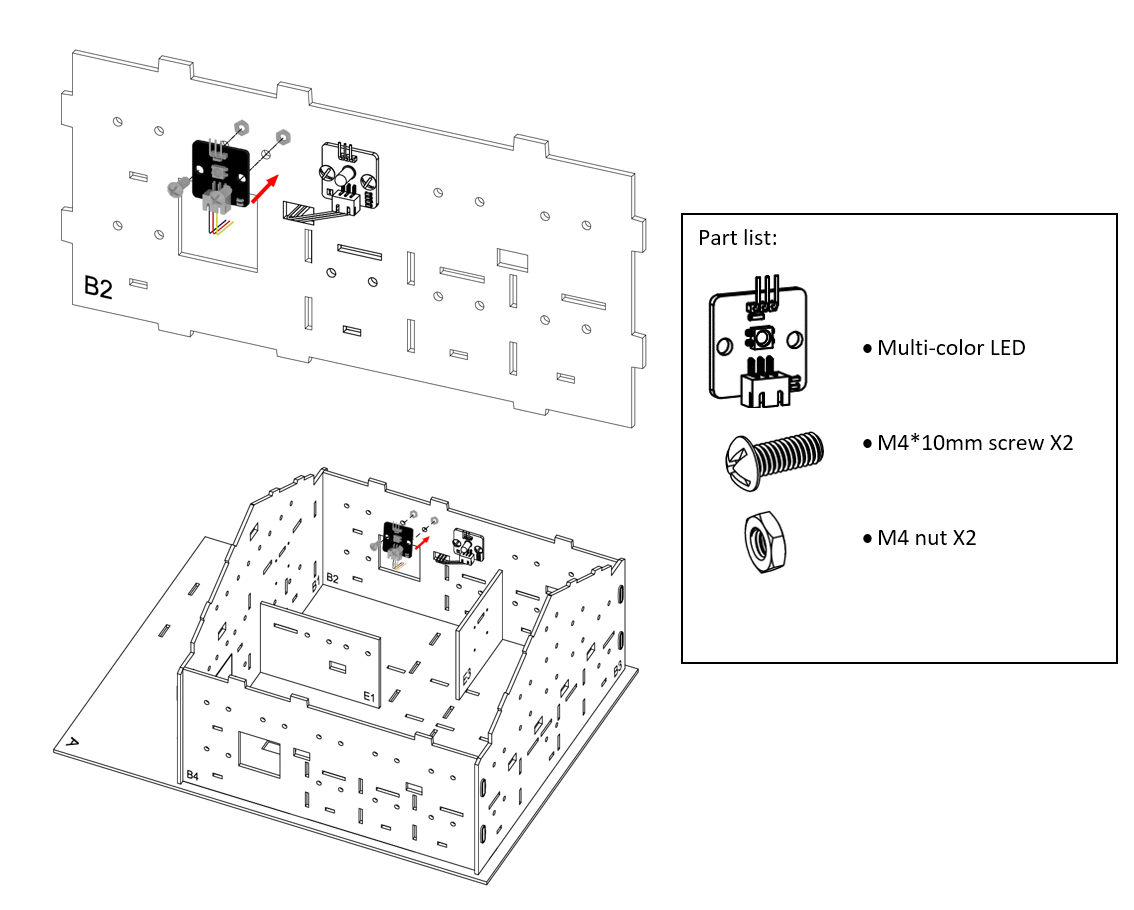
Attached multi-color LED to the model B2 using M4*10mm screws and nuts. And the connecting wire should be bended to the hole below.
Step 5
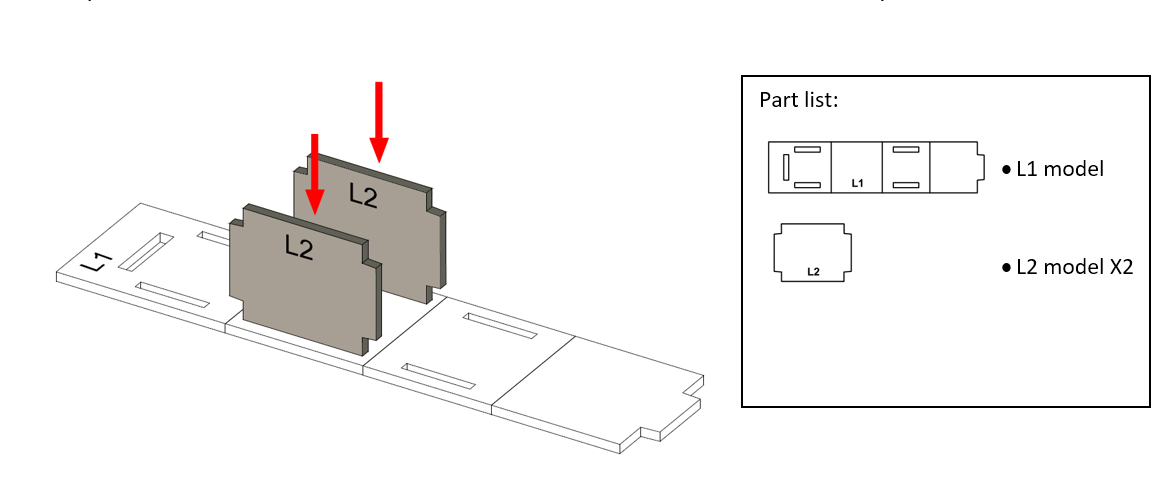
To build a stove model. Put the model L2 to model L1 from the top to bottom.
Step 6
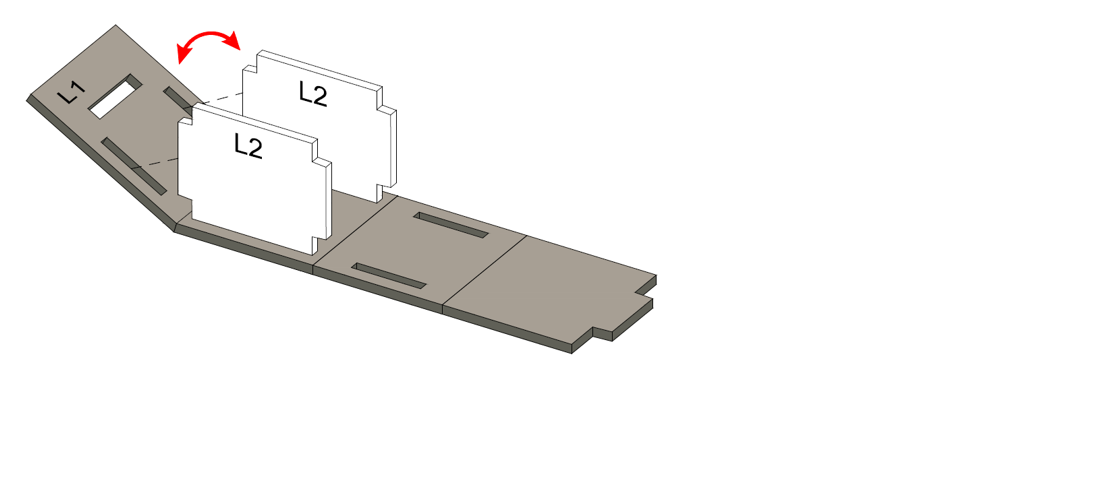
Fold the model L1 into the model L2 according to the arrow.
Step 7
Fold the another side of model L1 into the model L2 according to the arrow.

Step 8
Stick the paper with a cooking stove pattern.
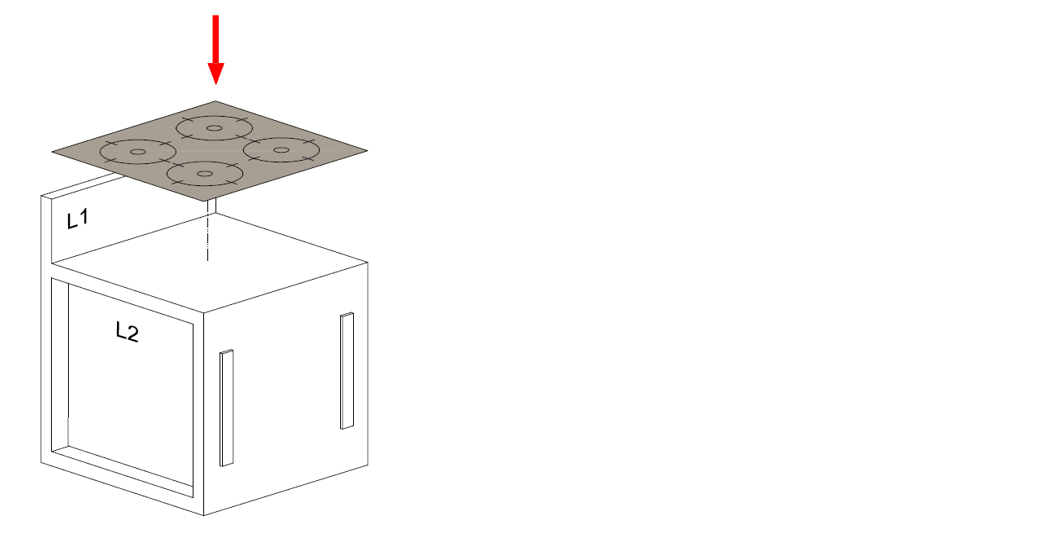
Step 9
The cooking stove Completed!

Step 10
Place the cooking stove model at the kitchen.
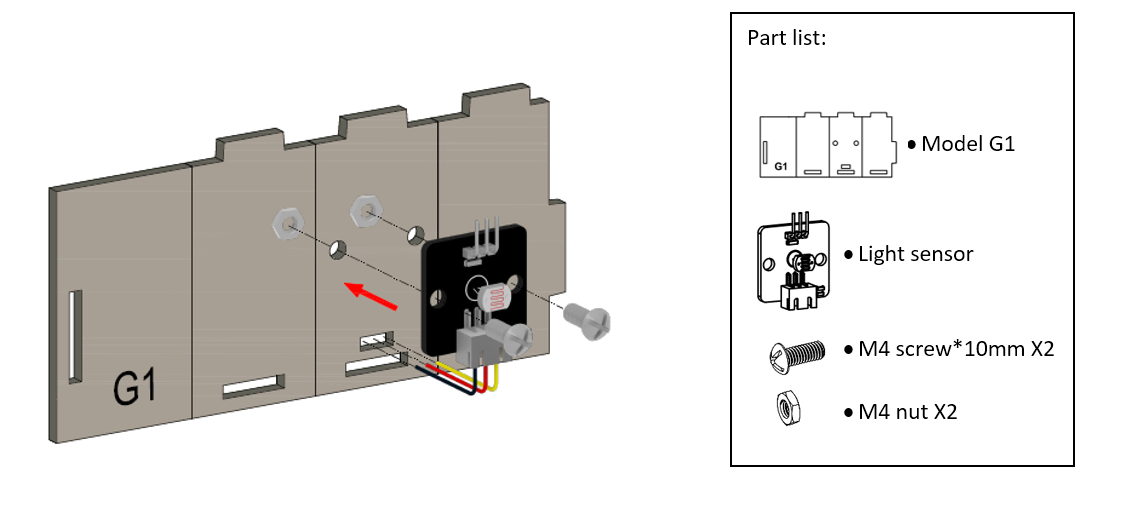
Step 11
To build a fridge, attach light sensor onto model G1 using M4 * 10mm screws and nuts. And the connecting wire could be bended to the hole below it.
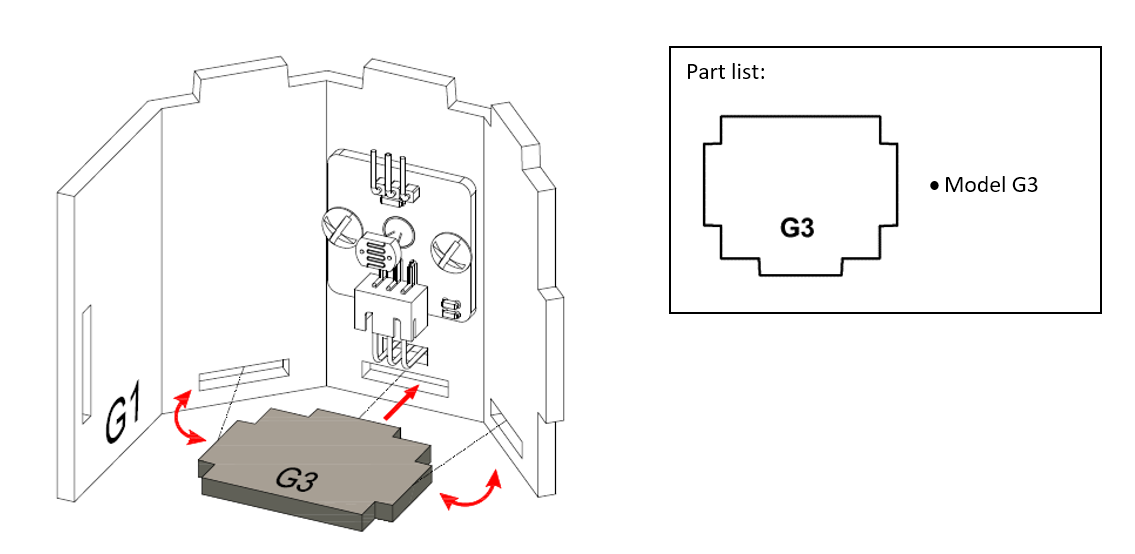
Step 12
Fold and bend the Model G1 accordinglyand put Model G3 into the Model G1, align with the holes.
Step 13
Put Model G2 onto the Model G1, align with the holes.
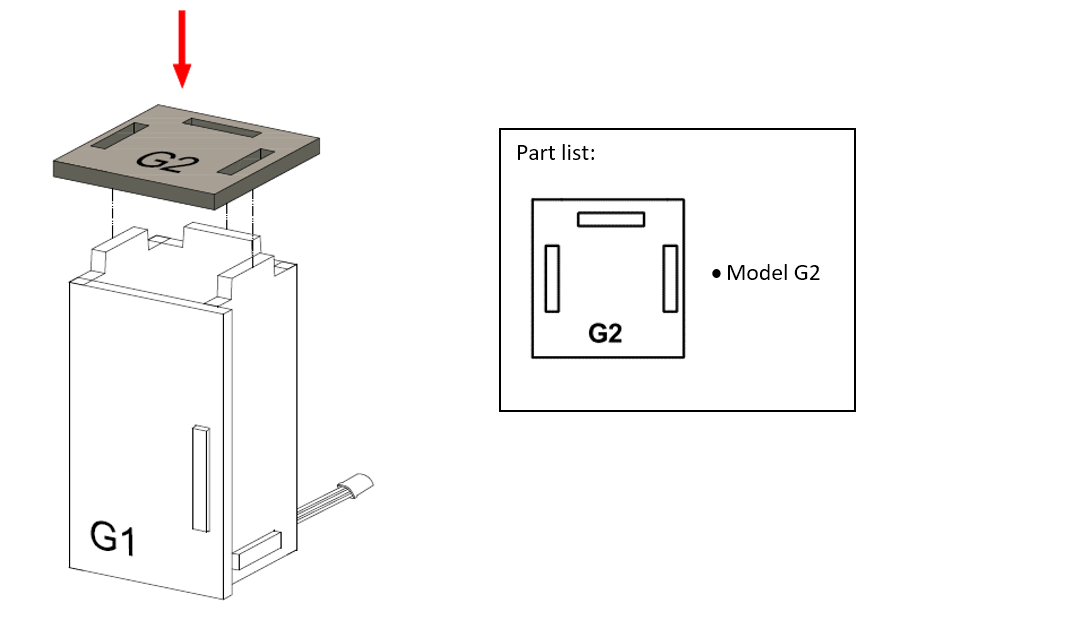
Step 14
The fridge completed!

Step 15
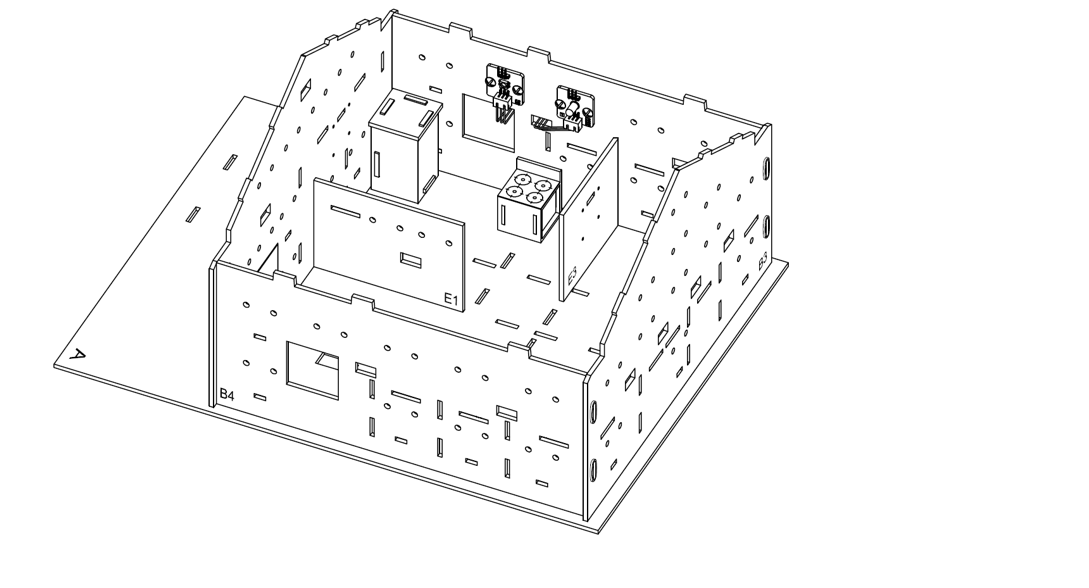
Place the fridge model at the coner of the kitchen.
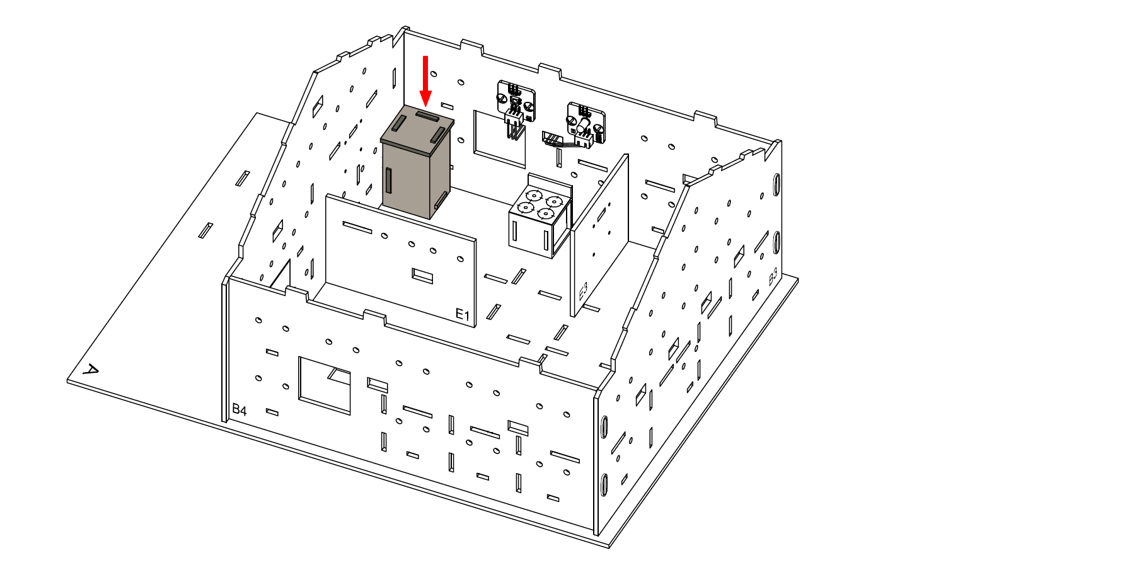
Step 16
The fridge Completed!
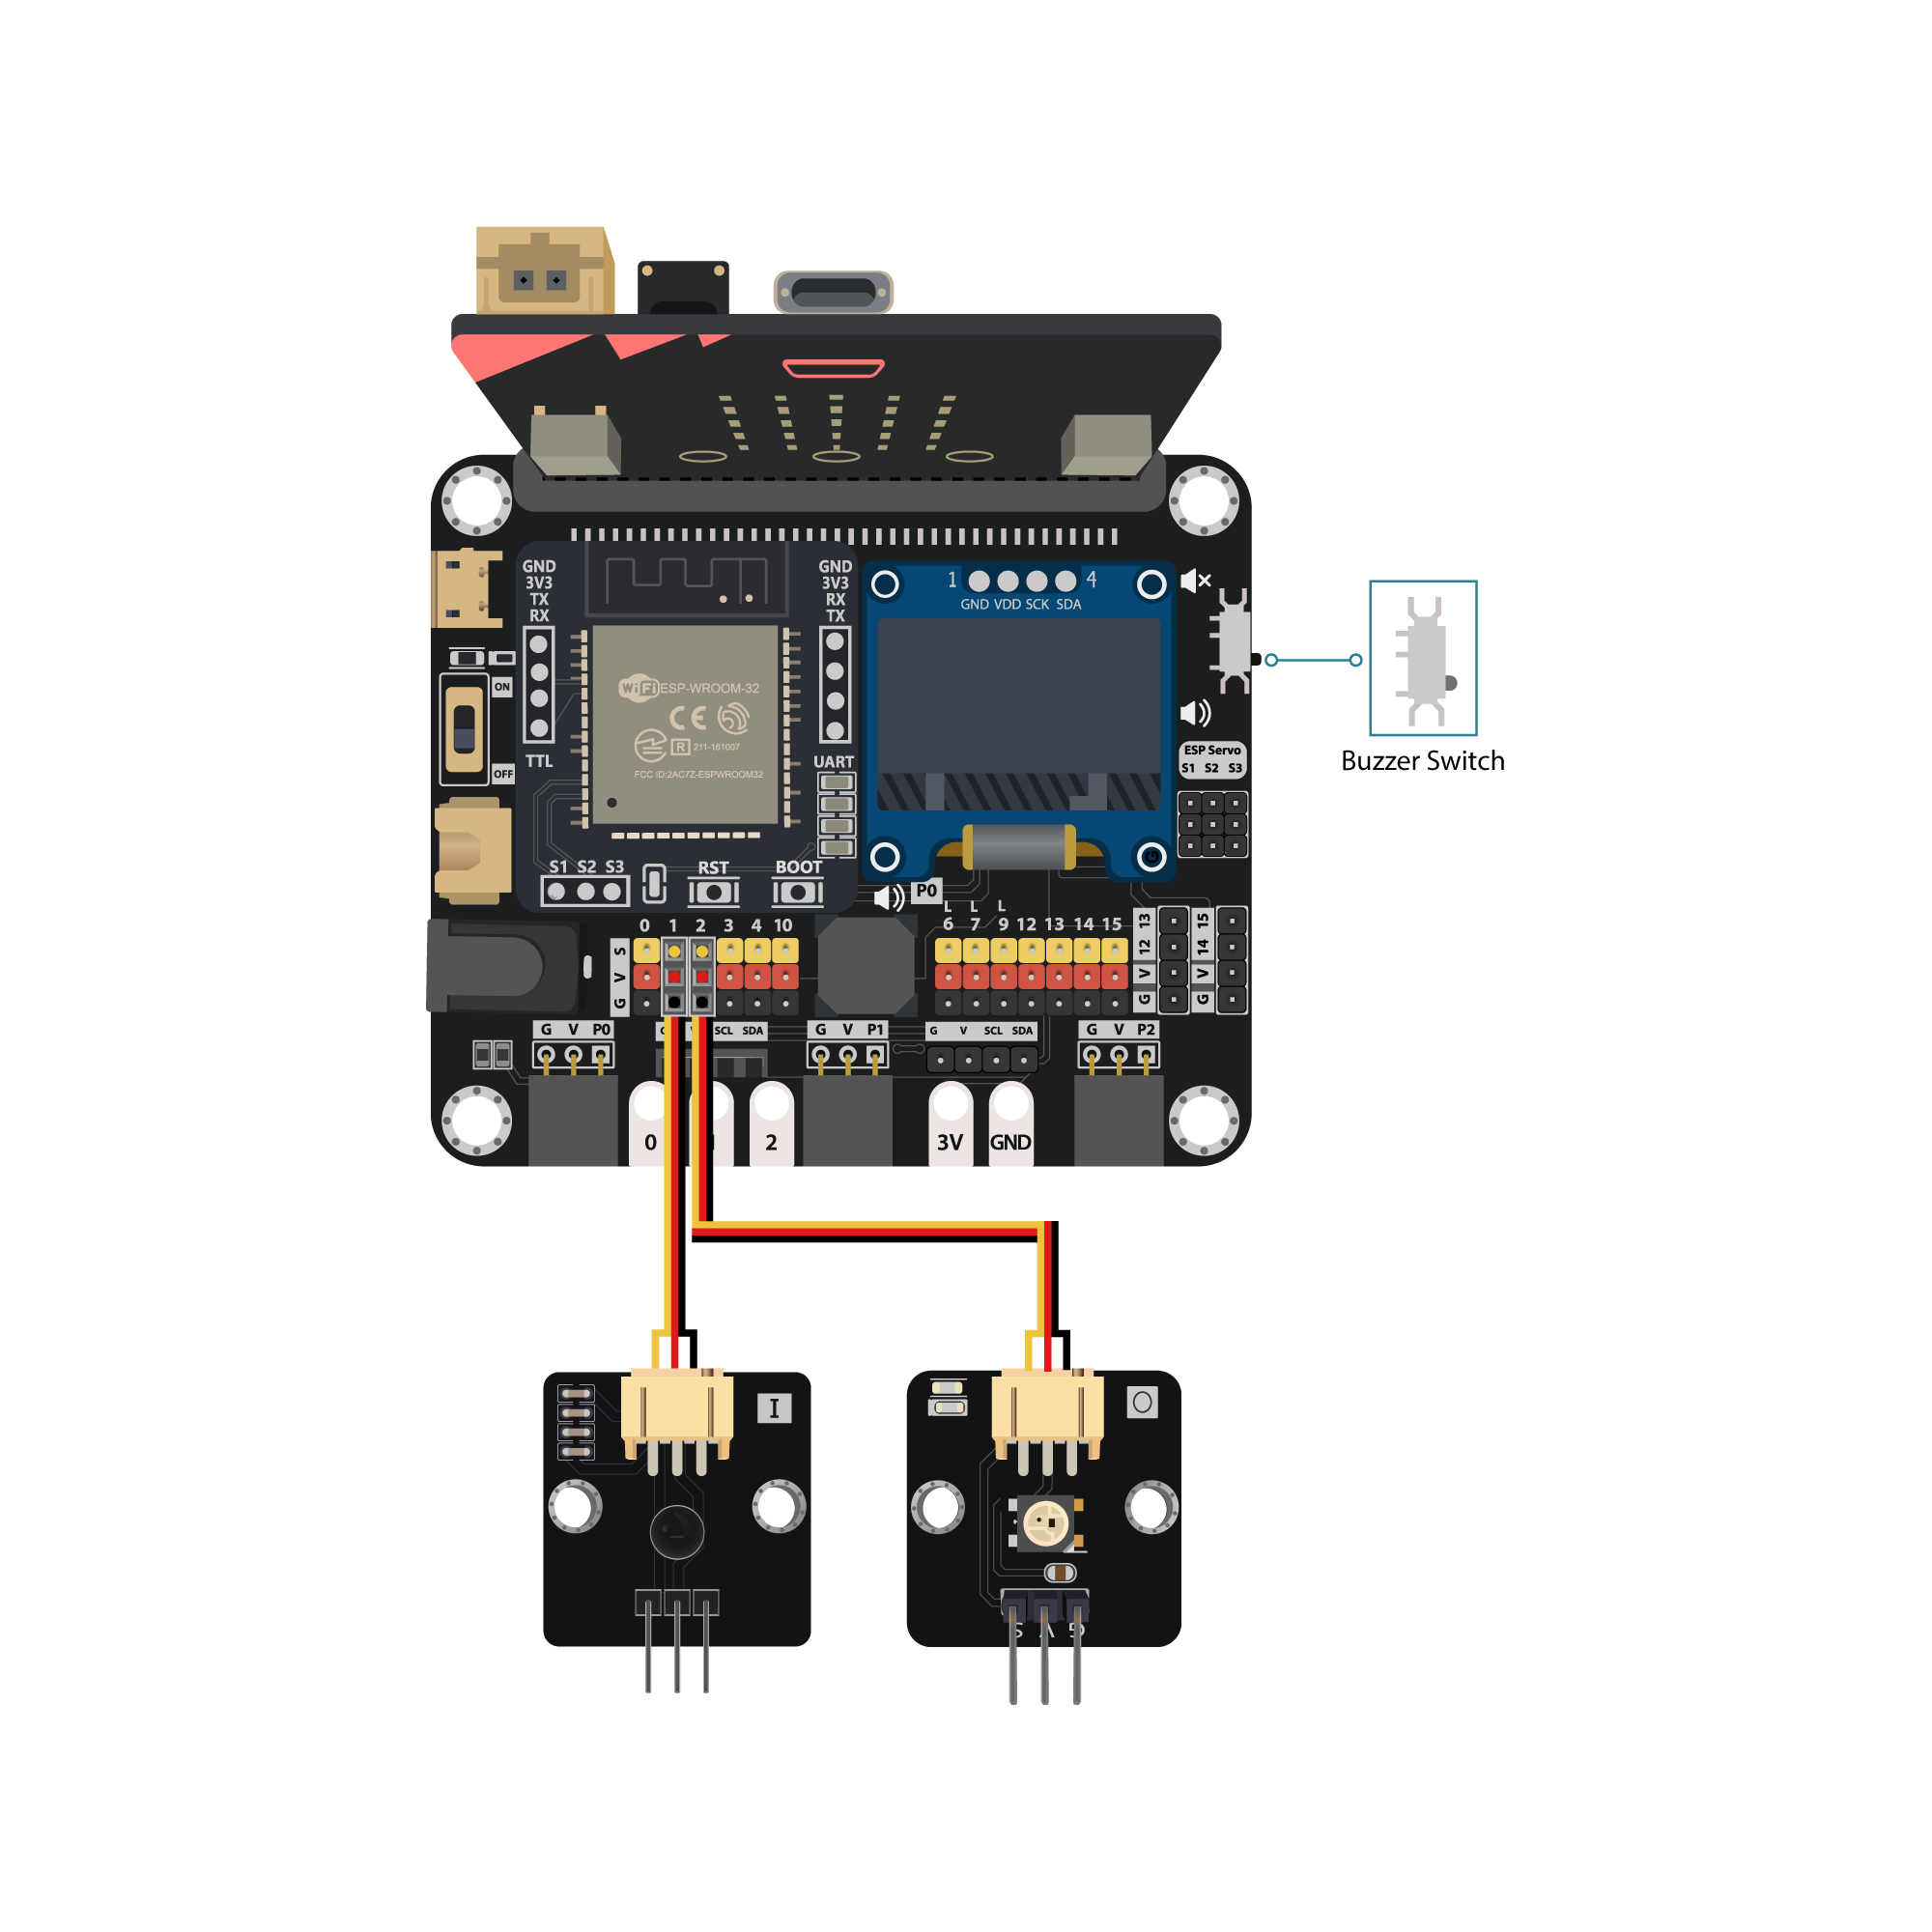
14.5. Hardware connect
Connect the flame sensor to P2
Connect the Multi-Color LED to P1
Pull down the buzzer switch to connect buzzer
14.6. Programming (MakeCode)
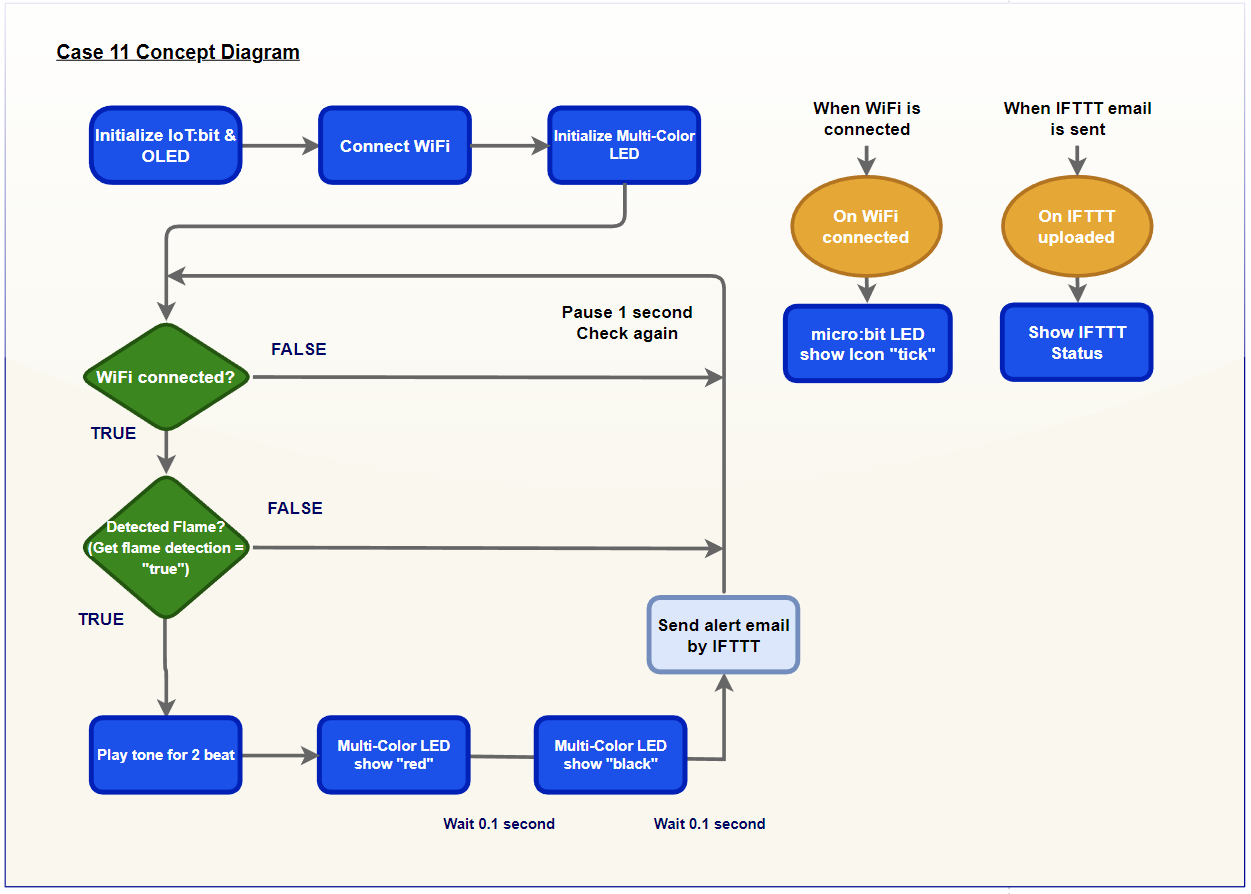
Step 1. Initialize OLED, IoT:bit and connect to WiFi, create variable
Snap
Initialize OLED with width:128, height: 64toon startSnap
Initialize IoT:bit TX P16 RX P8fromIoT:bittoon startSnap
Set Wi-Fi to ssid pwdfromIoT:bitEnter your Wi-Fi name and password. Here we set
smarthonasSSIDand12345678aspasswordSnap
Set strip to NeoPixel at pin P1 with 1 leds as RGB(GRB format)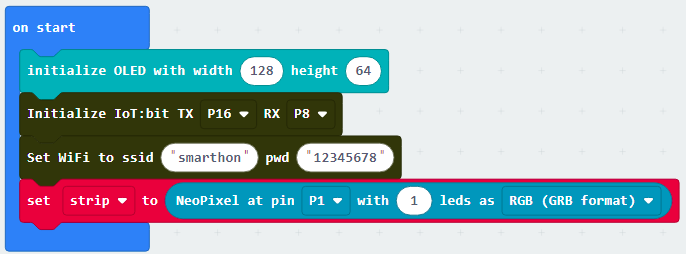
Step 2. Show icon “tick” and Device ID after WiFi connection
Snap
show iconfrombasictoOn WiFi connectedand select icontickDraw the
Device IDvariable fromOn WiFi connectedto theshow stringblock placeholder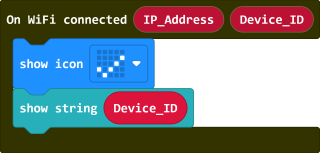
Step 3. Check the internet connection status
In the
Forever, put aifstatement with conditionWiFi connected?to check the connection status
Step 4. Check the flame sensor result and action on OLED display
Put another
ifstatement with conditionGet flame detection at Pin P2 = trueto recognize the flamePlay a warning sound when the flame was detected

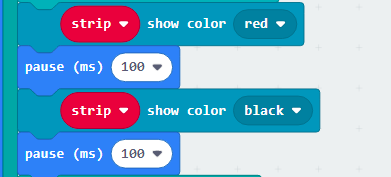
Step 5. Action on Warning LED
The LED should be blinking to telling dangerous
Put
strip show color redto turn on the LED in red colorAdd a
pause (ms) 100to wait for 0.1 secondPut
strip show color blackto turn off the LEDPause for 0.1 second again
Step 6. Action on IFTTT
Put a
Send IFTTT event_name* XXXXXto send the event to IFTTTFill in the Applet’s
event_name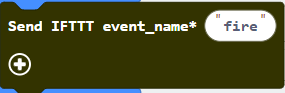
Step 7. Know the Upload result
To check the upload state, use the
On IFTTT Uploadedto get the sending resultInside the
On IFTTT Uploaded, use OLED display to show the informationClear the OLED display before each update by
clear OLED displayShow upload state by
show string join IFTTT: Status, theStatusvalue is from the function’s placeholderShow error_code by
show string join Error: Error_code, theError_codevalue is from the function’s placeholder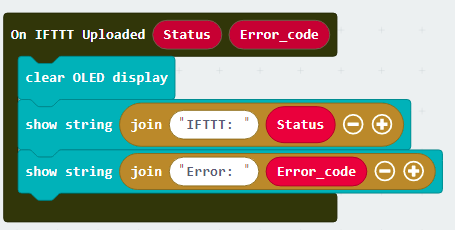
Full Solution
MakeCode: https://makecode.microbit.org/S90038-27905-10105-17023
You could also download the program from the following website:
14.7. IoT (IFTTT)
Part 1: Setup IFTTT
Step 1
Go to http://www.ifttt.com, register an account and login to the platform

Step 2
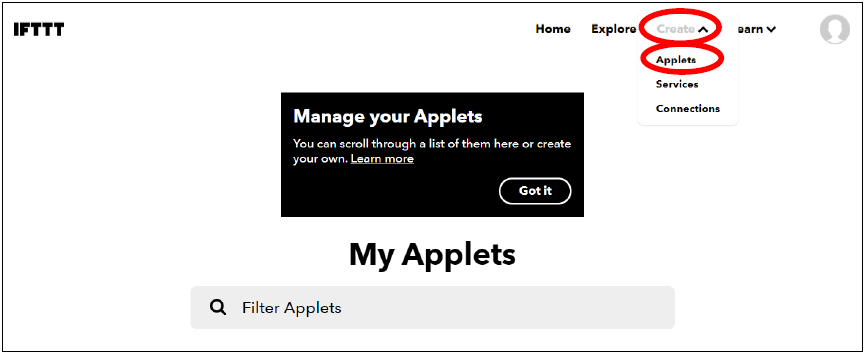
On the top right menu, click “Create” > “Applets”
Step 3
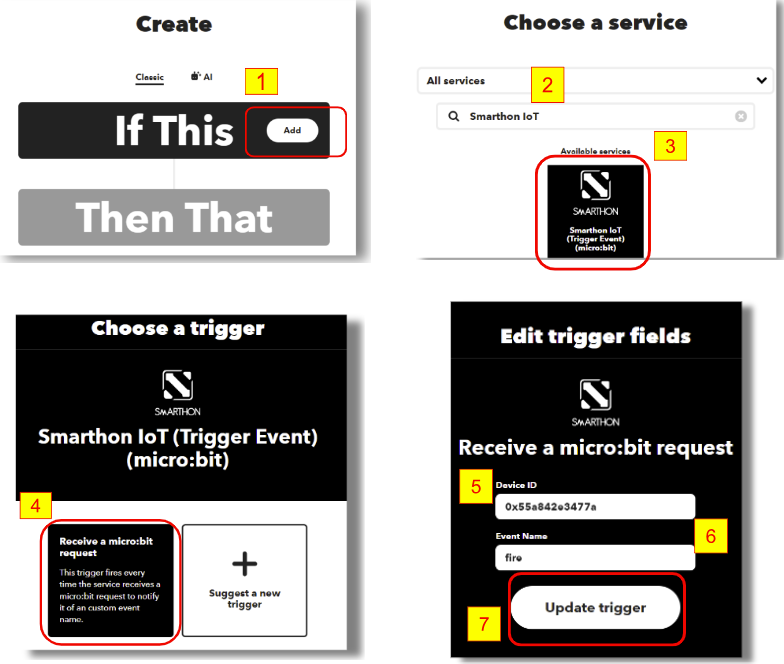
Select this
Select Smarthon IoT
Input Device ID and Event Name. (eg. Device ID: 0x55a842e3477a, Event Name: Fire)
Click “Create trigger”
Step 4
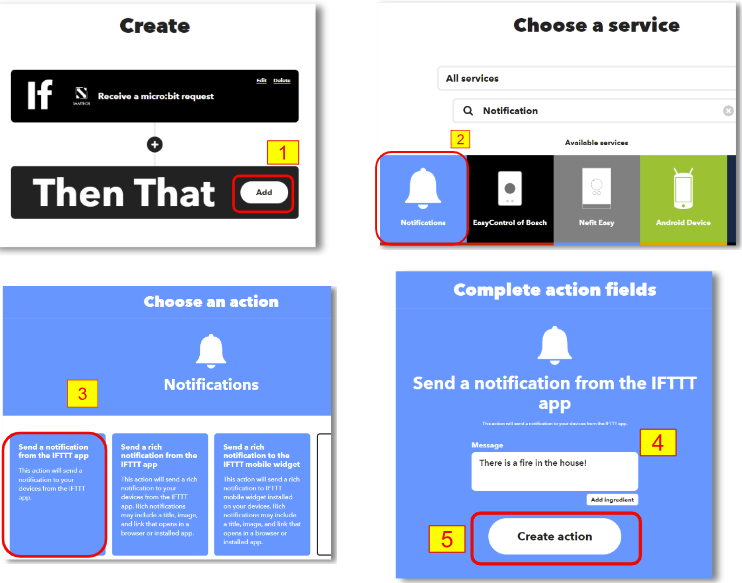
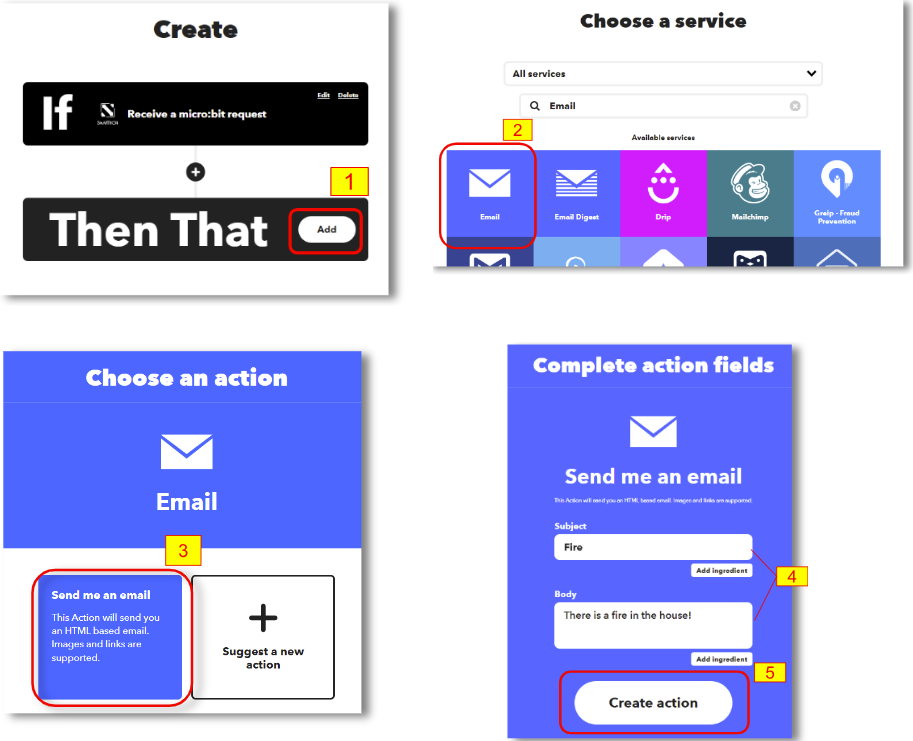
Select “That”
Notifications
Send a notification from the IFTTT app
Message (eg. There is a fire in the house!), the click “Create action”
Optional: Use email as notification method
In the THEN field, search for the “email” and use it to replace the “notifications” in previous step
Part 2: Install the IFTTT App on smartphone
Go to play store or app store to search and download the IFTTT App

Login to your IFTTT account

14.8. Result
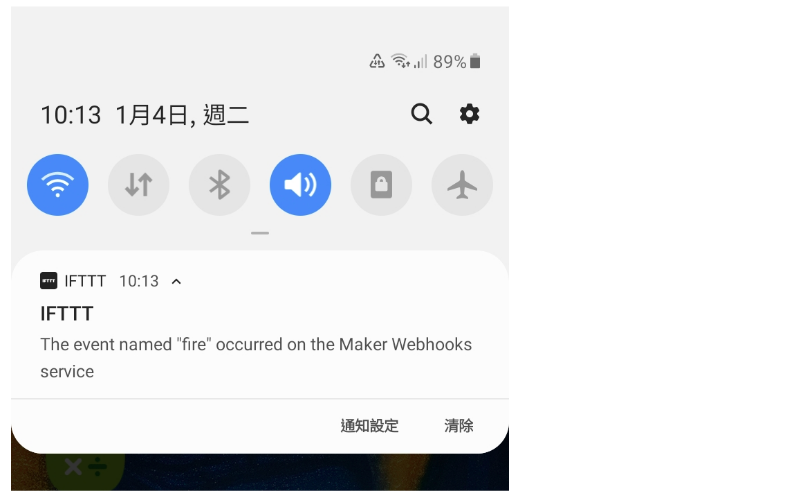
When the flame source is detected by the flame sensor, it will trigger to blink the LED, making alert sound, and send the warning notification to IFTTT

14.9. Think
Other than warning, any task we can do when we detect the flame? (e.g add a fan or sprinkler to extinguish the fire, call the police?)