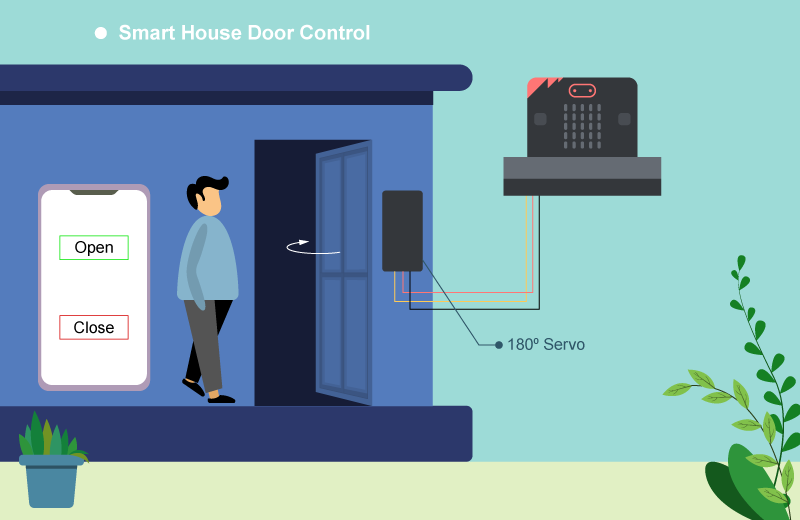
12. IoT Case 09: Smart House door control
Level: 
12.2. Background
What is app inventor?
App Inventor allows user to develop their own app for Android phones or IOS device(iphone, ipad) by simple programming and design work.
Smart House door operation
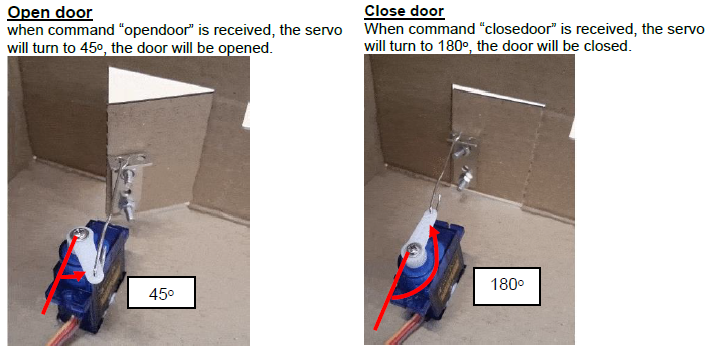
When the micro:bit receives the signal “opendoor” from the app, the 180o servo will turn for 180o to open the door. When the micro:bit receives the signal “closedoor” from the app, the 180o servo will turn back 180o to close the door.

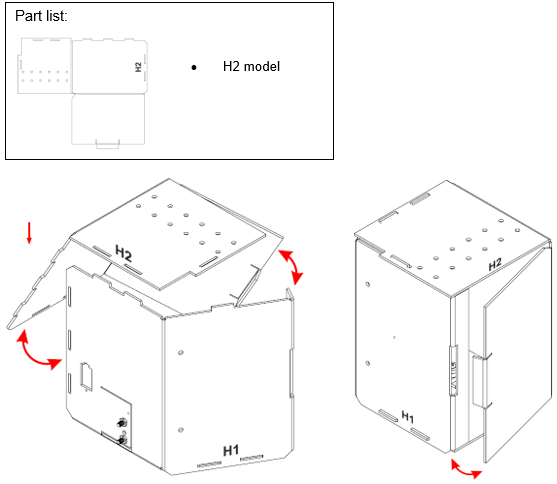
12.4. Assembly step
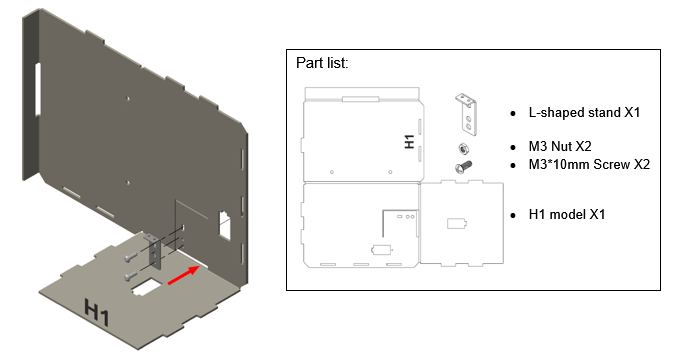
Step 1
Attach the L-shaped stand with M3 screws and nuts to the model H1. Make a small hole to fix into the stand securely.
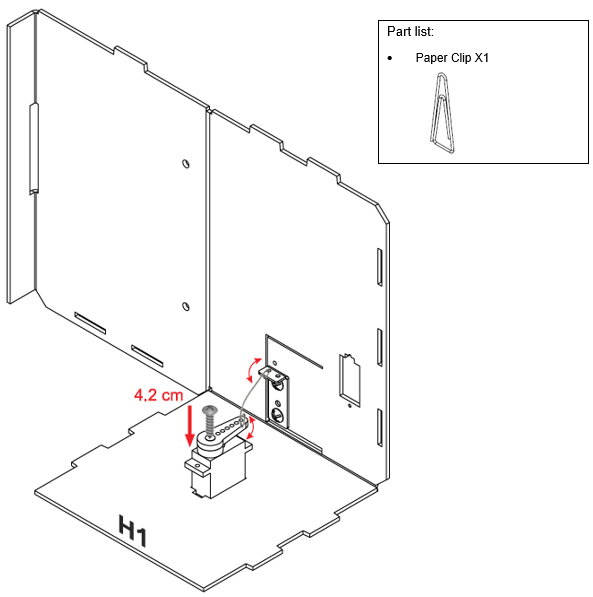
Step 2
Attach the servo to the model H1.

Step 3
Straighten the paper clip and cut it to 6.5 cm. Use pilers to fix the paper clip into the L-shaped stand.
Step 4
Put together all the cardboard parts (H1-H2)
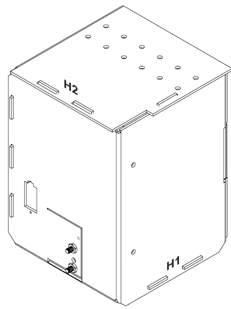
Step 5
Assembly completed!
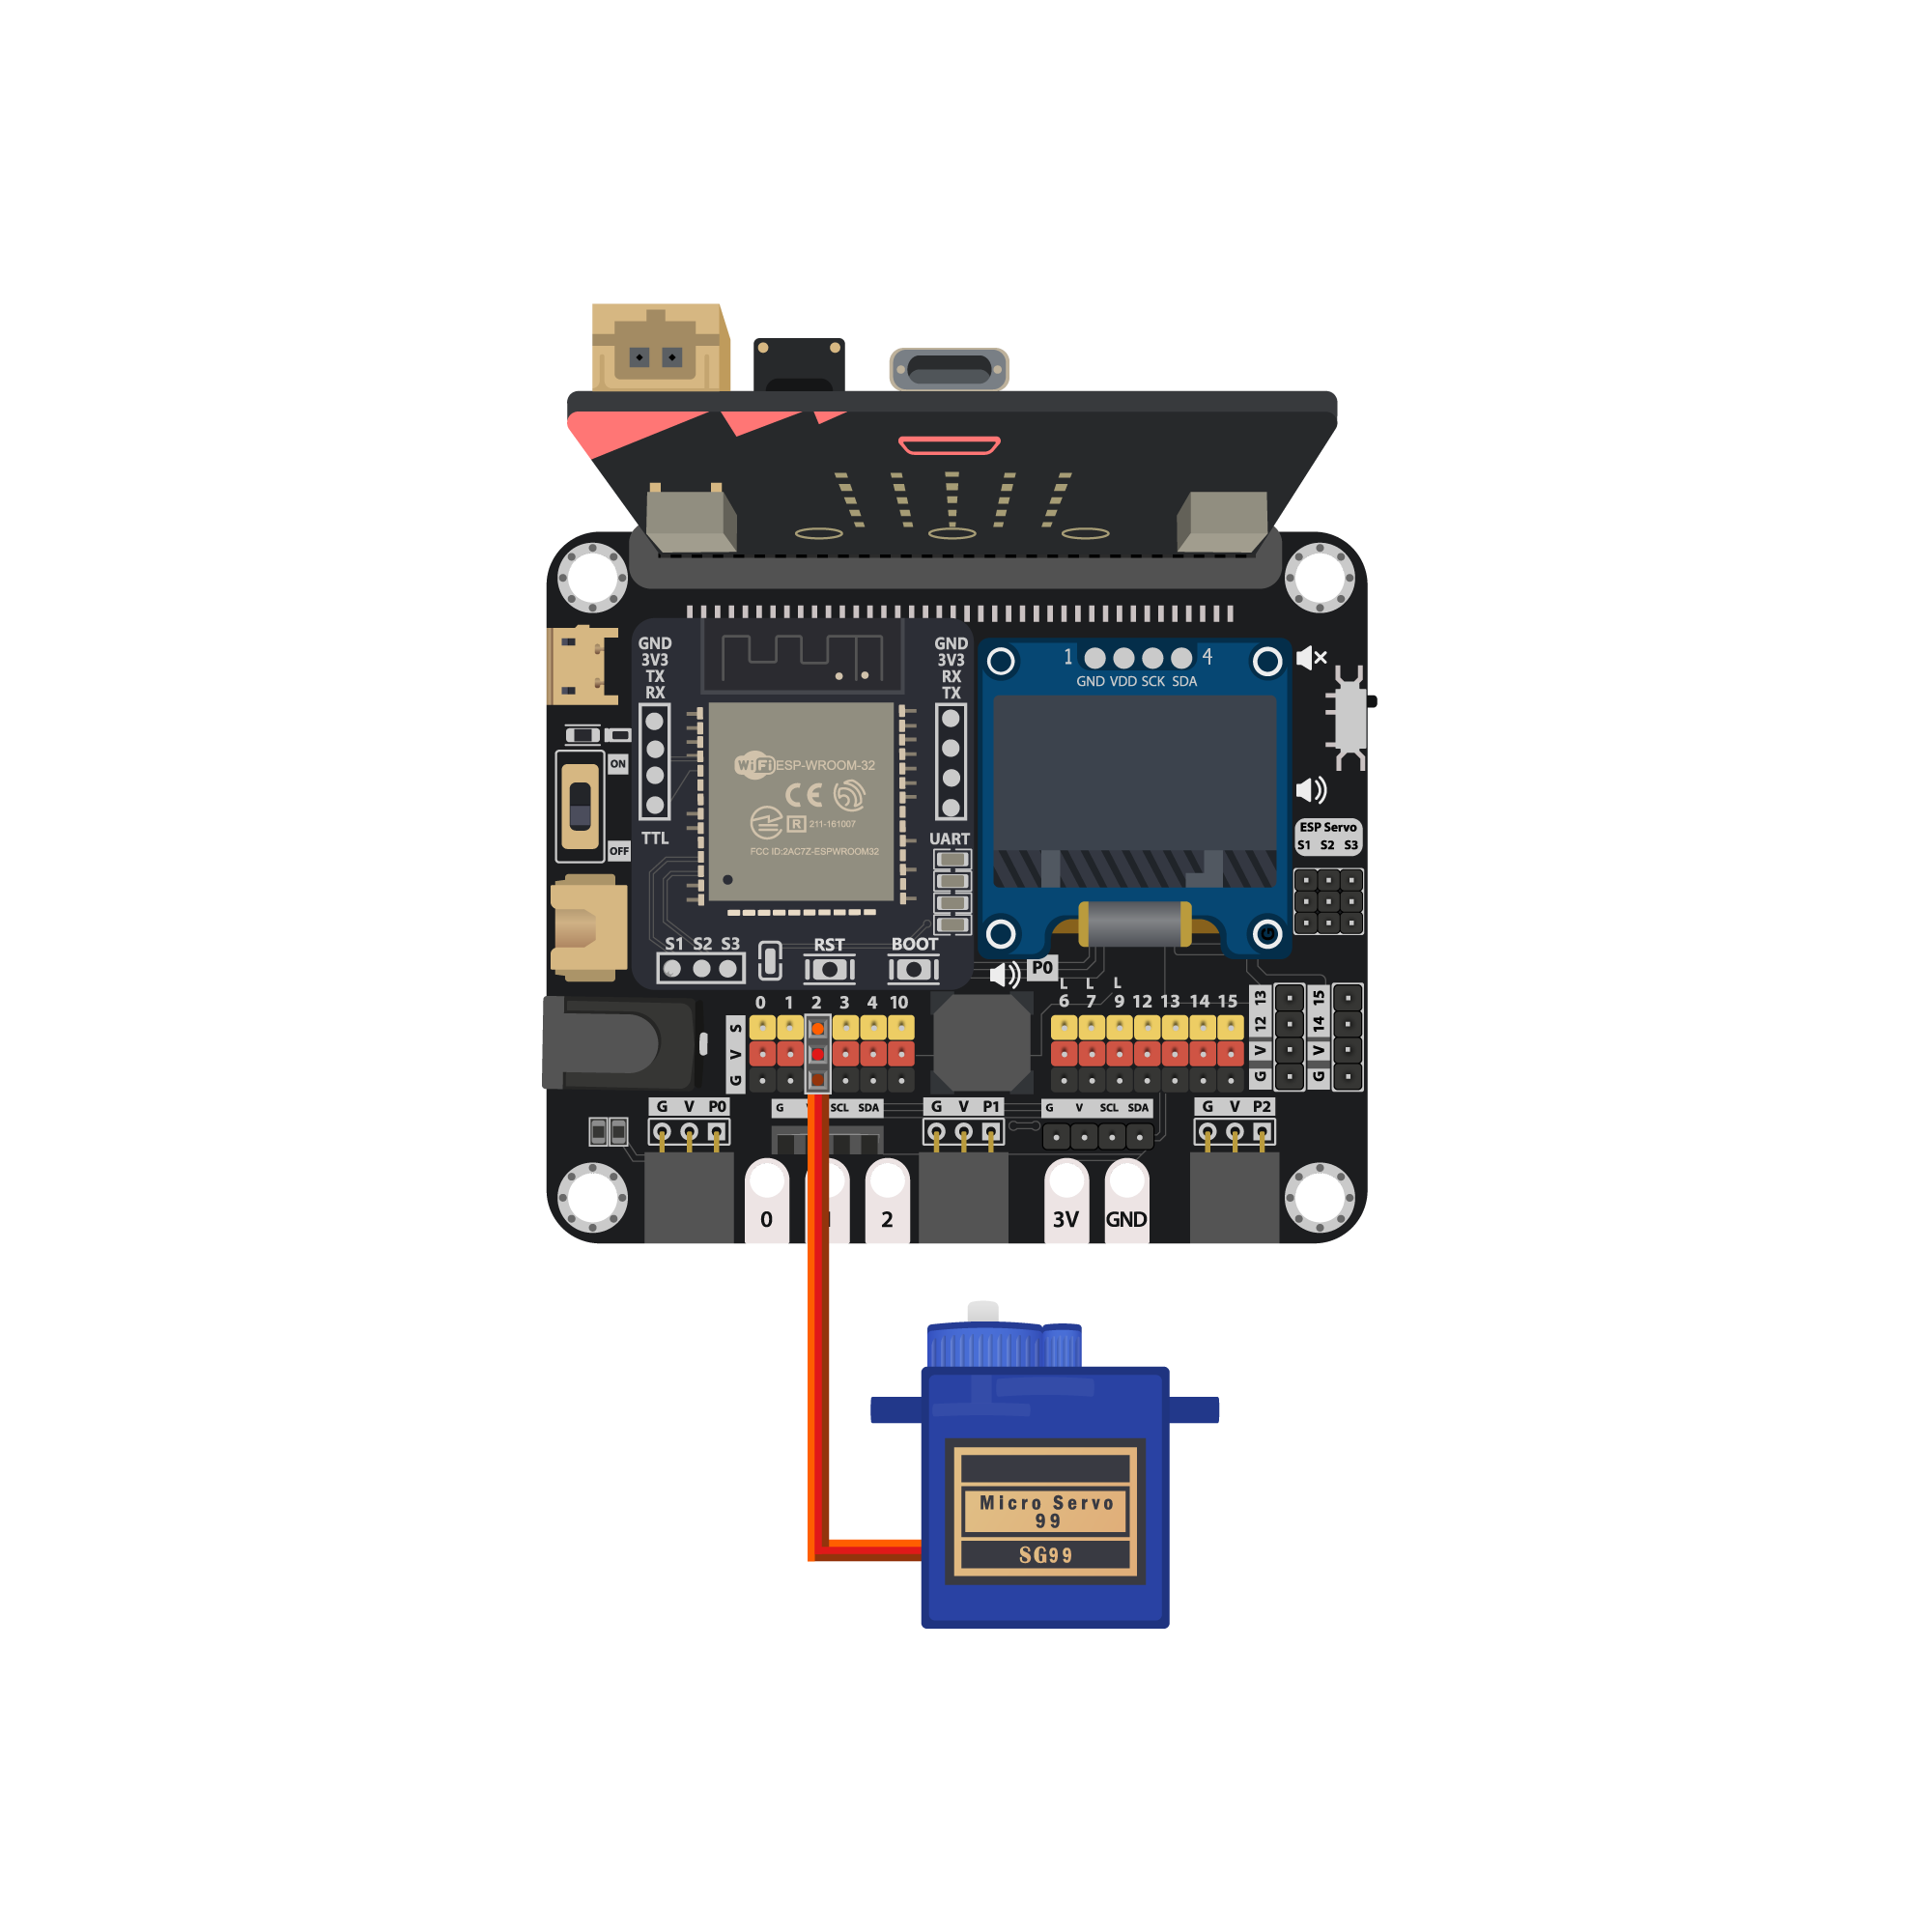
12.5. Hardware connect
Connect the 180ᵒ servo to P2 port of IoT:bit
| Micro:bit P2 | Servo |
|---|---|
| S (yellow) | S (orange) |
| V (red) | V (red) |
| G (black) | G (brown) |
12.6. Programming (MakeCode)
Step 1. Initialize OLED, IoT:bit and connect to WiFi
Snap
Initialize OLED with width:128, height: 64toon startSnap
Initialize IoT:bit TX P16 RX P8fromIoT:bittoon startSnap
Set Wi-Fi to ssid pwdfromIoT:bitEnter your Wi-Fi name and password. Here we set
smarthonasSSIDand12345678aspassword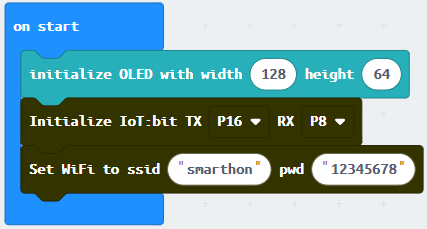
Step 2. Set servo initial position
Snap
Turn Servo to … degreefromSmartCity>OutputTurn servo to
180degree at pinP2(the servo will control the door to be closed initially)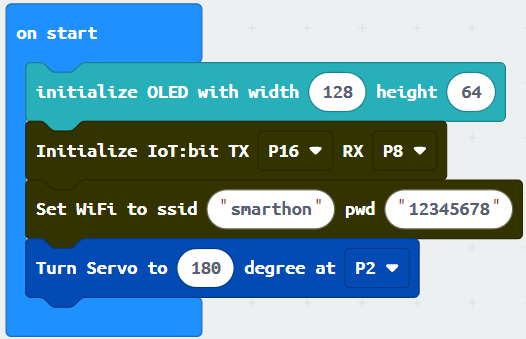
Step 3. Show icon “tick” after WiFi connection
Snap
show iconfrombasictoOn WiFi connectedand select icontickDraw the
Device IDvariable fromOn WiFi connectedto theshow stringblock placeholder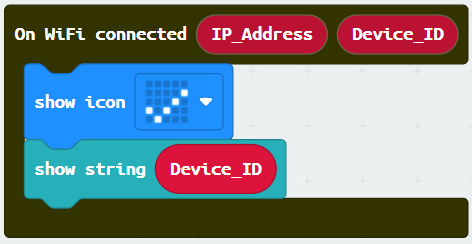
Step 4. Receive WAN command
Go to OLED
Snap the
clear OLED displaytoOn WiFi receivedto avoid overlapSnap the
show stringtoOn WiFi receivedDraw the
WAN_Commandvariable to show string placeholder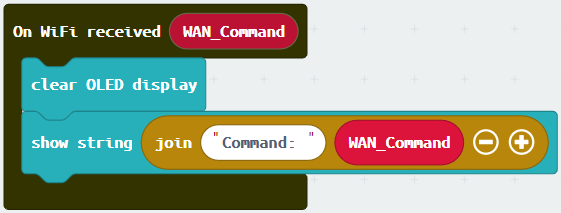
Step 5. Open/close door by WAN command
If Wan command
opendooris received,turn servo to 45 degree at P2(open door angle)If Wan command
closedooris received,turn servo to 180 degree at P2(close door angle)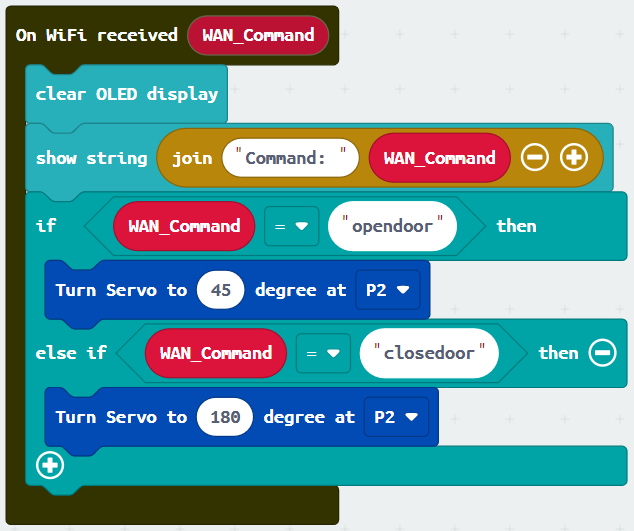
Full Solution
MakeCode:https://makecode.microbit.org/S66708-17604-37414-86430
12.7. IoT (App Inventor)
* For more details, please refer to “Chapter 3: Direct control micro:bit by App Inventor 2”
Step 1
Create the page with the components
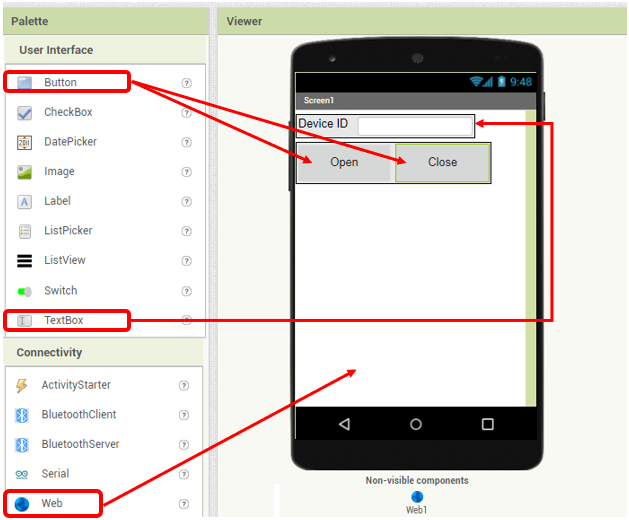
On Designer:
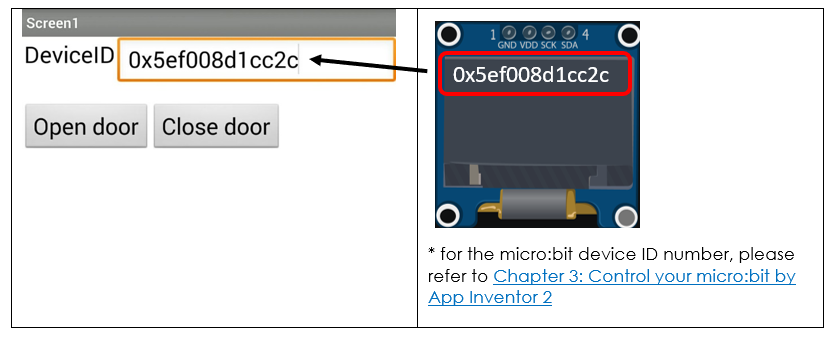
Drag the components from the left menu – we will need buttons to open or close the door and a textbox for input the Device ID number.
Also, add the invisible component “Web” under connectivity, we will need it for WAN connection.
Step 2
Make the programming part
On Blocks:
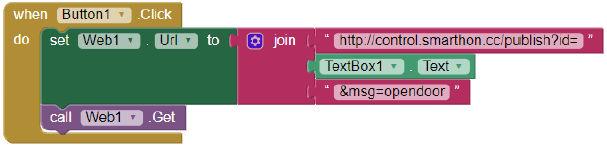
The WAN control command URL is: http://control.smarthon.cc/publish?id=DeviceID&msg=ControlCommand
When Button1 is clicked, it will direct to the URL with given device ID and command “opendoor”.
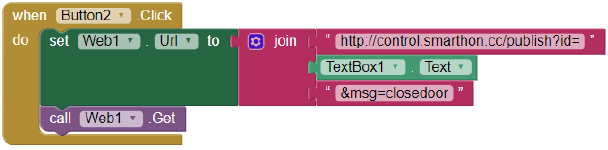
When Button2 is clicked, it will direct to the URL with given device ID and command “closedoor”.
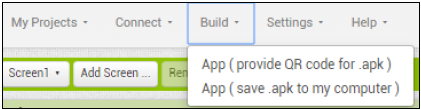
Download the App in your phone to by .apk or scan QR code.
12.8. Result
Input your device ID number in the textbox, then click button “opendoor” to send command “opendoor”. Click button “Close Door” to send command “closedoor”.
With app inventor and micro:bit, you can control the door open/close by mobile app!
12.9. Think
Q1. How can we add password authentication to open the door?
Q2. We can install the servo to different position in the house (tips: modify the turning angle of the servo)