15. Project 10: Remote control on the curtain
Level: 
15.1. Part List
360° servo X1
Multiple Sensors for smart house X1
Multiple Actuators for smart house X1
Connecting Wire X1
micro:bit X2
USB Cable X2
15.2. Description
In project 10, you will need 2 microbit. One is sender (controller). Another is the receiver (curtain machine). You can learn how to use micro:bit to remote control SMARTHON main board with curtain (360 servo) up and down.
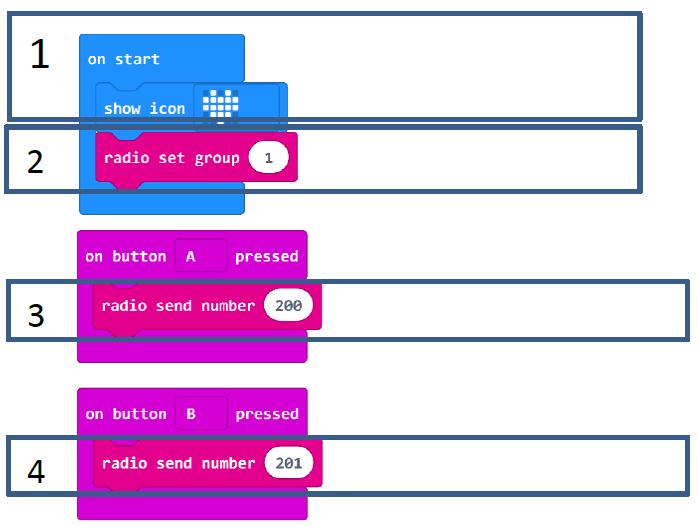
15.3. Sender Steps
Basic (Add block on start) > Basic (Add block show icon - heart)
Basic (Add block on start) > (Add block radio set group 0, change 0 to 1)
Input (Add block on button A is pressed) > Radio (Add block radio send number 0, change 0 to 200)
Input (Add block on button A is pressed > change “A” into “B” ) > Radio (Add block radio send number 0, change 0 to 201)
15.4. Hardware
Download the code and transfer to micro:bit
Connect USB with micro:bit
Send the signal with button A/B pressed
15.5. Receiver Steps
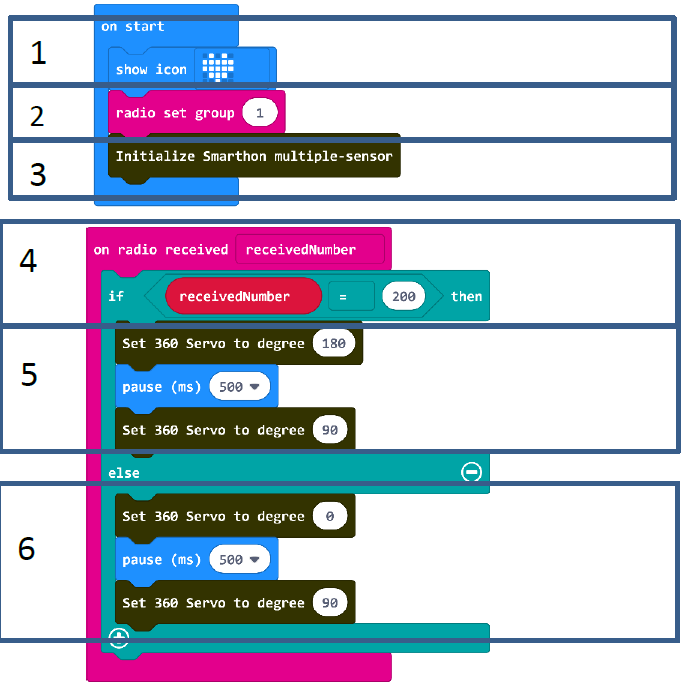
Basic (Add block on start) > Basic (Add block show icon - heart)
Basic (Add block on start) > (Add block radio set group 0, change 0 to 1)
Basic (Add block on start) > House (Add block Initialize Smarthon multiple-sensor)
Radio (Add block on radio received receivedNumber) > Logic (Add block if…then…else) > For if : Logic (Add block 0 = 0, change “0” to Variables “receivedNumber”; “0” to “200”)
For then: House (Add block Set 360 servo to degree 0, change 0 to 180); Basic (Add block pause (ms) 100, change “100” to “500”); House (Add block Set 360 servo to degree 0, change 0 to 90)
For else: House (Add block Set 360 servo to degree 0); Basic (Add block pause (ms) 100, change “100” to “500”); House (Add block Set 360 servo to degree 0, change 0 to 90)Basic (Add block pause (ms) 100)
15.6. Hardware
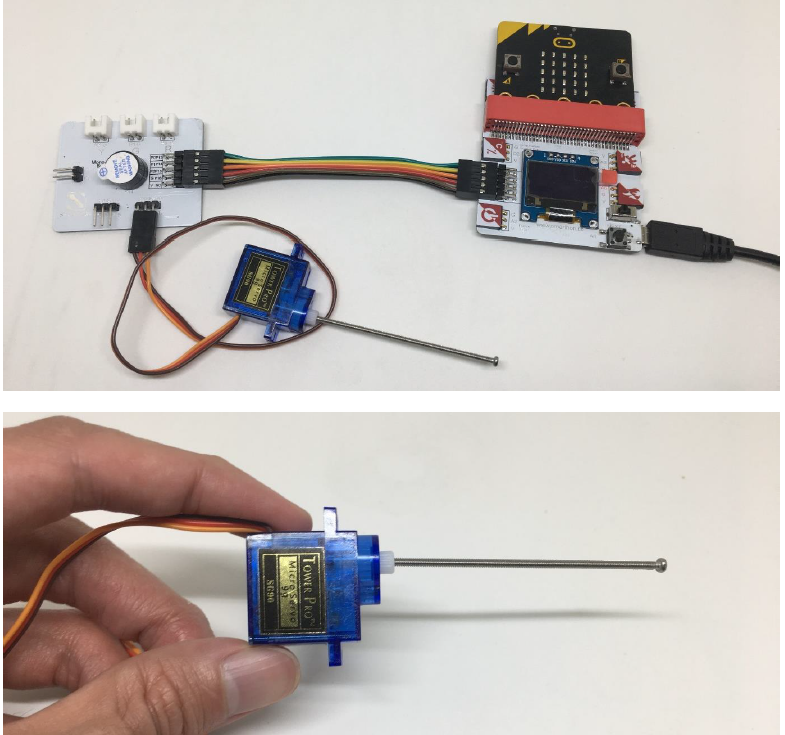
Download the code and transfer to micro:bit
Plug the micro:bit into Multiple Sensors
Connect Multiple Sensors and Multiple Actuators by connecting wire
Connect 360° servo module to 360 servo port of the Multiple Actuators
 * Let’s put on the hardware into the house model.