6. Chapter 2: Send Email by IFTTT
IFTTT is the way to connect hundreds of the apps and devices, including Twitter, Dropbox, Email, Google Assistant, etc. By the basic programming logic “if this then that”, it connects IoT services through their API (application programming interface).
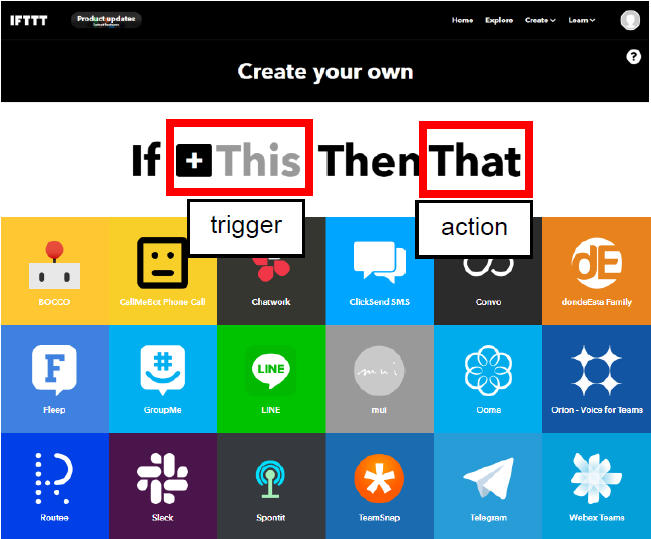
In IFTTT, you can make your own applet and link services together by “if this(trigger) then that(action)”. For example, if we select webhooks (micro:bit button A) as trigger, Email (send email to your mailbox) as action. When micro:bit button A is pressed, it triggers (webhooks) and implement the action (send email) in IFTTT.
In this chapter, you will learn using micro:bit to activate trigger (webhooks). After that, it can implement other services (e.g. email)
6.1. IFTTT Configuration
Goal:
Create applet and get the API keyStep 1
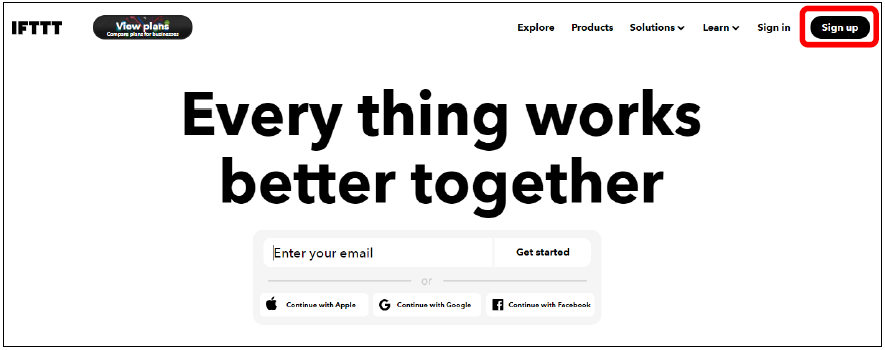
Go to http://www.ifttt.com, register an account and login to the platform
Step 2
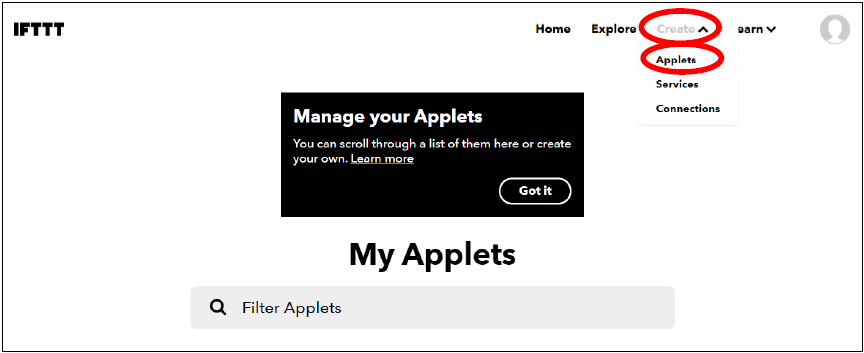
On the top right menu, click “Create” > “Applets”
Step 3
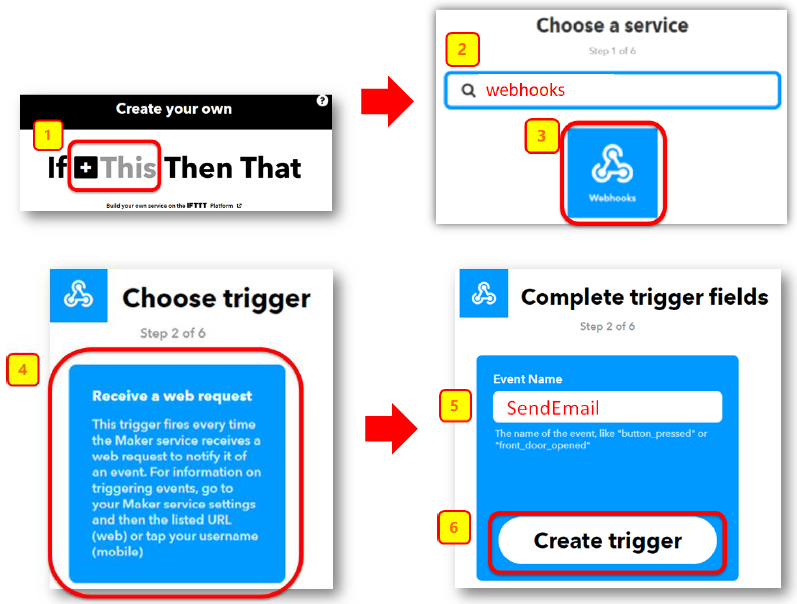
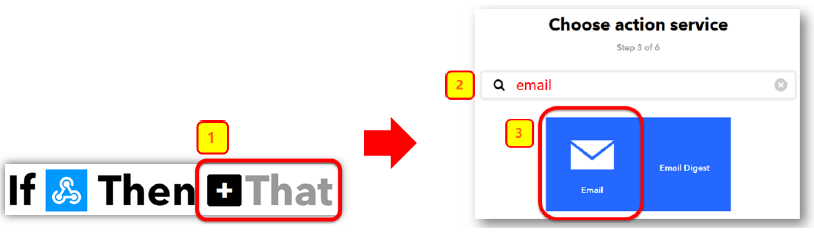
Select this -> select webhooks -> input Event Name (eg. Event Name: SendEmail),then click “Create trigger”
Step 4
Select “That” > Email
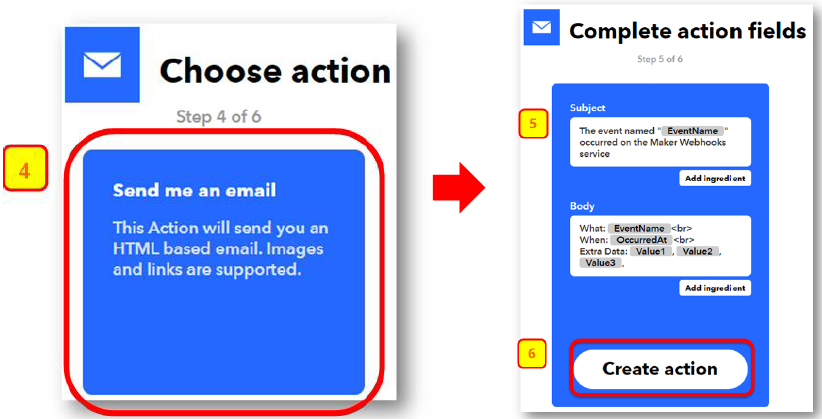
Step 5
Select “Send me an email” , Input email title and body, then click “Create action”
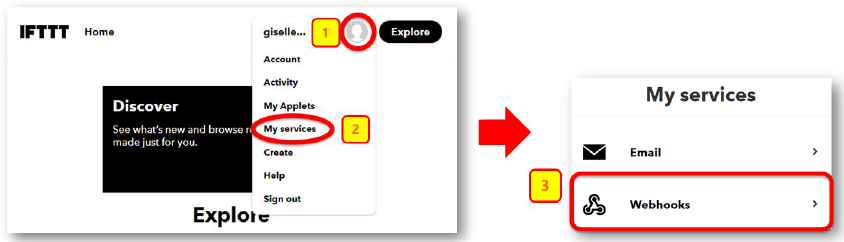
Step 6
Open your web browser, open the top right menu, select “My services” > “Webhooks”
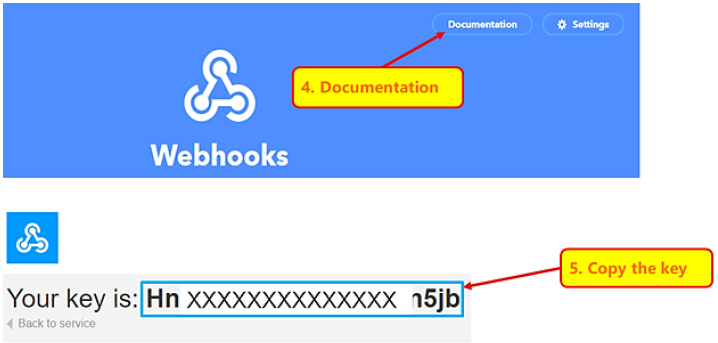
Step 7
Select “Documentation” ,Copy your Webhooks Key as follows:
6.2. Coding (Makecode)
Step 1
Before we do the IFTTT uploading part, we have already know how to connect to the WiFi on the first chapter.
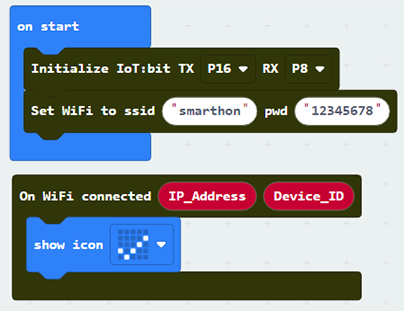
Step 2
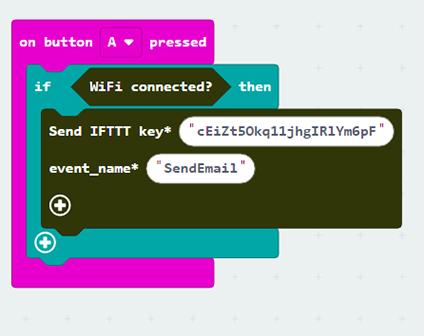
When need to send ITFFF request, if WiFi connected, send data to IFTTT.
Input the following data of the IFTTT Application to the Send IFTTT key… block
IFTTT API key: XXXXXXXXXXXXXXXX.event_name: event name to trigger in Webhooks (eg. SendEmail)value 1-3: if user want to add the value inside the email, click the add button and input value1, value2, value3
Step 3
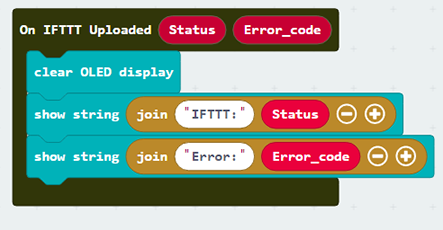
If you want to show the IFTTT upload status, you can use the “on IFTTT Uploaded” handler to check the variable. You may use the OLED to display the status and error code.
Go to OLED Tab
Snap
initialize OLED with width…height..toon startSnap the
show stringinside theOn IFTTT UploadedDraw the variable from
On IFTTT Uploadedto theshow stringblock placeholder
Full Solution
MakeCode: https://makecode.microbit.org/_CwbdXV0ascyx
You could also download the program from the following website:
6.3. Result
After micro:bit is connected to WiFi and click button A, it will upload data to IFTTT.
If the upload is success, it will show OK with error code 0
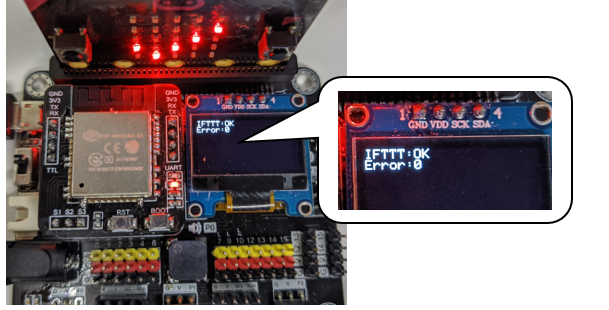
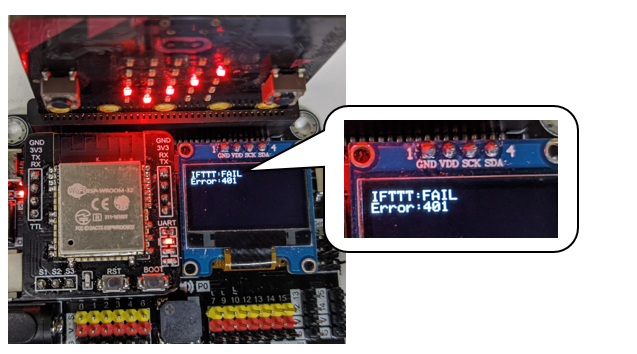
If the upload is fail (such input wrong API key in this case), it will show FAIL with error code.
For the error 401, the user inputted the wrong API Key. For the error code -28674, there is no internet connection.
When success, email will be sent to your mailbox by IFTTT.
