11. Project 6: Light Automation
Level: 
11.1. Part List
Light sensor X1
Yellow LED X1
Multiple Sensors for smart house X1
Multiple Actuators for smart house X1
Connecting Wire X1
micro:bit X1
USB Cable X1
11.2. Description
In project 6, you can learn how to build a light automation in the house subject to the sunshine.
11.3. Steps
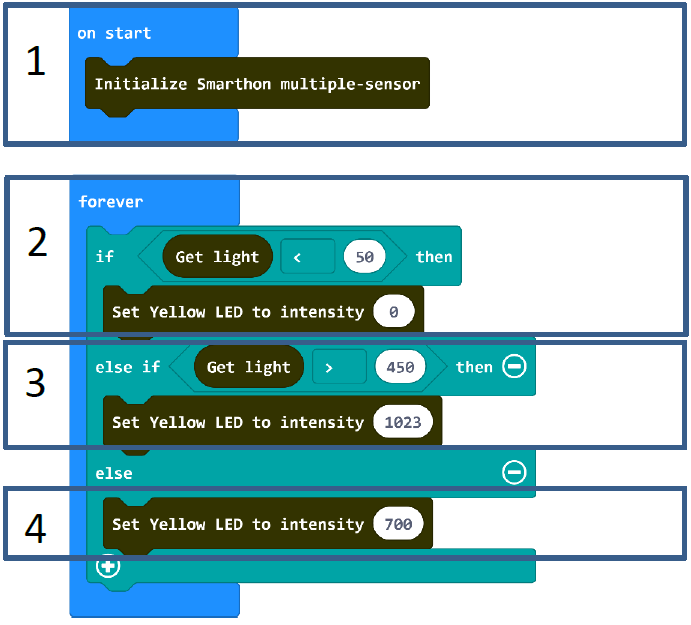
Basic (Add block on start) > House (Add block Initialize Smarthon multiple-sensor)
Basic (Add block forever) > Logic (Add block if…then…else, add 1 more if…then…else) > For 1st if : Logic (Add block 0 = 0, change “0” to House “Get light”; “=” to “<”; “0” to “50”) > For then: House-More (Add block Set Yellow LED to intensity 0)
For else if: Logic (Add block 0 = 0, change “0” to House “Get light”; “=” to “>”; “0” to “450”) > For then: House-More (Add block Set Yellow LED to intensity 0, change “0” to “1023”)
For else: House-More (Add block Set Yellow LED to intensity 0, change “0” to “700”)
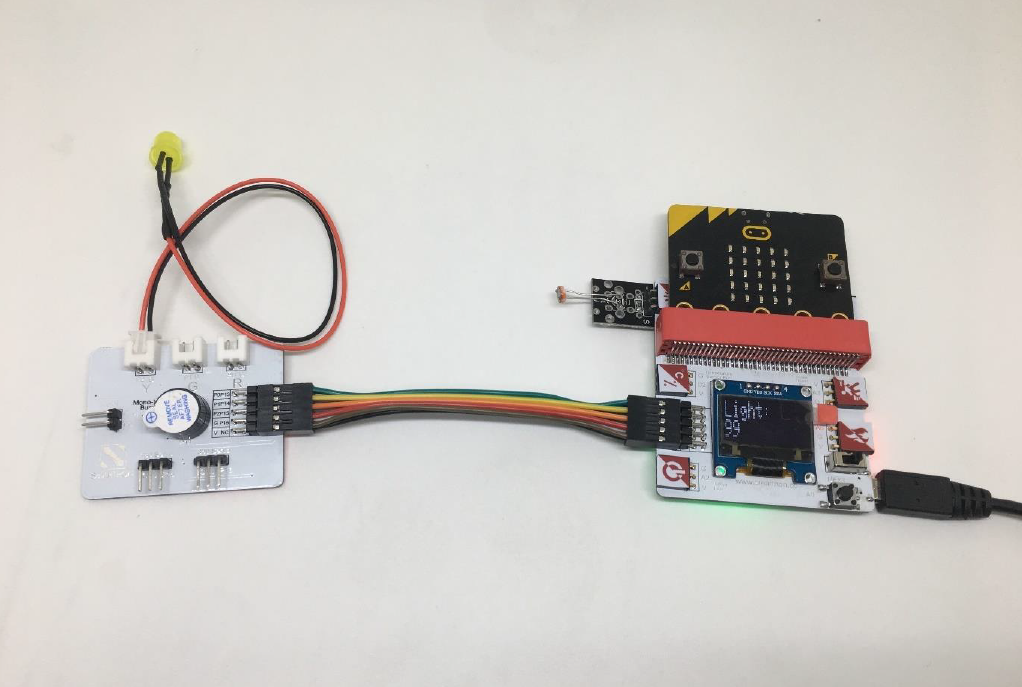
11.4. Hardware
Connect the Light sensor to Light Sensor port of Multiple Sensors
Download the code and transfer to micro:bit
Plug the micro:bit into Multiple Sensors
Connect Multiple Sensors and Multiple Actuators by connecting wire
Connect the Yellow LED to Y port of the Multiple Actuators
Use the finger to cover the light sensor to see if the LED light can be turn on / Shining a torch to the light sensor to see if the LED light can be turn off
 * Try to conduct the experiment under the dark environment or sunshine and adjust the value of the sensors or LED light to fit the different projects.