7. Project 2: Control Actuators - button A/B
Level: 
7.1. Part List:
LED lights X2 (placed on the Multiple Actuators for plant)
Multiple Sensors for plant X1
Multiple Actuators for plant X1
Connecting wire X1
micro:bit X1
USB Cable X1
7.2. Description:
In project 2, you can learn how to use micro:bit Button A/B to control LED lights on Multiple Actuators.
7.3. Steps:
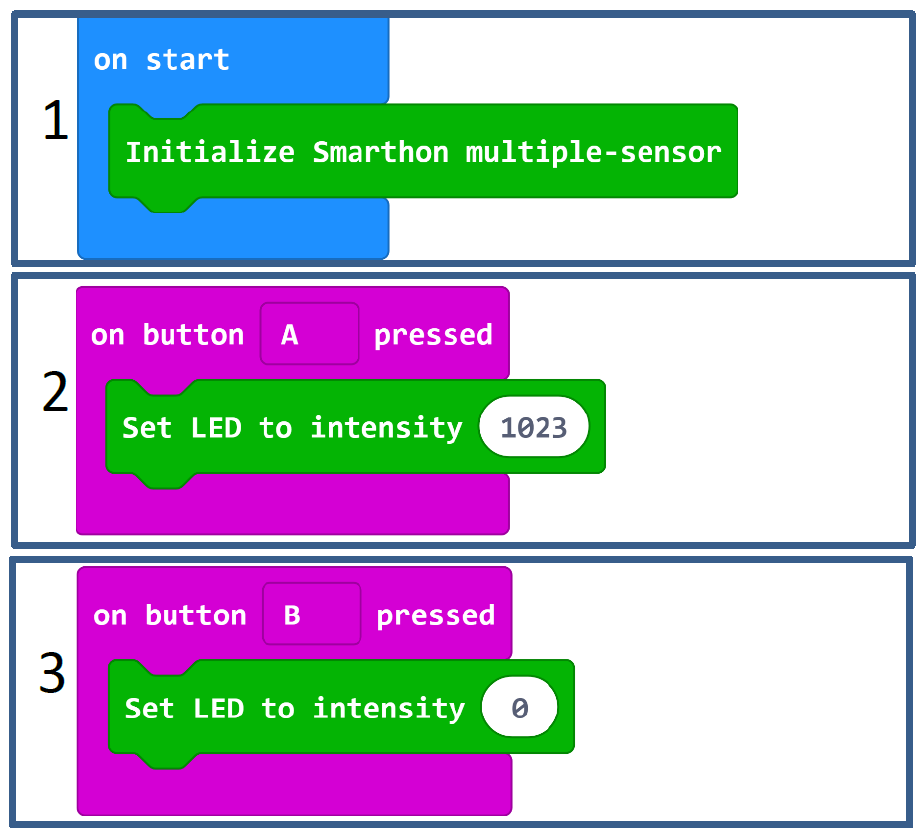
Basic (Add block on start) > Plant (Add block Initialize Smarthon multiple-sensor)
Input (Add block on button A is pressed) > Plant-More (Add block Set LED to intensity 0, change “0” to “1023” )
Input (Add block on button A is pressed, change “A” into “B” ) > Plant-More (Add block Set LED to intensity 0)
7.4. Hardware:
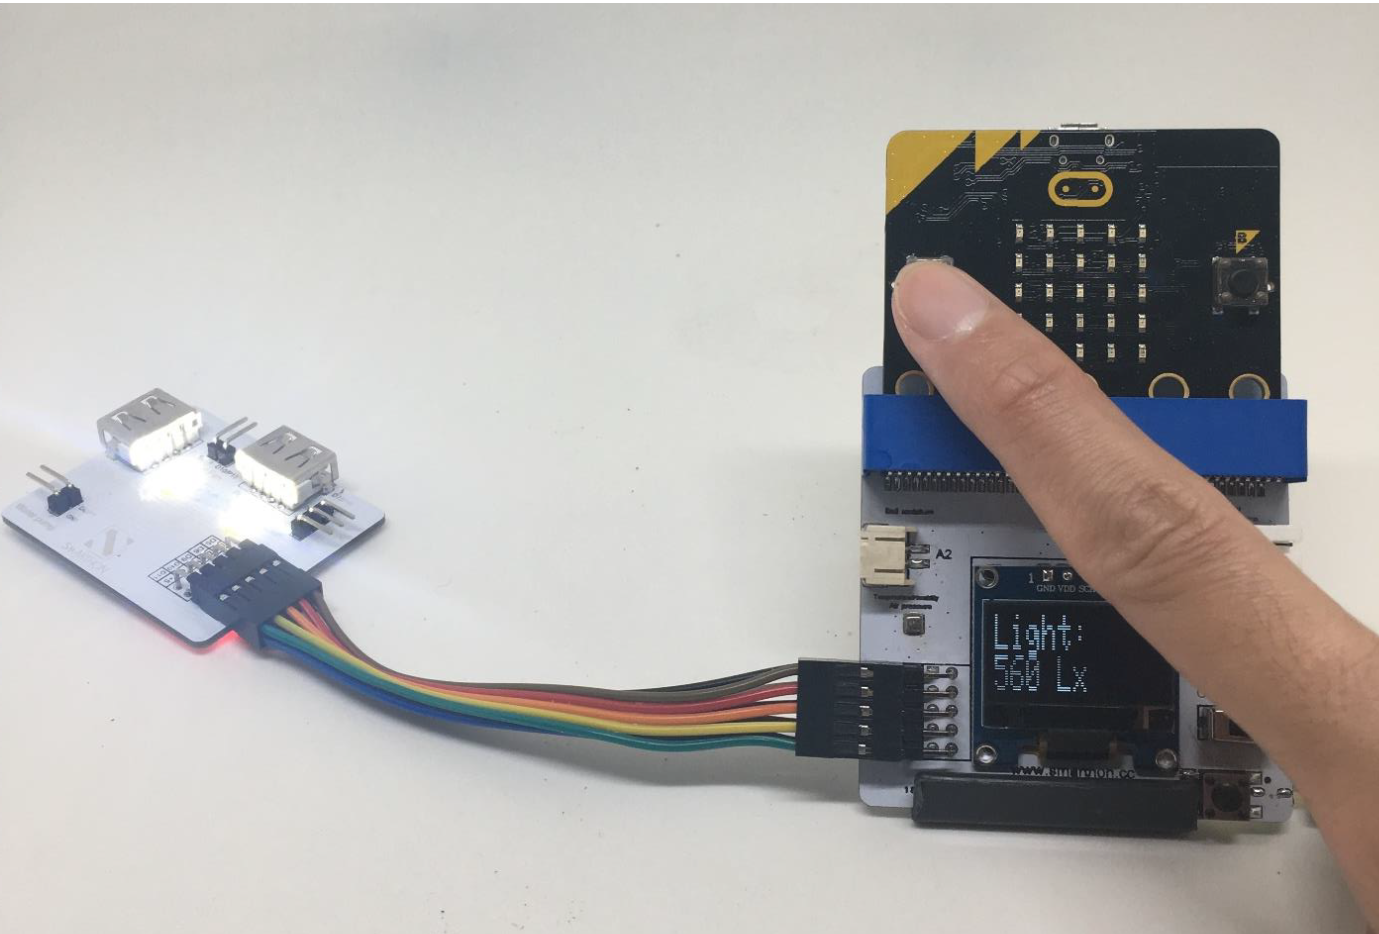
Connect Multiple Sensors and Multiple Actuators by connecting wire
Download the code and transfer to micro:bit
Plug the micro:bit into Multiple Sensors
Pressed micro:bit button A to turn on the LED light; button B to turn off the LED light
*Try to use micro:bit Button A/B to control other outputs – motor fan, humidifier, water pump and LED grow lights