10. Case 07: Smart Remote Control Musical Light
Level: 
10.1. Sender
Background
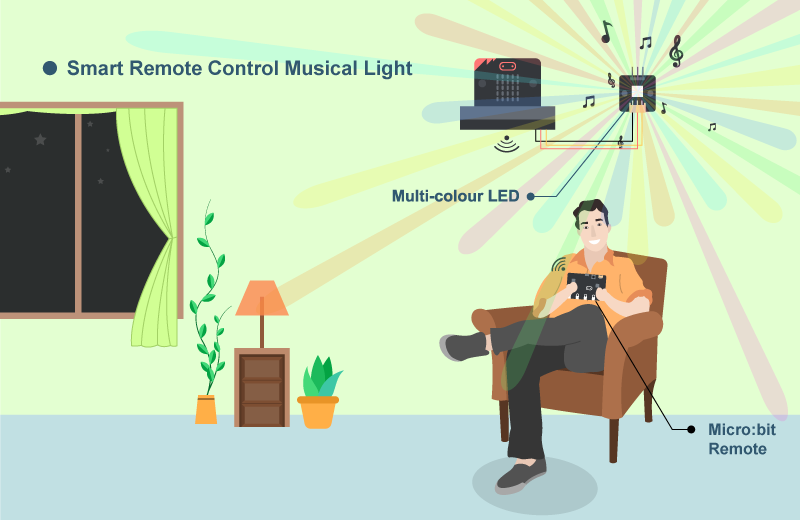
What is the Smart Remote Control Musical Light?
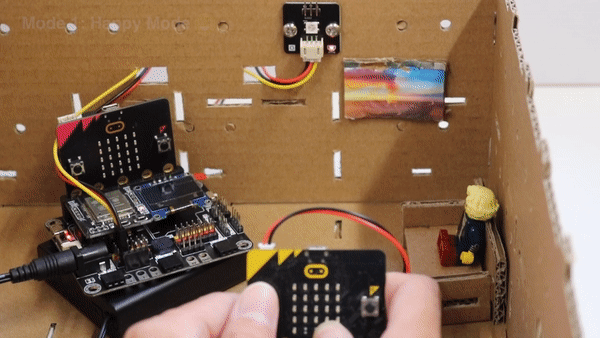
Nowadays, different electronic furniture can also be controlled remotely. In this case, it illustrates the concept of remote control in Smart Home. The home owner can control the room atmosphere in the living room by pressing the remote. (Change of music and light)
Principle of Remote (Sender)
-Micro:bit includes the radio function, allowing two or more Micro:bit to form a group and communicate in a small area.
-In this case, this micro:bit sender (Remote) join group 1 with receiver. When we pressed the different button from micro:bit, it will send different message (mode) to another micro:bit so that the receiver will do the corresponding action.
-The message represent the mode which is “Funny”, “Exciting” and “Stop Music”.
Sender
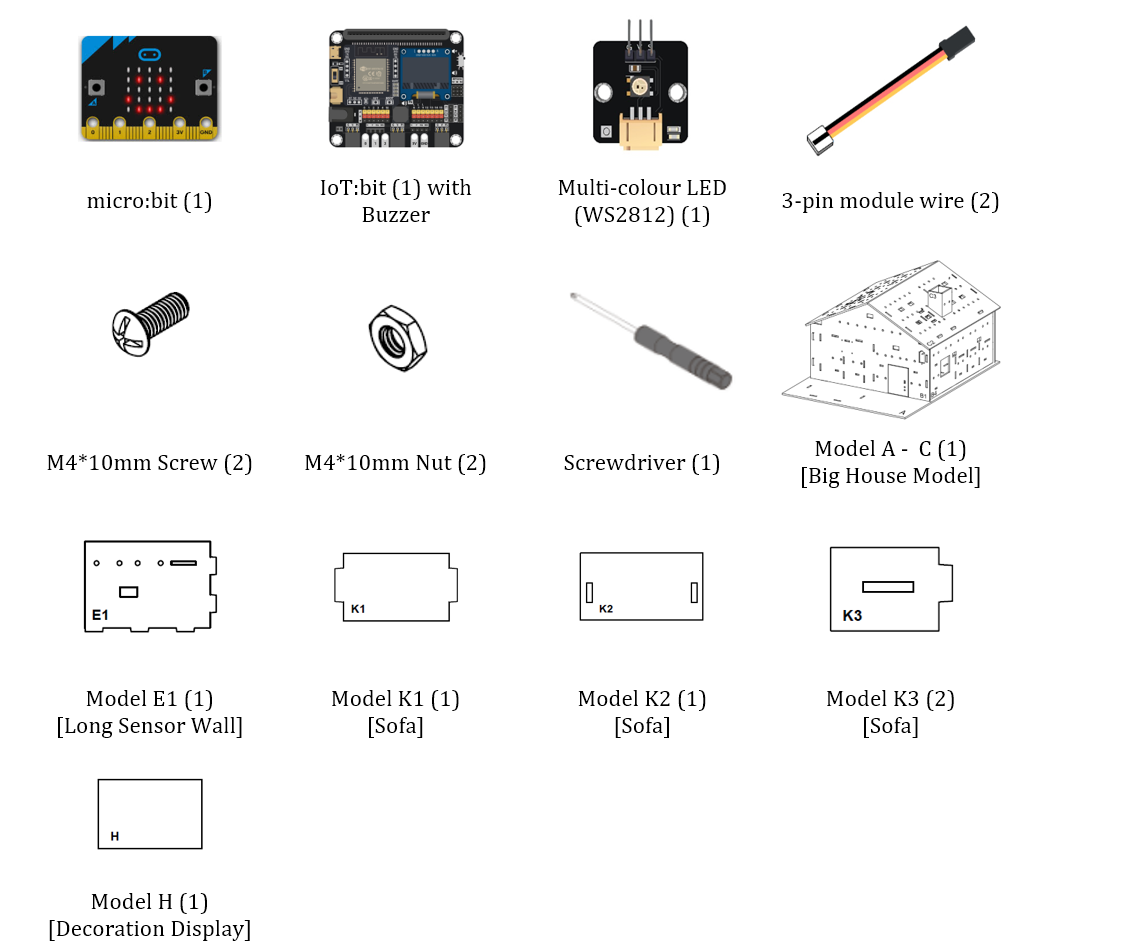
Part List
Assembly step
N/A
Hardware connect
N/A
Programming(Makecode)
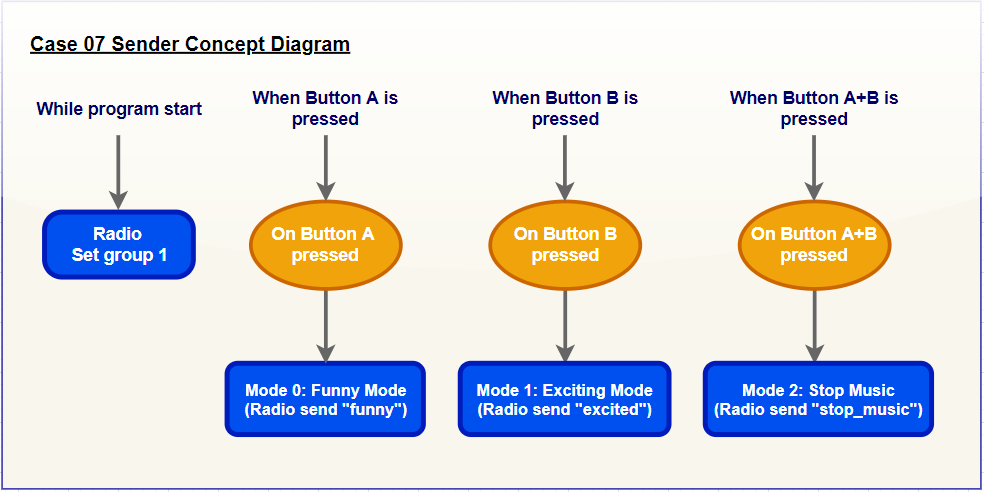
Step 1. Connect to radio group
In
on Start, put aradio set group 1to join the radio group 1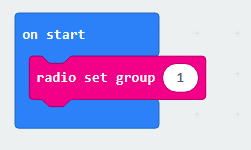
Step 2. Send message to group
Snap
on button A pressedto editorIn
on button A pressed, put aradio send string funnyto sendfunnymessage to group 1 micro:bitsRepeat the steps with minor changes on the trigger button and string to create other message sender for
excitedandstop_music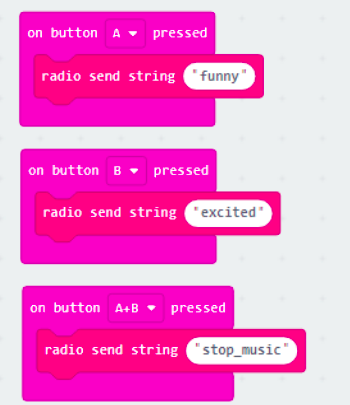
Full Solution MakeCode: https://makecode.microbit.org/S03594-89946-74148-89880
You could also download the program from the following website:
Result
After loaded program to micro:bit,
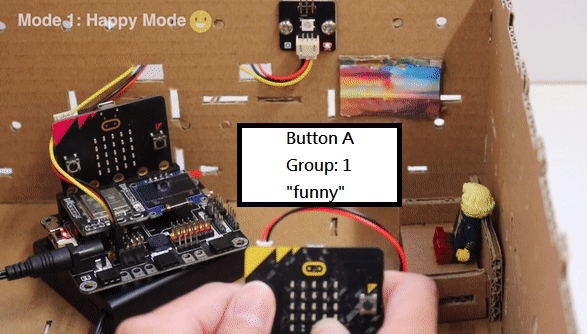
When the press the button A, micro:bit sends the funny message to group 1.
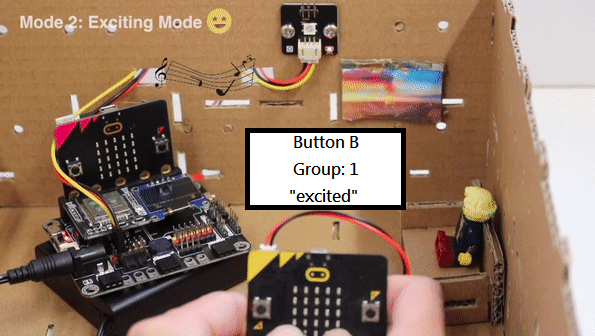
When the press the button B, micro:bit sends the excited message to group 1.
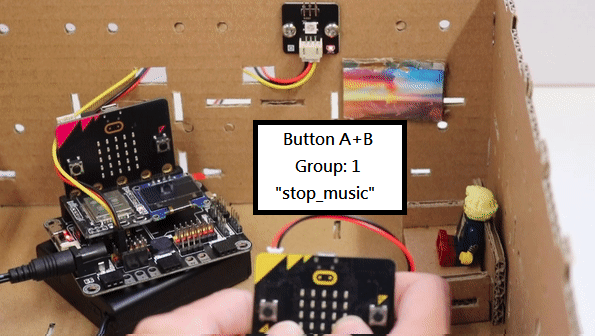
When the press the button A and B, micro:bit sends the stop_music message to group 1.
Think
1. Other than press button, any other way to make the decision how to send the message?
10.2. Receiver
Background
Principle of Music and Light Player (Receiver)
When this Micro:bit receives the message from the another Micro:bit (Remote), it will use the buzzer to play a different tone or music, at the same time, the multi-color LED will be changed to have better ambience. There are 3 modes, one is enjoyable mode, another is exciting mode, the last one is Stop Music.
Assembly step
Step 1
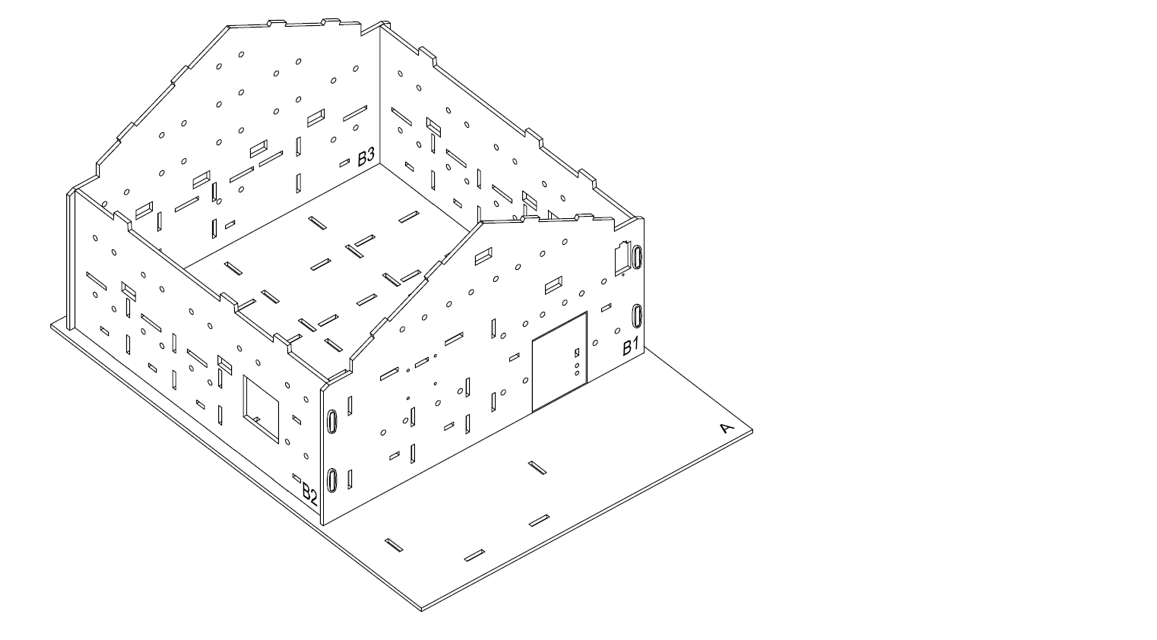
In this case, build the “Big Style Model” as a home base.
Step 2
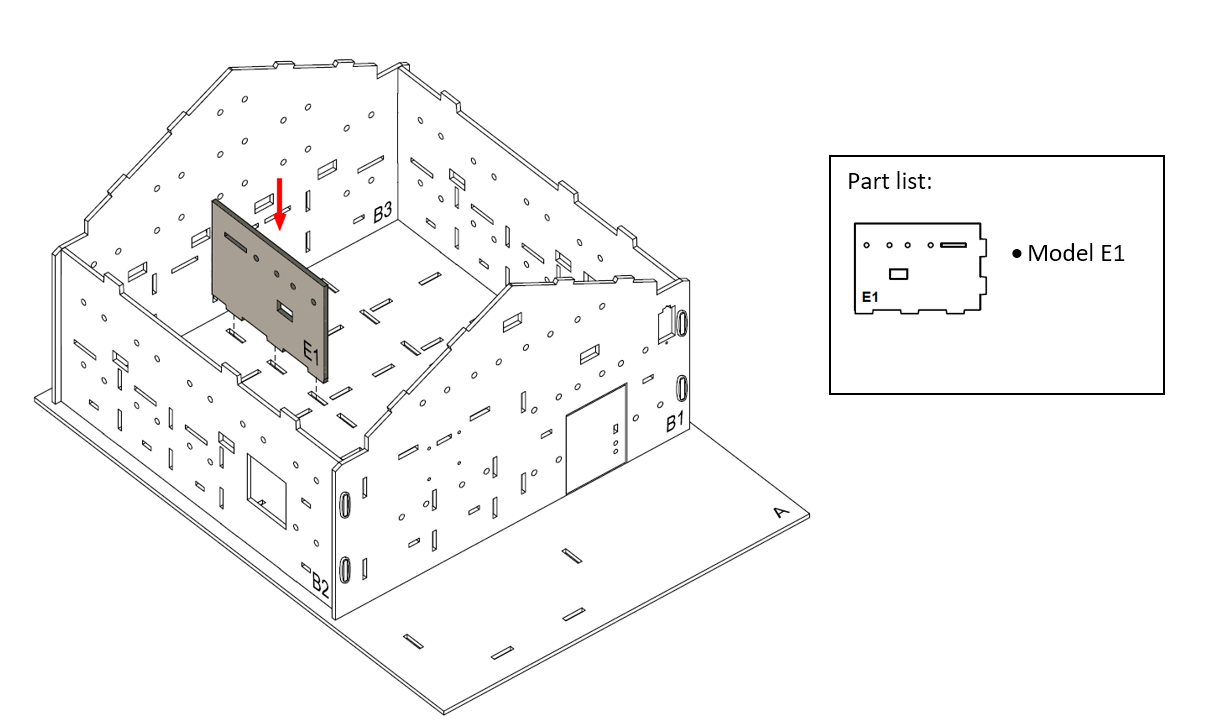
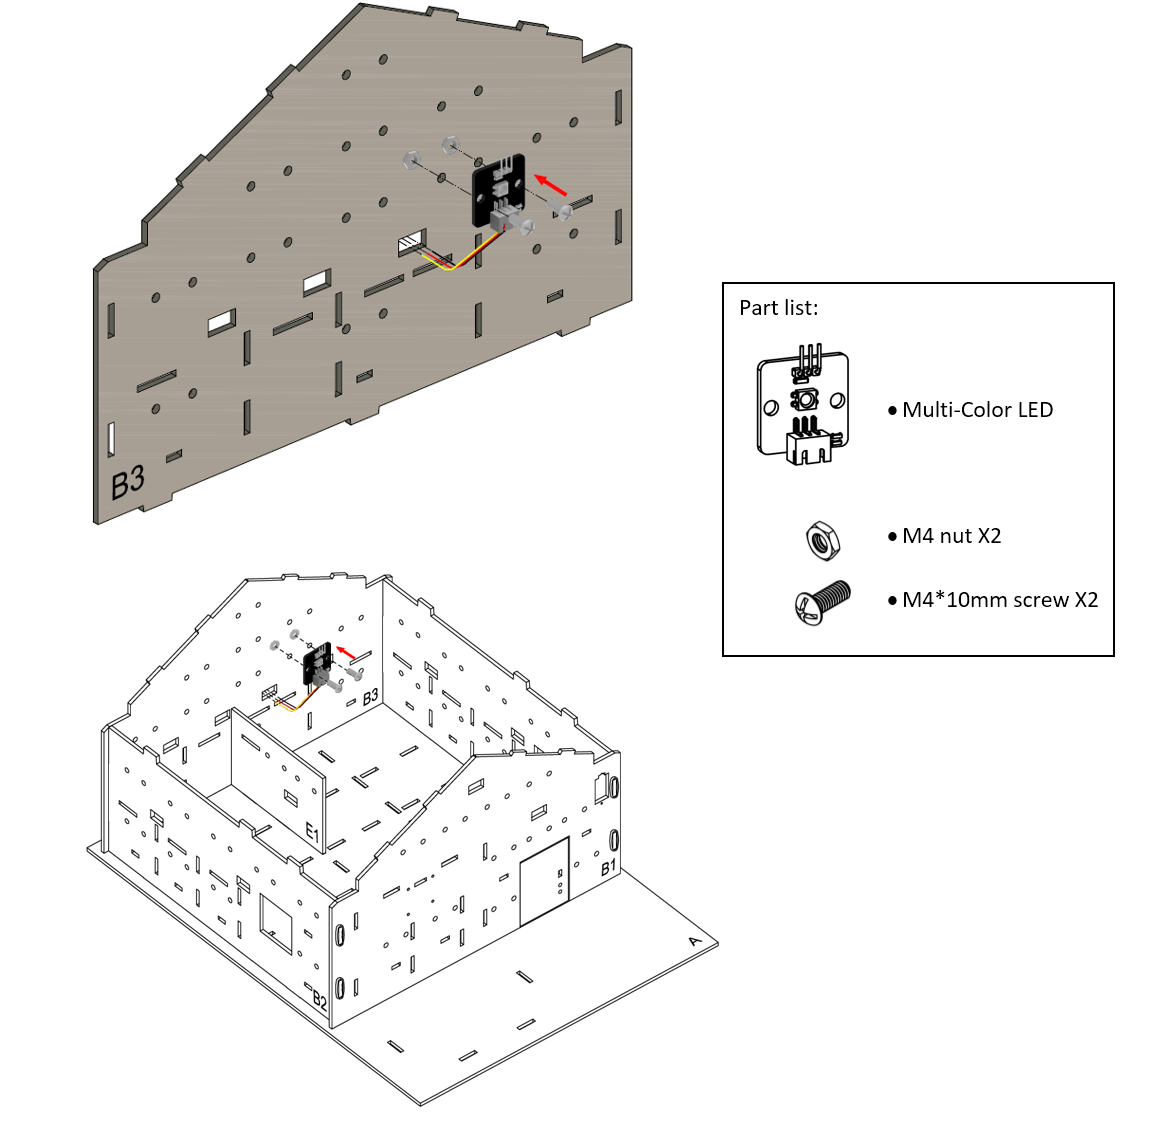
To build a living room, put model E1 onto model A, align with the holes at model A and B3.
Step 3
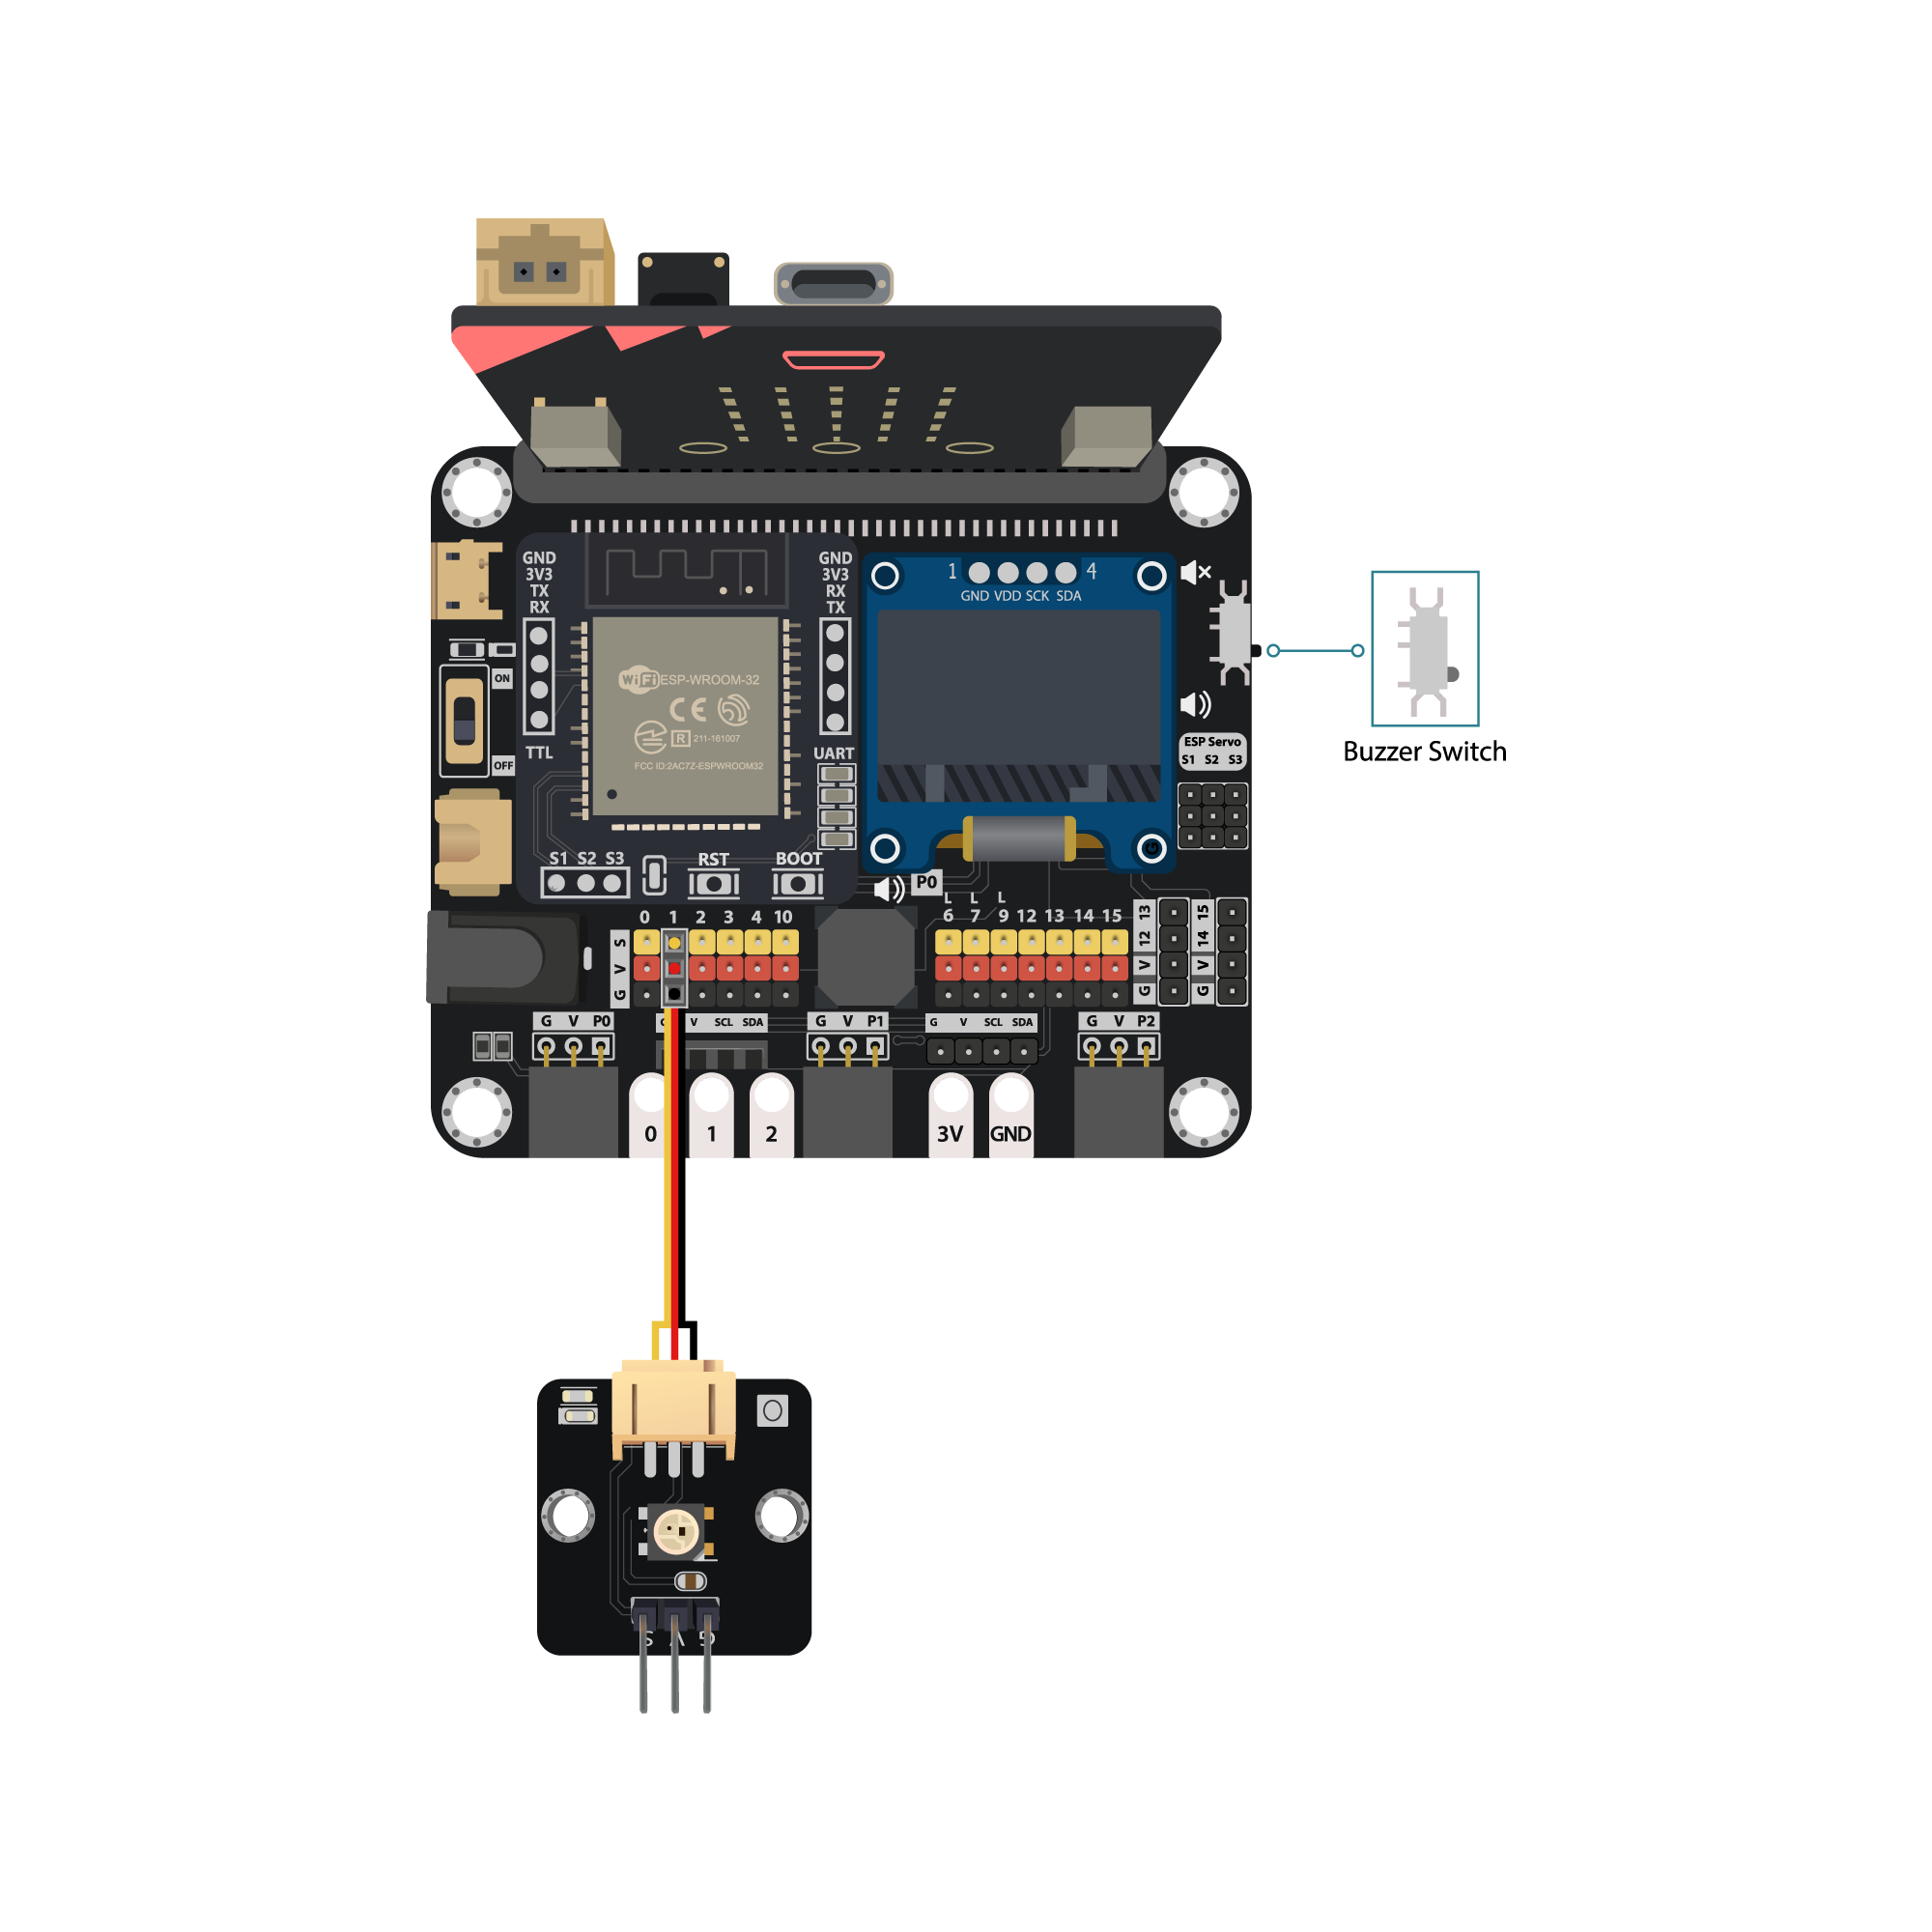
Attach the multi-color LED to the model B3 using M4*10mm screws and nuts. And the connecting wire should be bended to the hole nearby.
Step 4
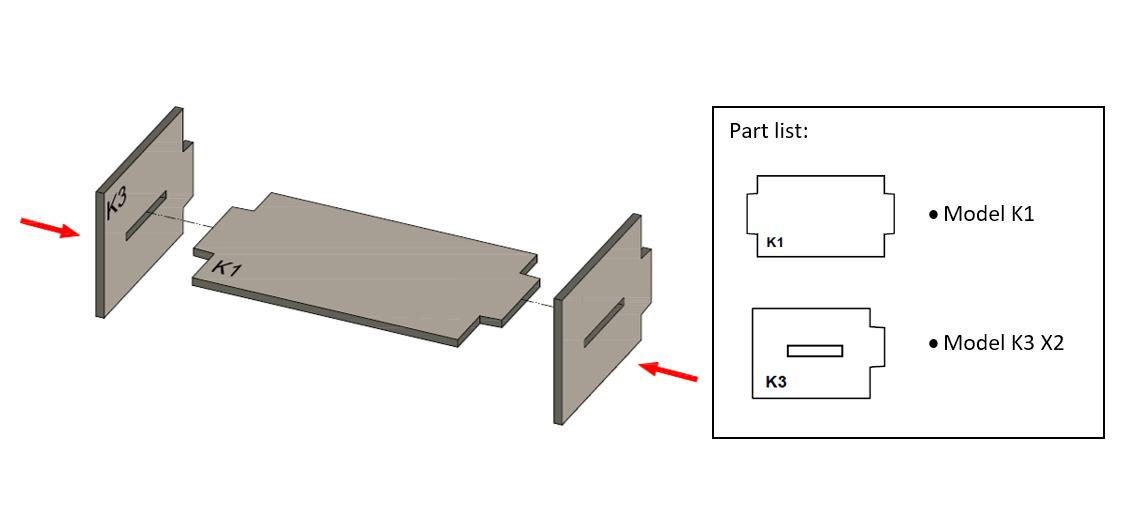
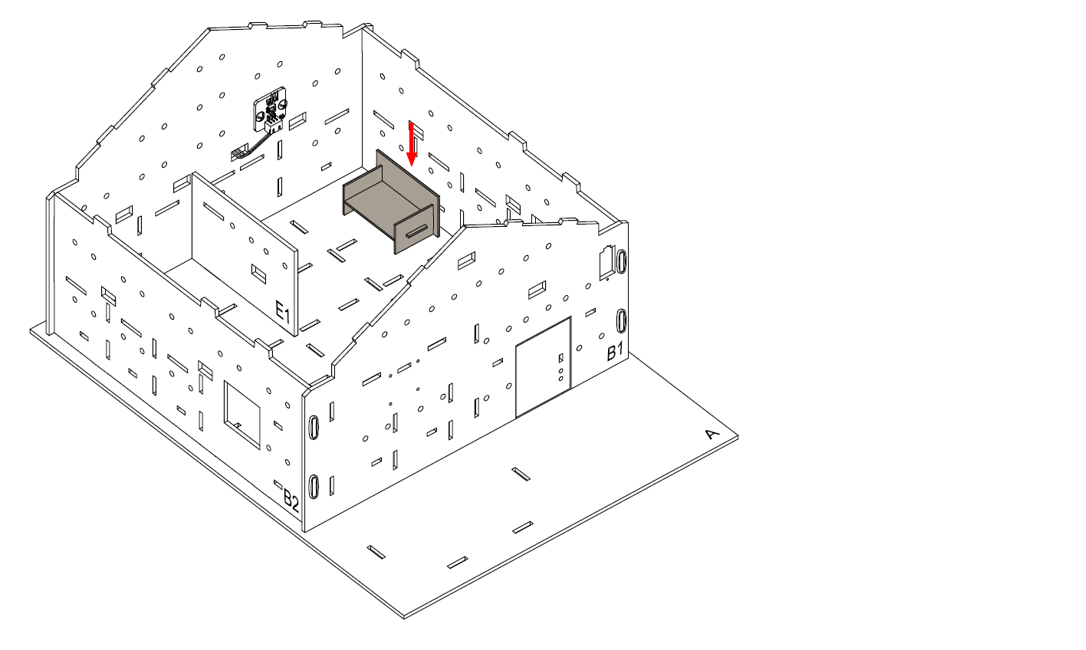
To build a sofa model. Put the model K3 to the two sides of model K1.
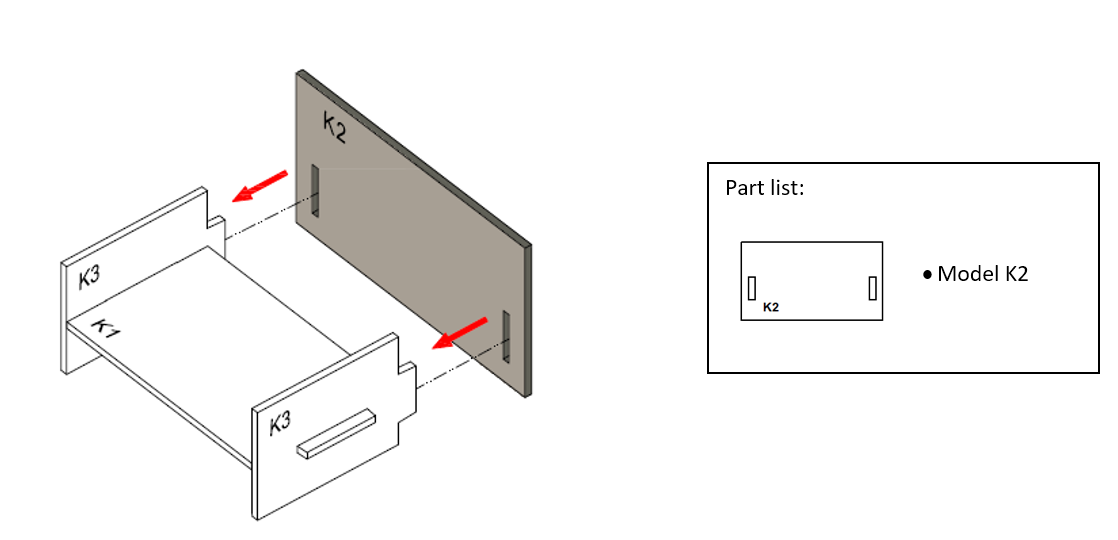
Step 5
Put model K2 all together to the cardboard parts (K1-K3).
Step 6
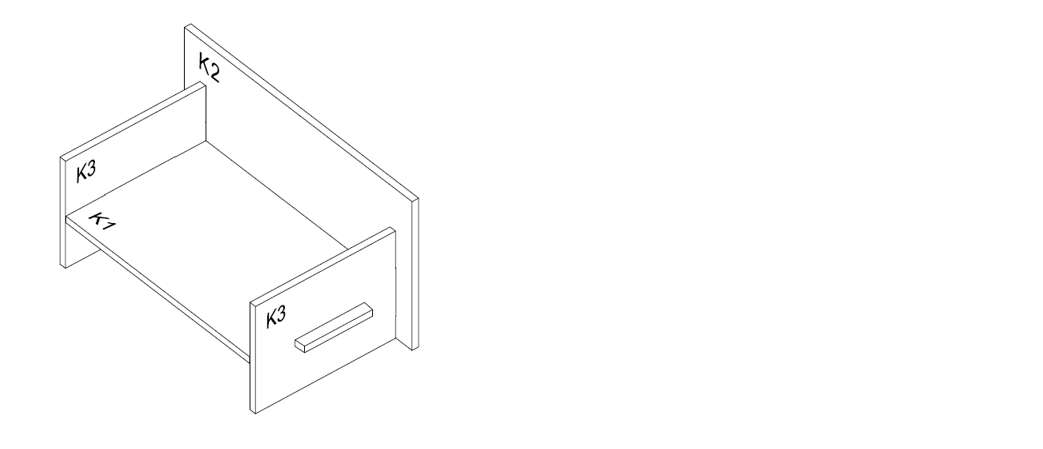
The sofa completed!
Step 7
Place the sofa at the living room.
Step 8
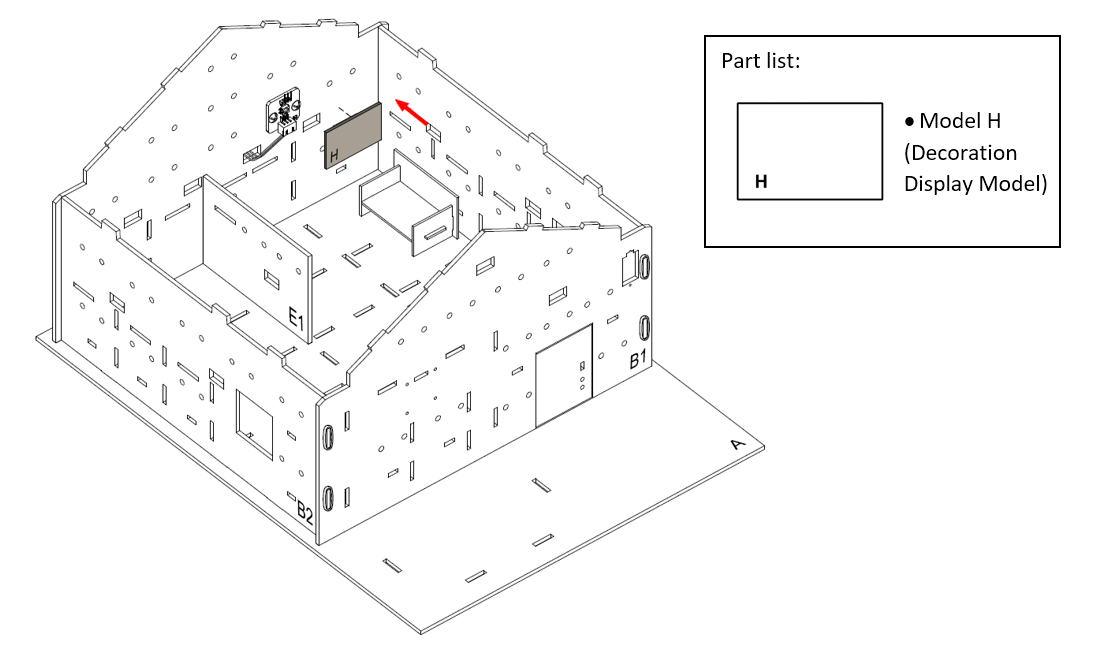
Put the model H as a decroration display on model B3.
Step 9
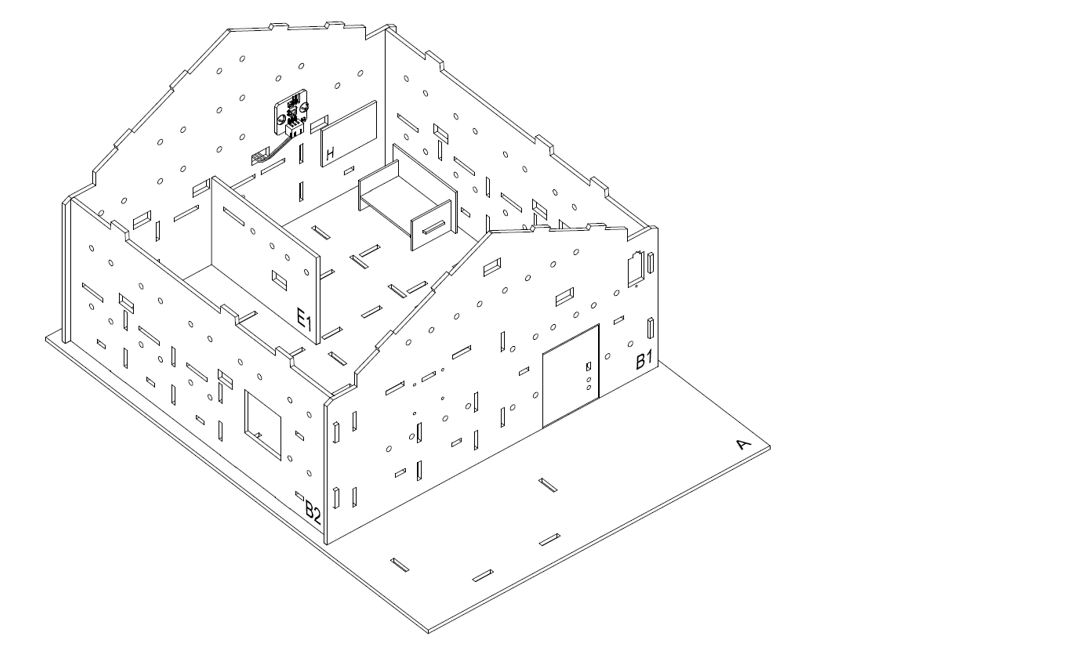
Assembly completed!
Programming (MakeCode)
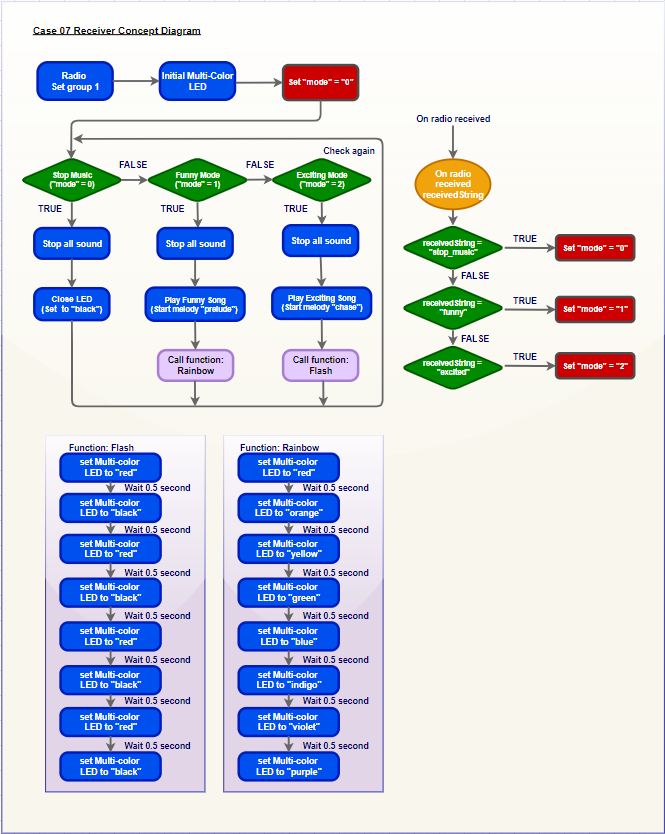
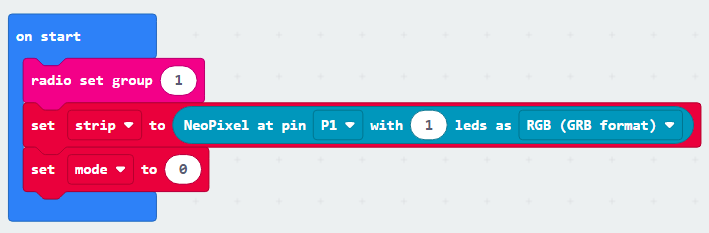
Step 1. Connect to radio group and initialize LED and music flag
Create a variable called
modeIn
on Start, put aradio set group 1to join the radio group 1Initialize Multi-Color LED by
set strip to NeoPixel at pin P1 with 1 leds as RGB(GRB format)Set the variable mode value to 0 by
set mode to 0
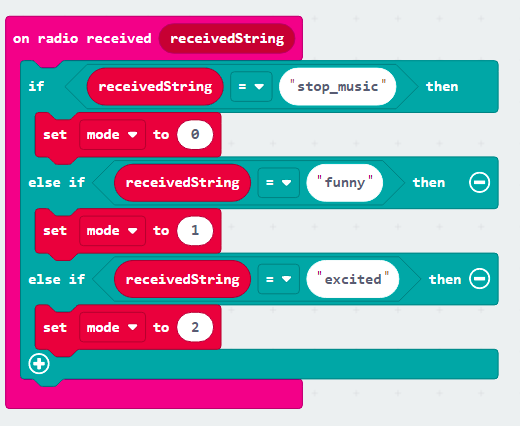
Step 2. Examine the radio message and take action
Snap
on radio received receivedstringblock to editorPut a nested
if-elsestatement inside that blockIn the first condition, use
receivedstring = stop_musicto filter out thestop_musicmessage, change themodeflag variable to0In the second condition, use
receivedstring = funnyto filter out thefunnymessage, change themodeflag variable to1In the third condition, use
receivedstring = excitedto filter out theexcitedmessage, change themodeflag variable to2
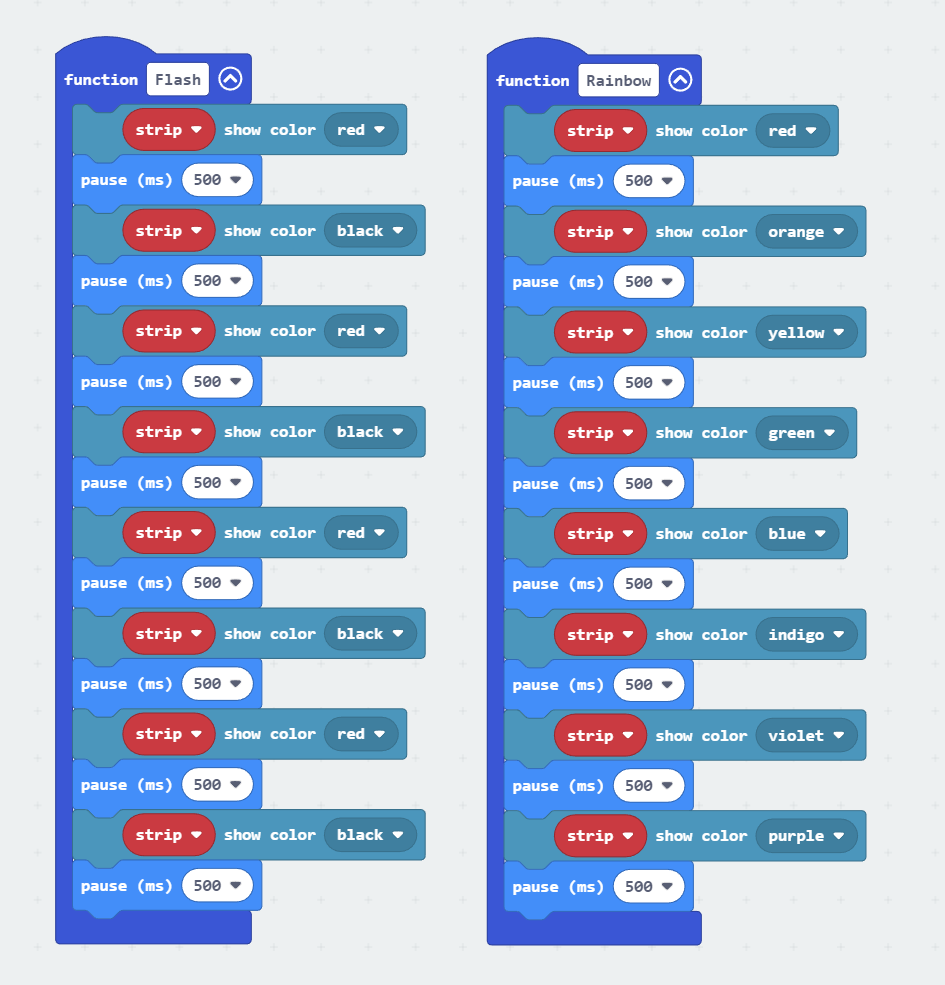
Step 3. Make the change color function
Create two function called
rainbowandflashFor each function, use
strip show color XXXandpause(ms) XXXto fill in the pattern of color changes as you want
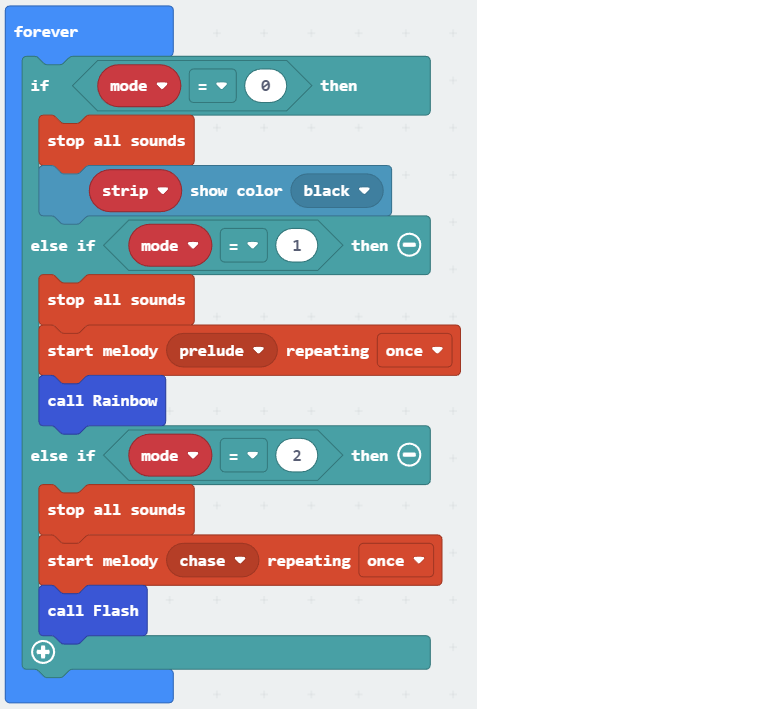
Step 4. Change LED color by the flag
The color of LED should be change following by the flag
| Flag | Meaning |
|---|---|
| 0 | stop_music |
| 1 | funny |
| 2 | excited |
Put a nested
if-elsestatement inside theForeverUse
mode = 0as the first conditionIn the first
ifsegment, that’s meansstop_music, stop the playing sound bystop all soundsTurn off the LED by
strip show color blackUse
mode = 1as the second conditionIn the second
ifsegment, that’s meansfunny, stop the playing sound bystop all sounds, then play a funny music withstart melody prelude repeating onceExecute the function to change to rainbow pattern by
call RainbowUse
mode = 2as the third conditionIn the third
ifsegement, that’s meansexcited, stop the playing sound bystop all sounds, then play a excited music withstart melody chase repeating onceExecute the function to change to flash pattern by
call flash
Full Solution MakeCode: https://makecode.microbit.org/_3PLEfo3pX5r4
You could also download the program from the following website:
Results
After loaded program to micro:bit,
When received the funny message, micro:bit will play the funny music and the light will show in rainbow mode.
When received the excited message, micro:bit will play the excited music and the light will show in flash mode.
When received the the stop_music message, micro:bit will stop the music and turn off the light.
Think
Apart from the built in melody, can you make your own music melody?
Can you control other hardware like a motor fan using radio control?