16. Adv IoT Case 13: Smart Fan Voice Control
Level: 
16.2. Background
What is Smart Fan Voice Control?
It is a fan that is connected to the internet and can be woken up by voice command using a voice assistant. The user can define different voice commands to control fan in different speeds or modes. In this case, the user can turn on and off from the voice command.
Smart Fan Voice Control Principle
In the program, the micro:bit connects to WIFI and gets the device ID. By setting the received command (turn_on_fan and turn_off_fan), the motor will be turned on and off.
In the Smarthon IoT:bit extension on IFTTT platform, commands can be pre-set such that when a specific phrase is said to the corresponding voice assistant it will send the commands through the internet to the fan and trigger on or off actions.
Know more: What is a Voice Assistant?
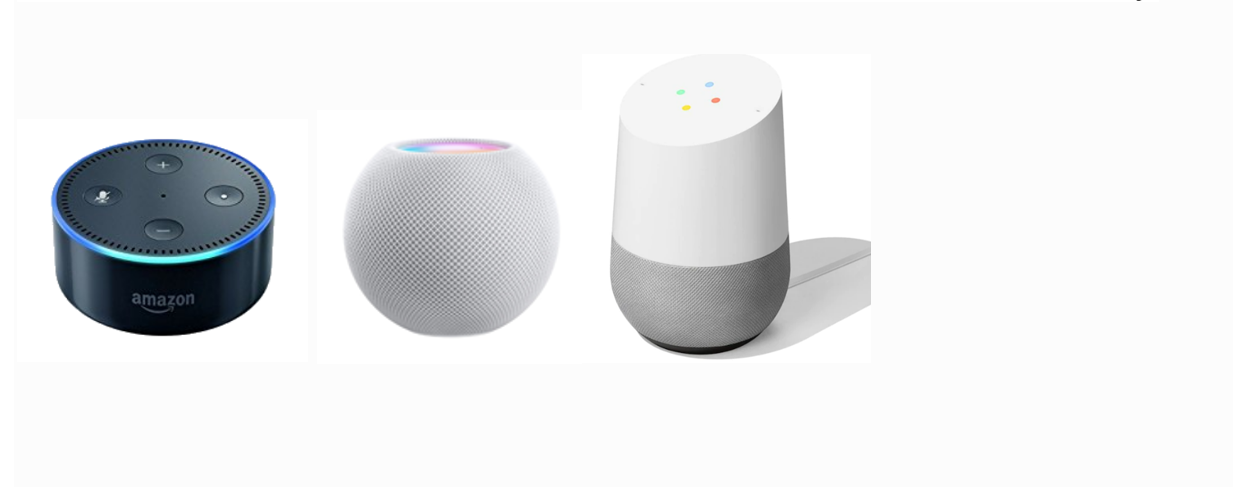
An intelligent virtual assistant (IVA) or intelligent personal assistant (IPA) is a software agent that can perform tasks or services for an individual based on commands or questions. The term “chatbot” is sometimes used to refer to virtual assistants generally or specifically accessed by online chat. Common giant examples are Amazon Alexa, Google Home and Apple Siri.
It is capable of voice interaction, music playback, making to-do lists, setting alarms, streaming podcasts, playing audiobooks, and providing weather, traffic, sports, and other real-time information, such as news. They can also control several smart devices using itself as a home automation system.
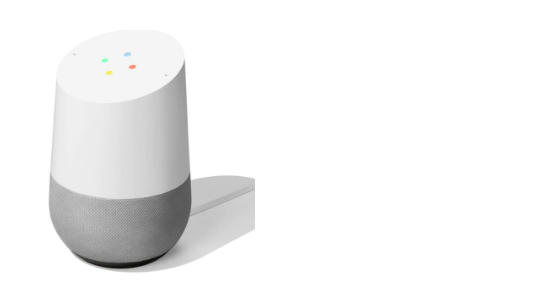
Nowadays, to make a home smarter, Amazon Echo Dot or Google Home or Apple home pod is a central control device which contains a voice assistant inside at home so that the user can use the voice command to control different electronics easily.
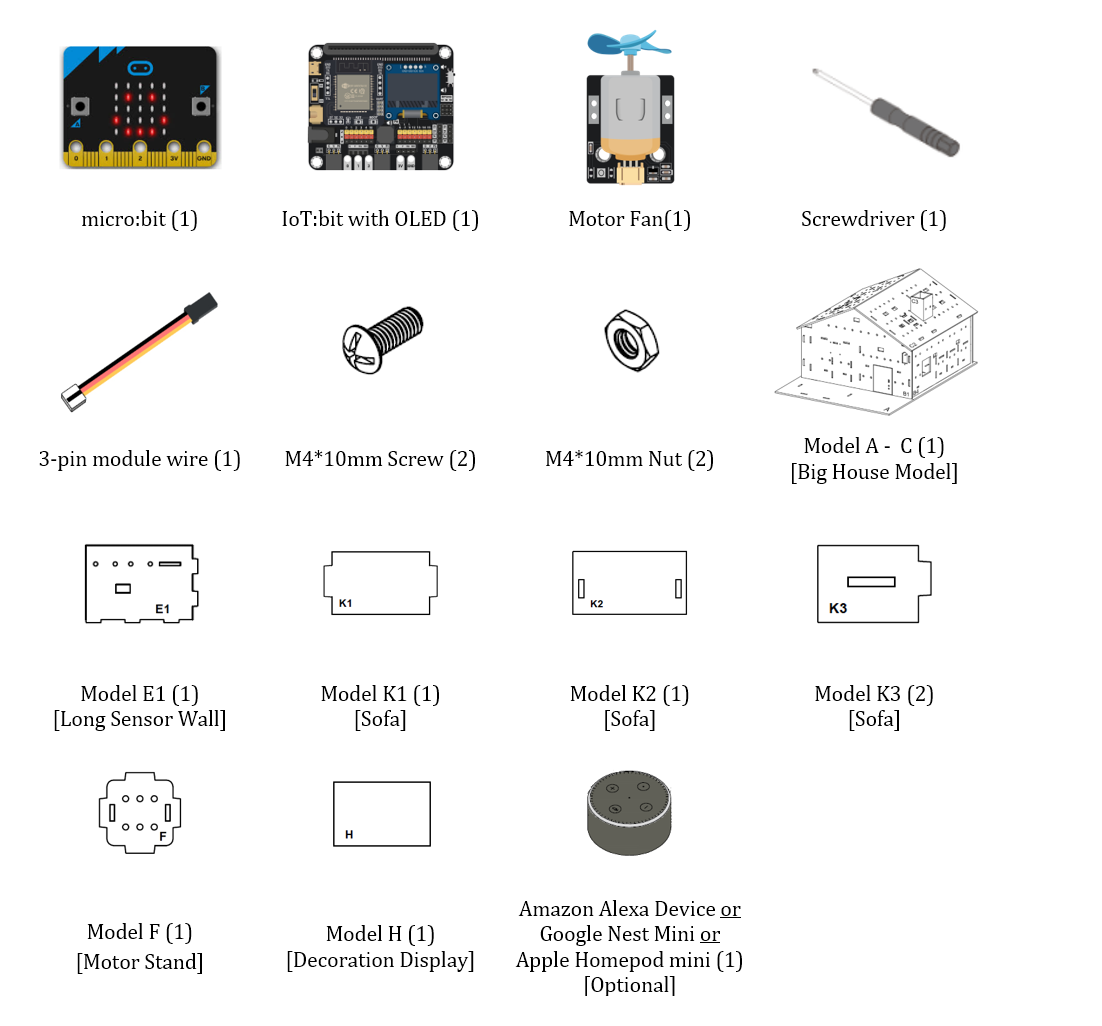
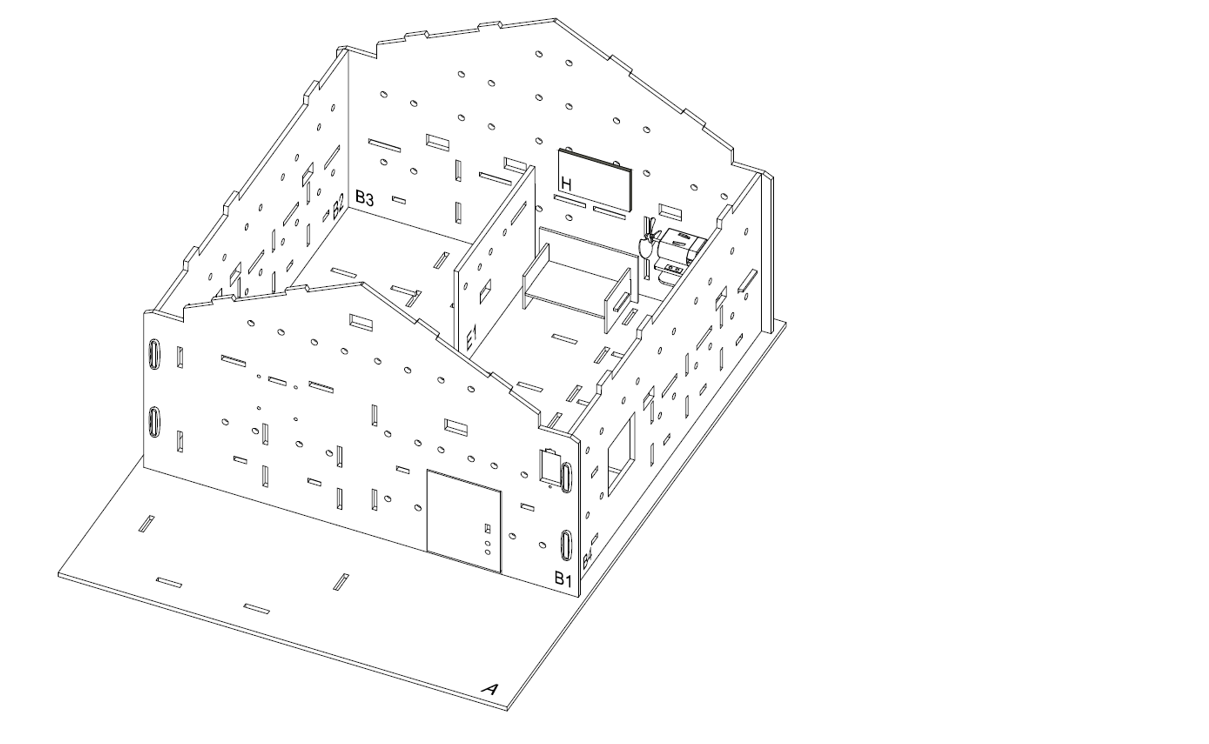
16.4. Assembly step
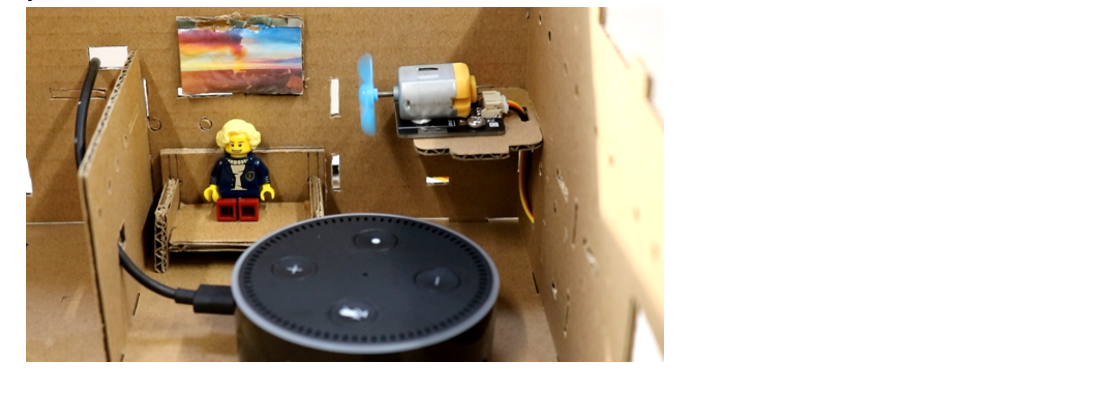
Step 1
In this case, build the “Big Style Model” as a home base.
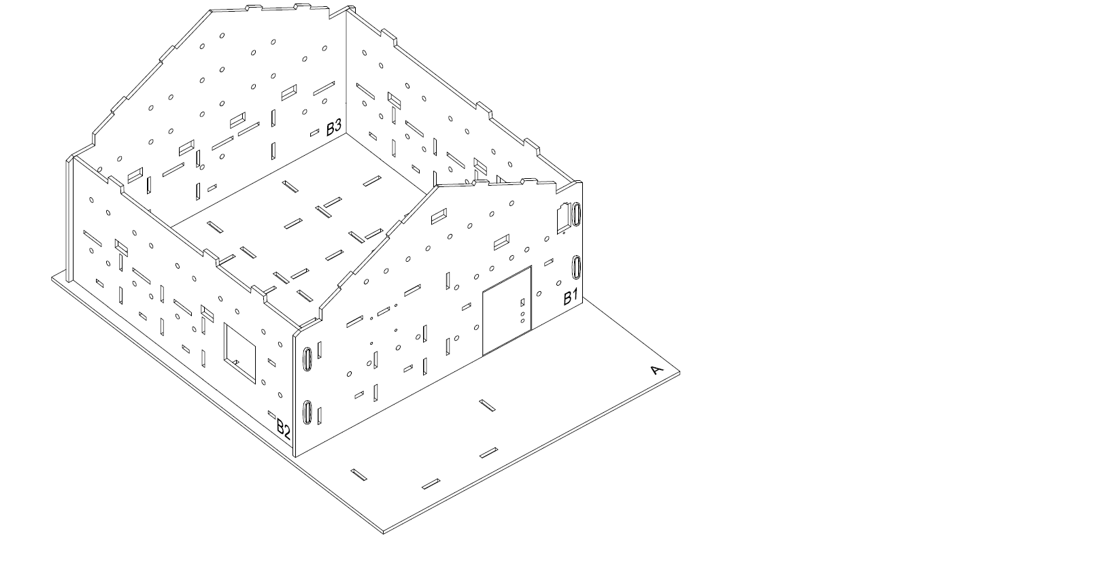
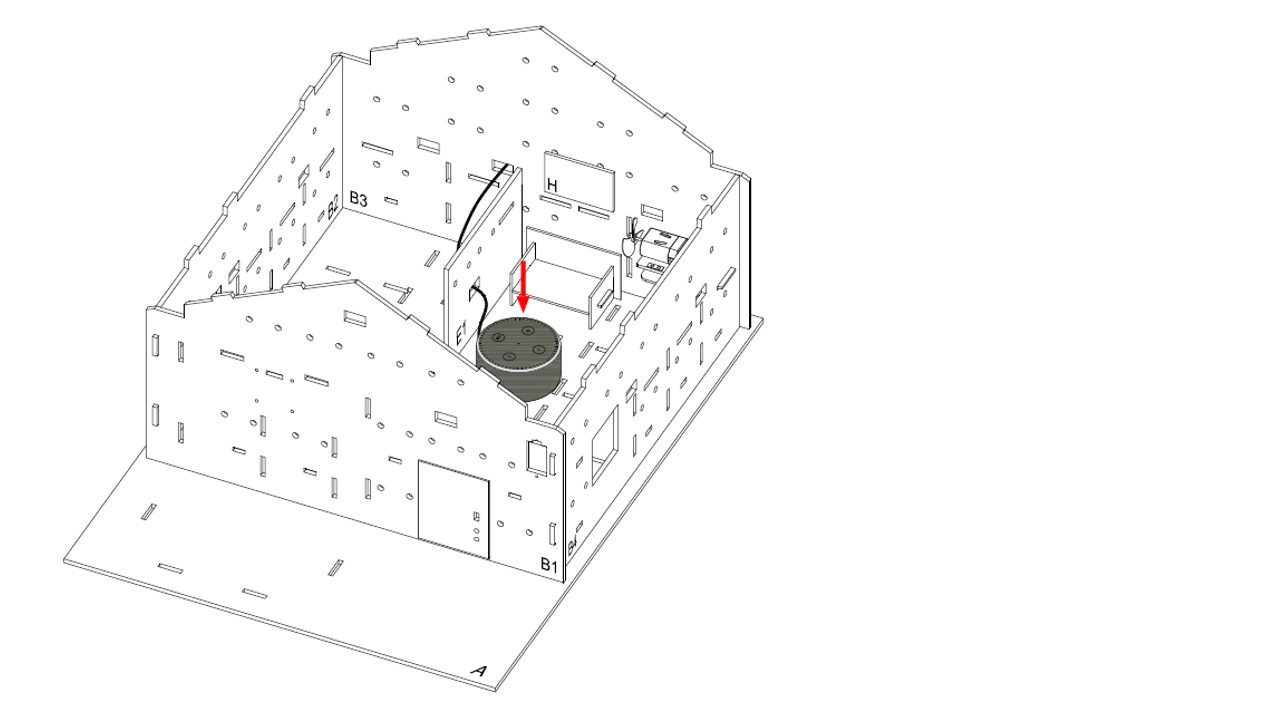
Step 2
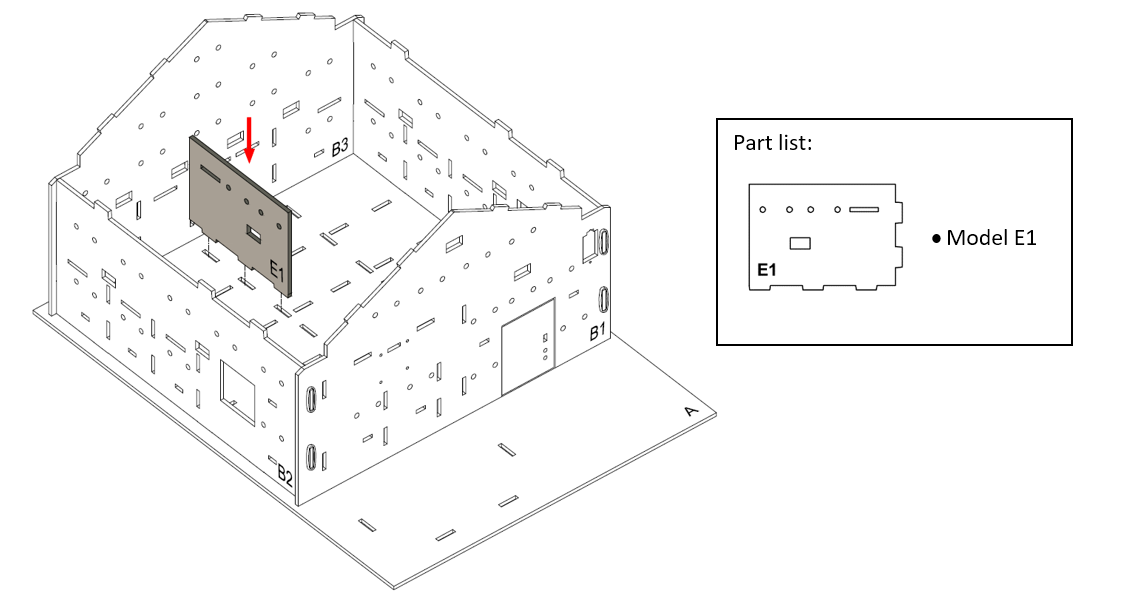
Insert the model E1 on model A, align with the holes on model A and B3.
Step 3
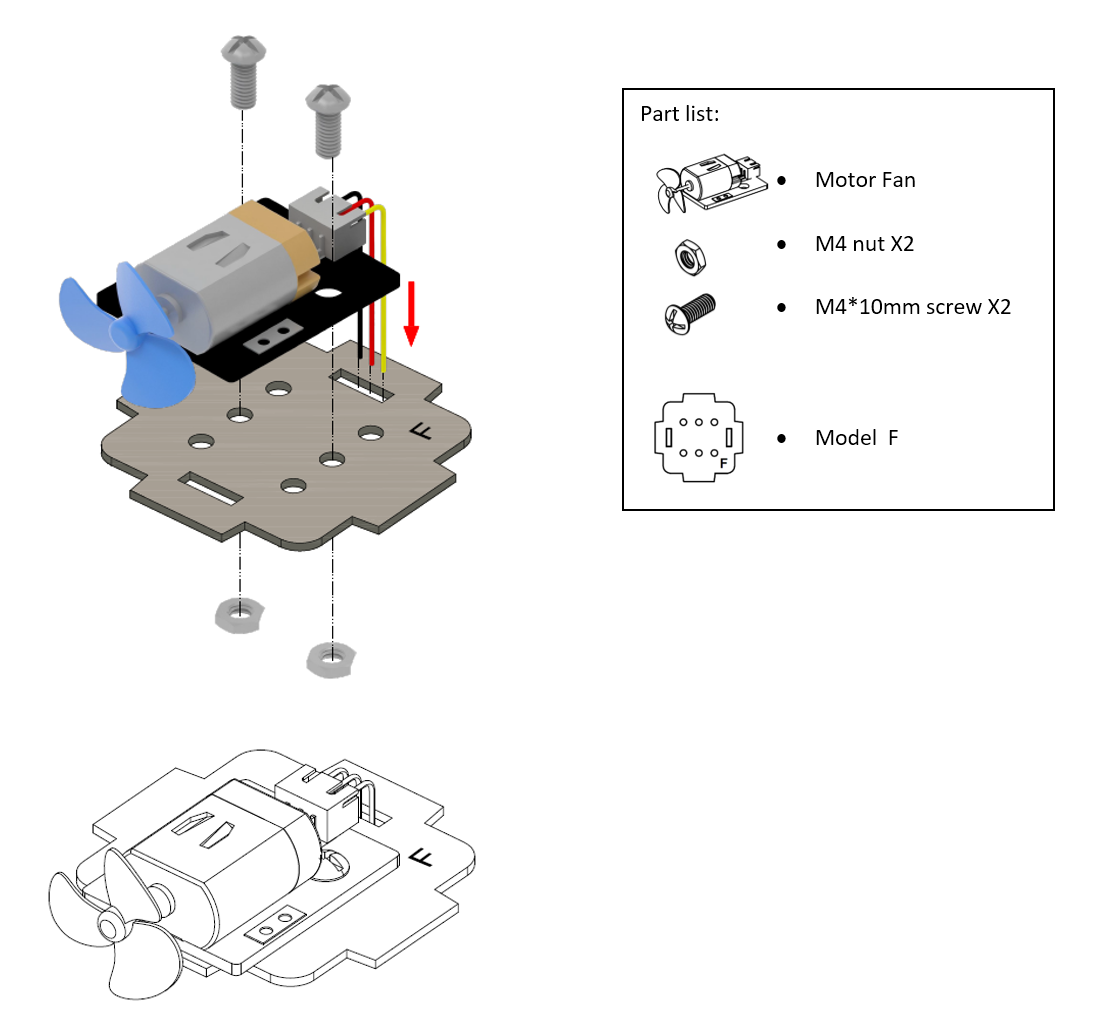
Attach the motor fan into the model F using M4 * 10mm screws and nuts. And the connecting wire could be bended to the hole next to it.
Step 4
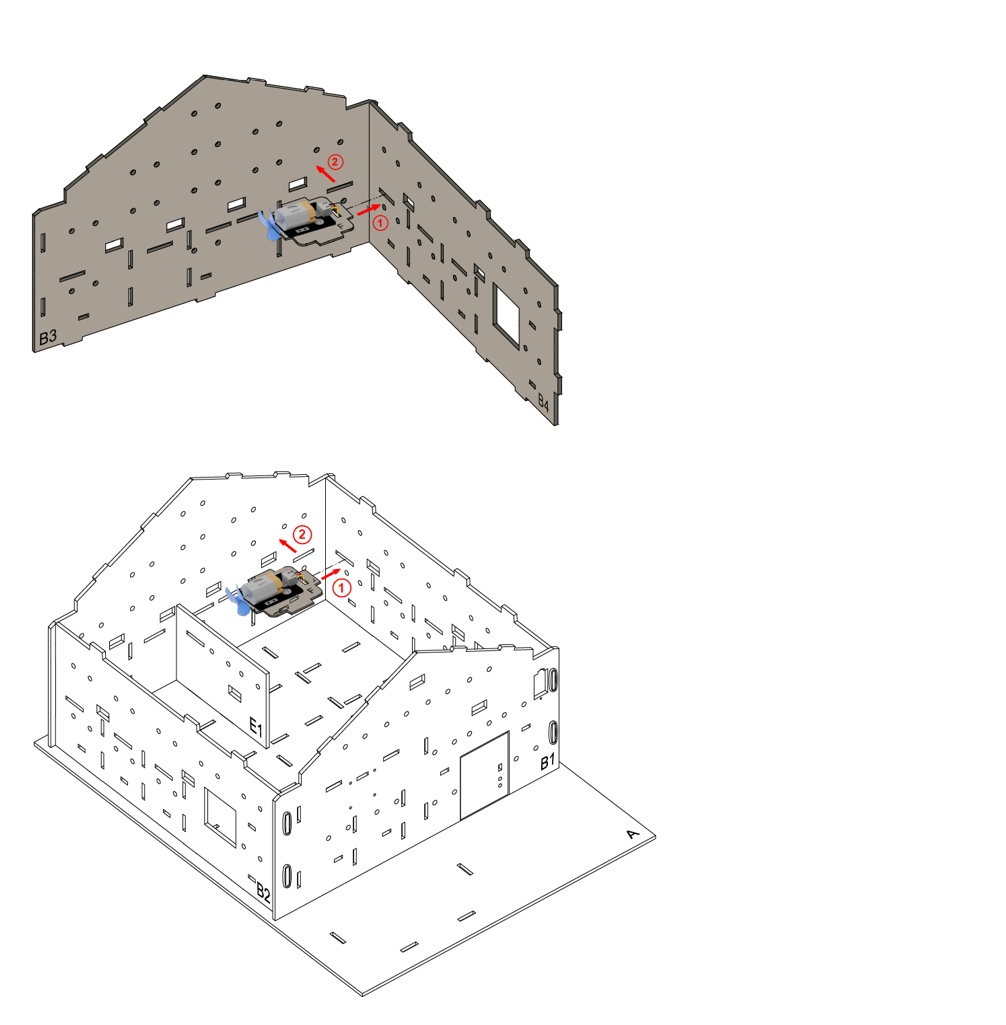
To build a fan stand, put model F into the model B3 and B4.
Step 5
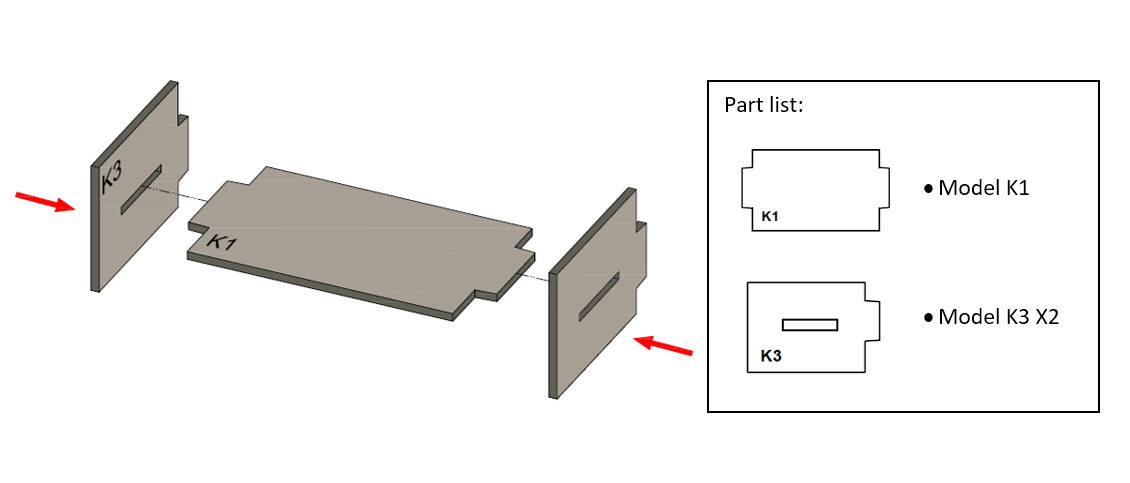
To build a sofa model. Put the model K3 to the two sides of model K1.
Step 6
Put model K2 all together to the cardboard parts (K1-K3).
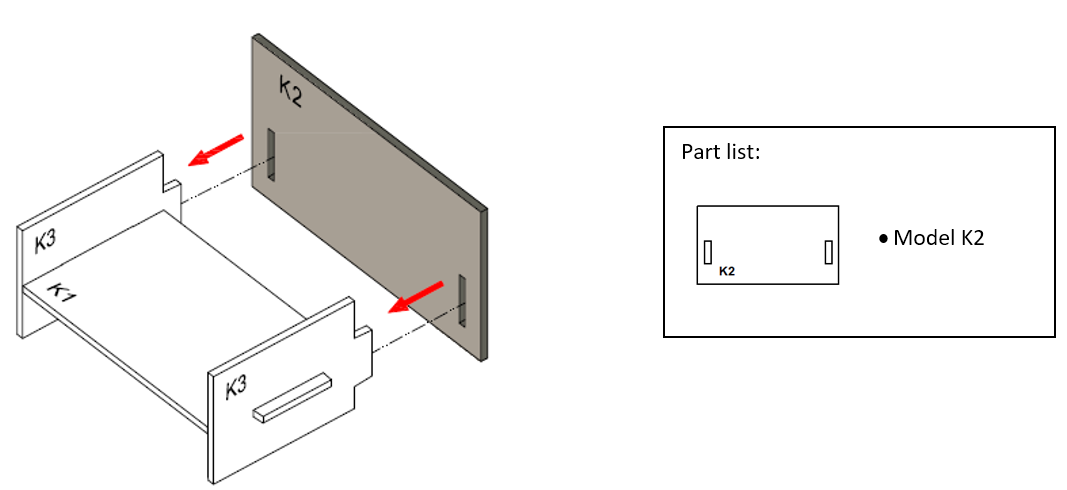
Step 7
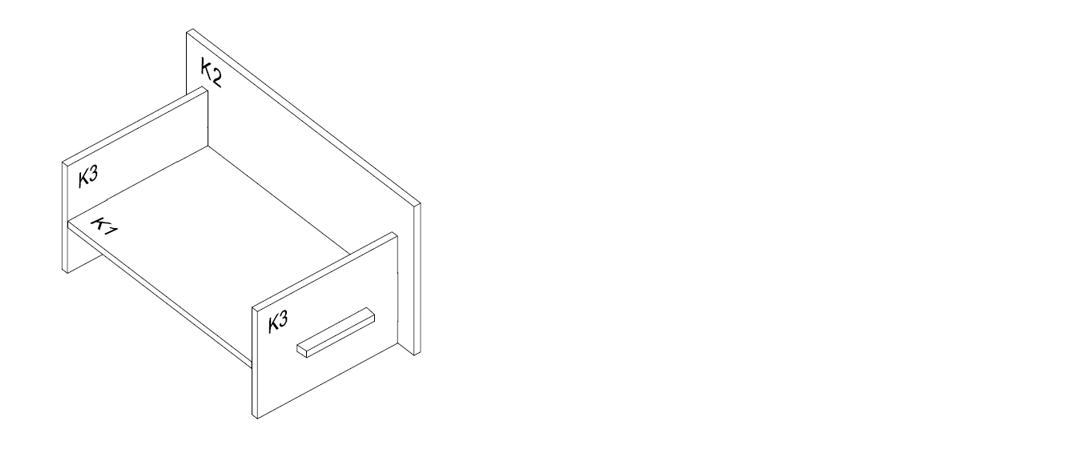
The sofa completed~
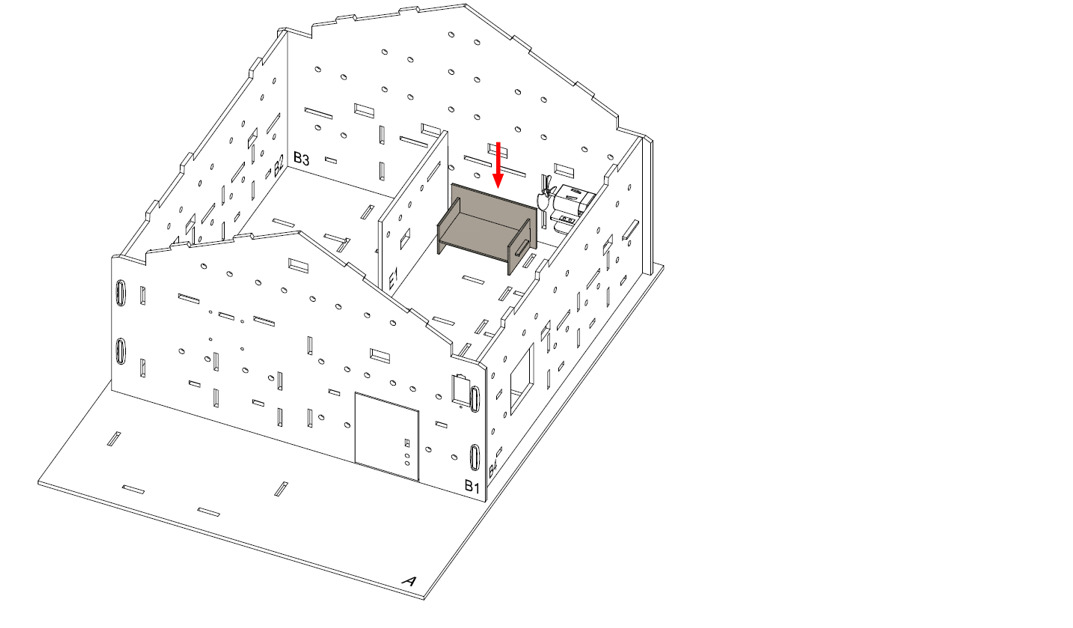
Step 8
Place the sofa next to the fan.
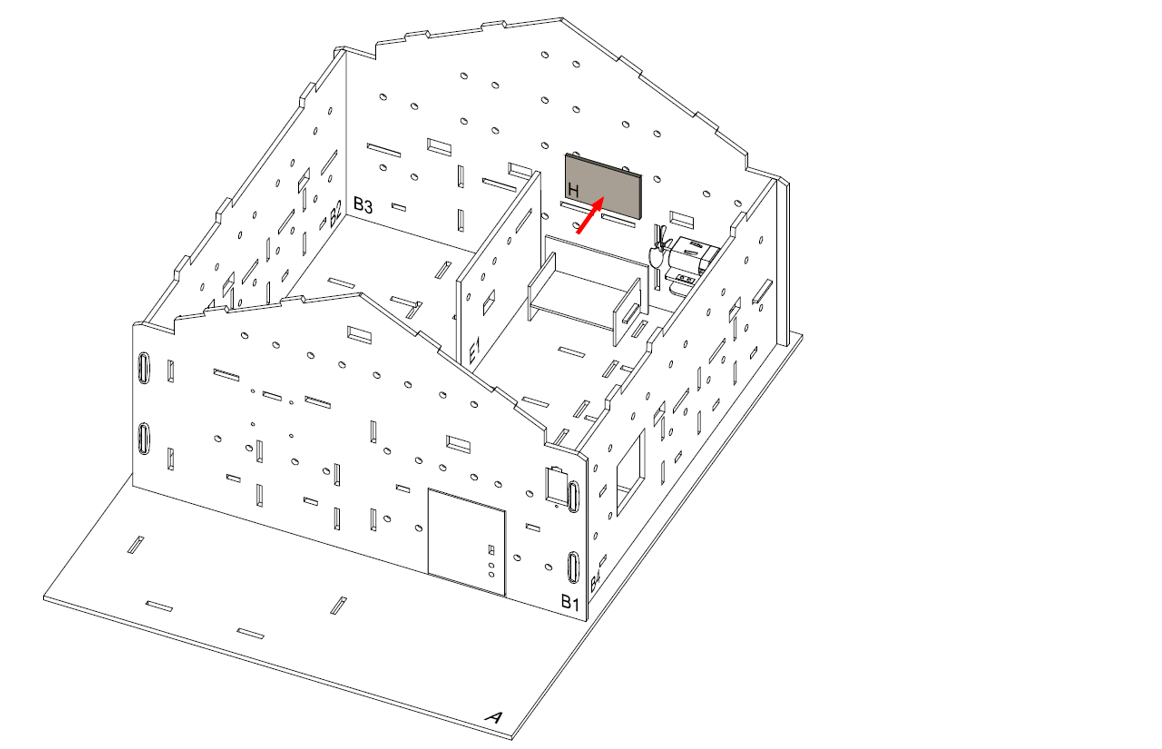
Step 9
Place the decoration board (Model H) on model B3.
Step 10
Completed!
Optional:
Step 1
Place the Amazon Alexa/Google Nest Mini/Apple Homepod mini at the living room. In this case, we put Amazon Alexa here.
Step 2
Assembly Completed!

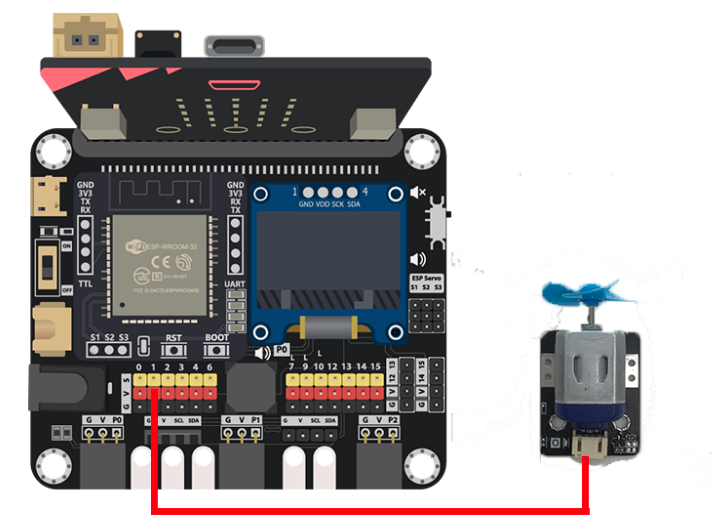
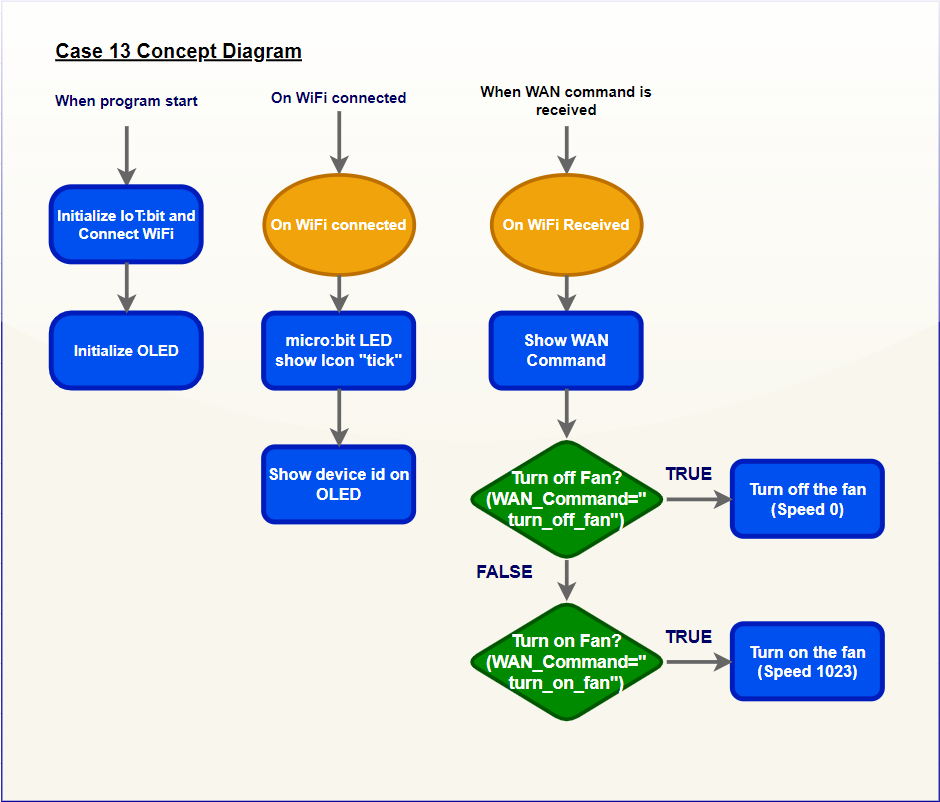
16.6. Programming (MakeCode)
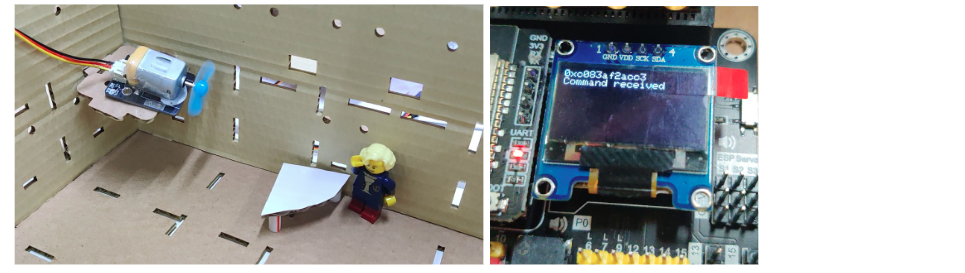
Step 1. Initialize OLED, IoT:bit and connect to WiFi
Snap
Initialize OLED with width:128, height: 64toon startSnap
Initialize IoT:bit TX P16 RX P8fromIoT:bittoon startSnap
Set Wi-Fi to ssid pwdfromIoT:bitEnter your Wi-Fi name and password. Here we set
smarthonasSSIDand12345678aspassword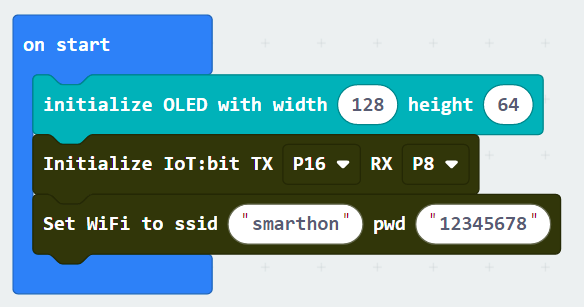
Step 2. Show icon “tick” and Device ID after WiFi connection
Snap
show iconfrombasictoOn WiFi connectedand select icontickDraw the
Device IDvariable fromOn WiFi connectedto theshow stringblock placeholder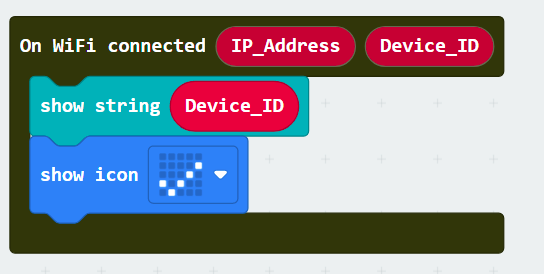
Step 3. Receive Command
Inside the
On WiFi Received, show the command on OLED displayClear the display before each update by
Clear OLED displayShow the
WAN_Commandwith text explanation byshow string join Command: WAN_Command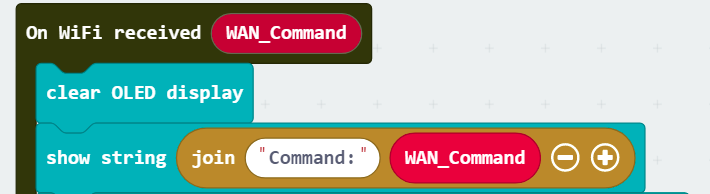
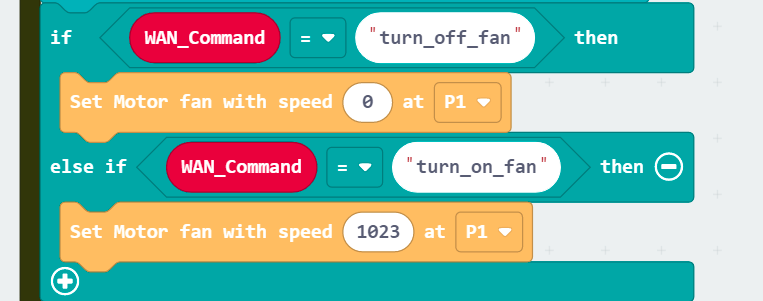
Step 4. Action with command
put a nested
if-elsestatement with different conditionsSet the first condition as
WAN_Command = turn_off_fanIn the
ifsegment, turn off the fan byset Motor fan with speed 0 at P1In the second
ifcondition, useWAN_Command = turn_on_fanIn the second
ifsegment, turn on the fan byset Motor fan with speed 1023 at P1
Full Solution
MakeCode: https://makecode.microbit.org/S40911-39605-55147-37667
You could also download the program from the following website:
16.7. IoT (Alexa, Cloud Control, IFTTT)
Part 1. Setup Amazon Alexa
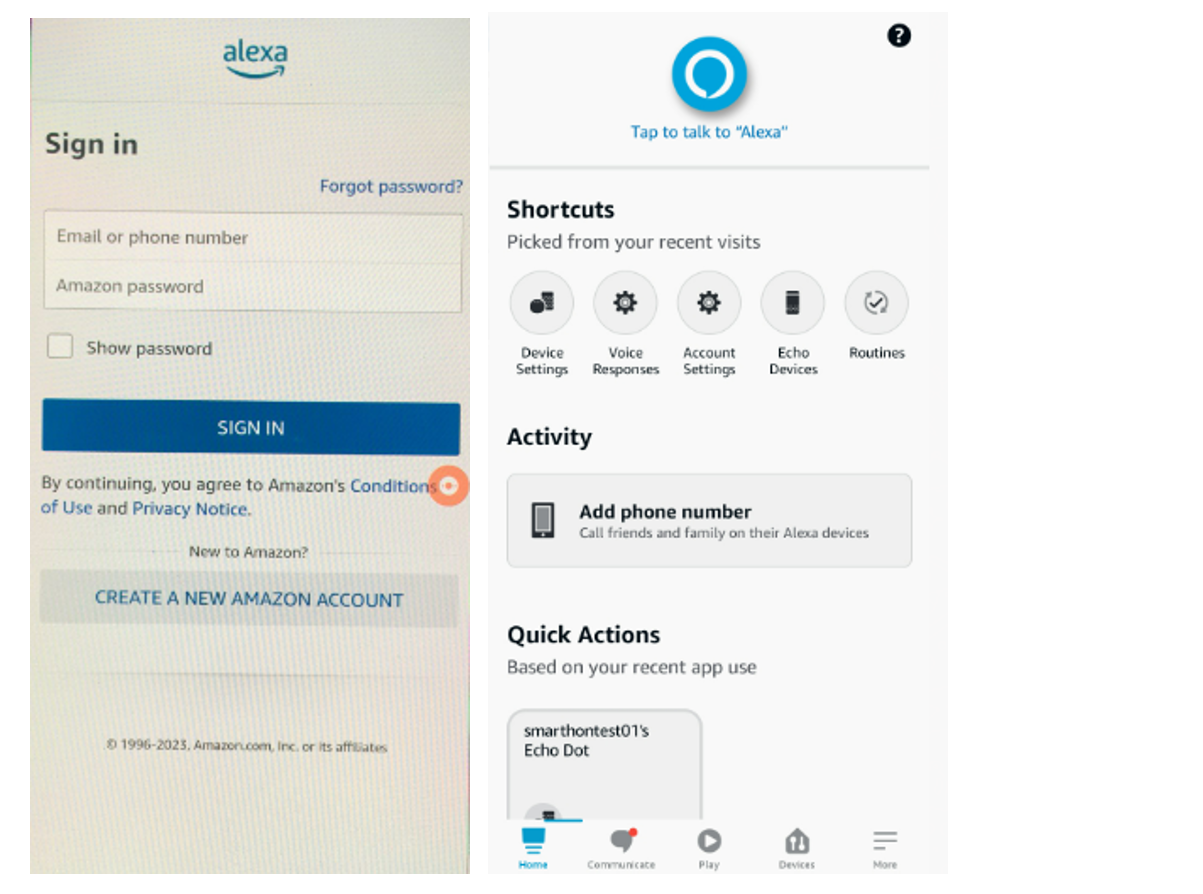
Get the amazon alexa apps.

Create Amazon Account (if not have amazon account) and login.
Optional:
Setup the alexa device and connect to the amazon account.
Part 2. Setup IFTTT
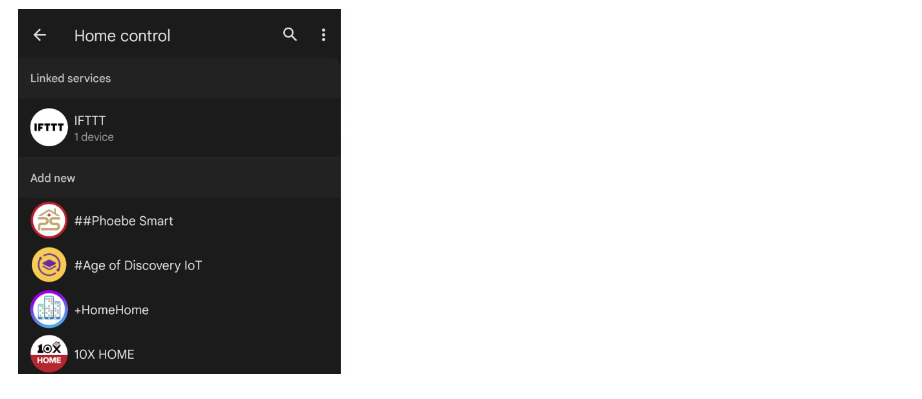
Install IFTTT from Google Play Store.
Open and login to IFTTT.
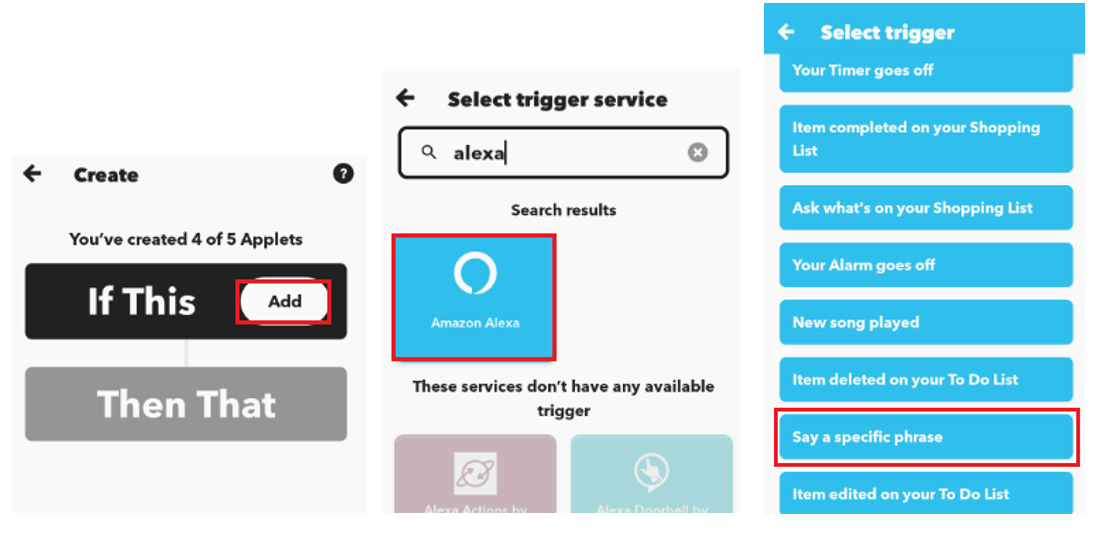
Press create to create the applet.
At the IF, search “alexa “ and choose “Amazon Alexa” and choose “Say a specific phrase.”
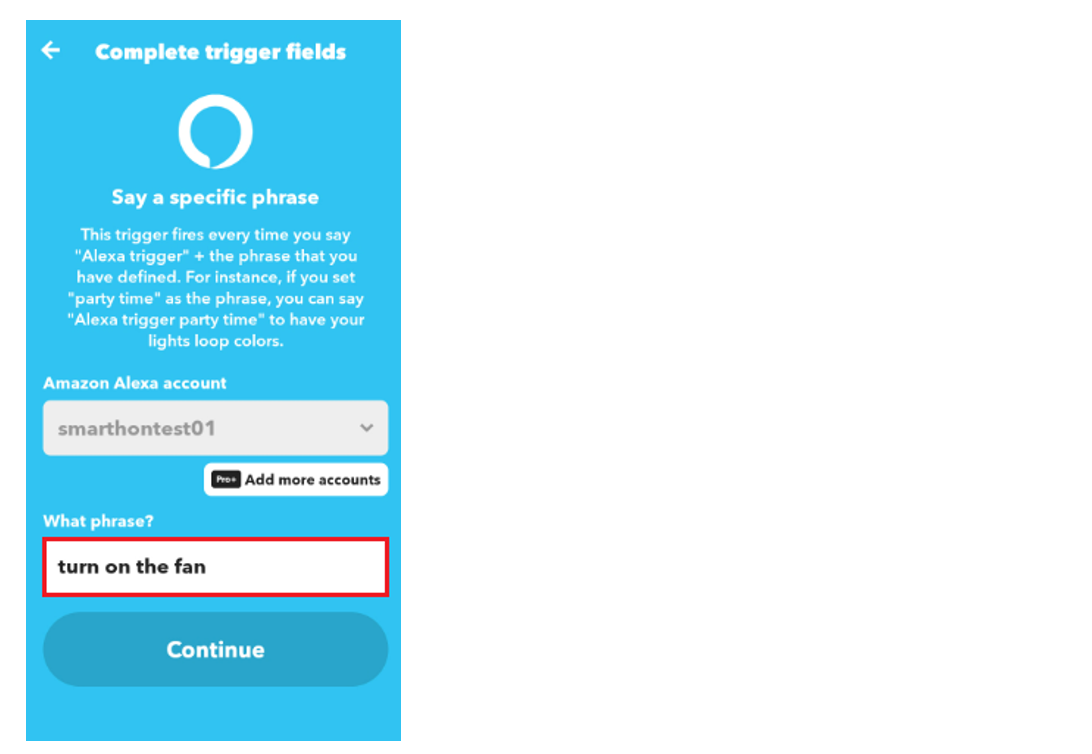
It will detect the login account from Amazon Alexa app. Then, type the phrase here. For this example, we type “turn on the fan”.
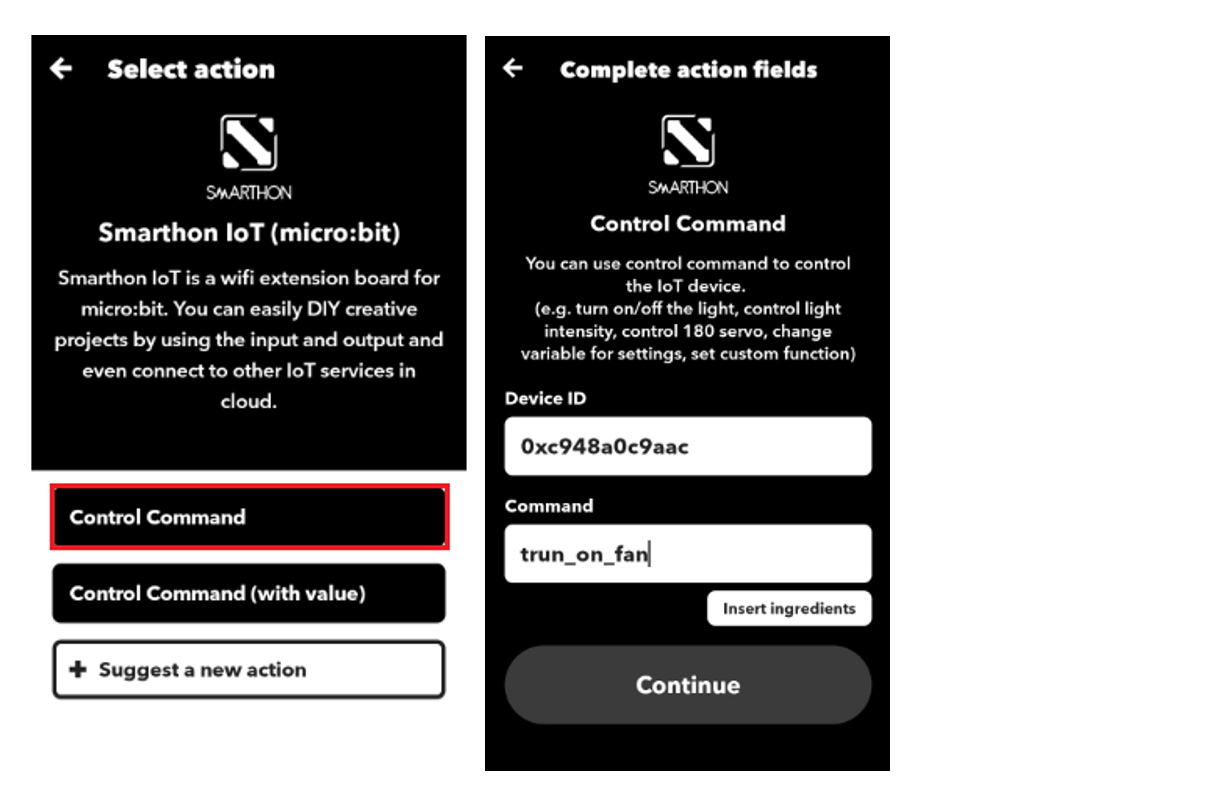
Click Add and type “smarthon iot” and choose Smarthon IoT as “then” service.
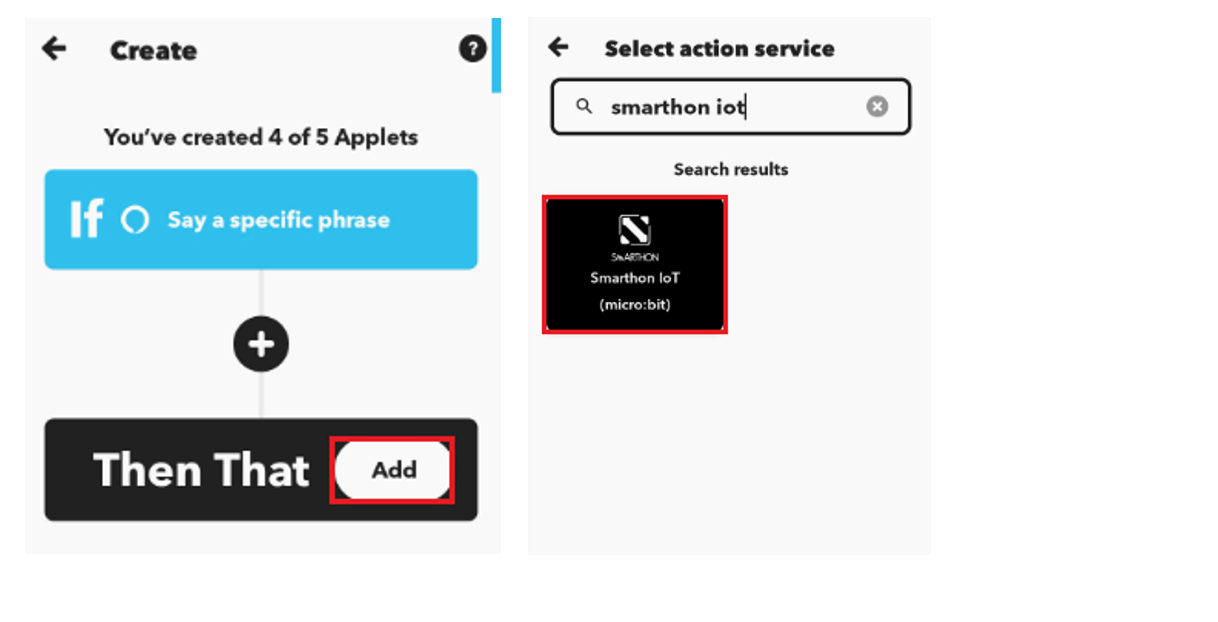
In the service, choose “Control Command” and then fill in the Device ID, the command name that can read from the Micro:bit, and click “continue”, DONE!
Result
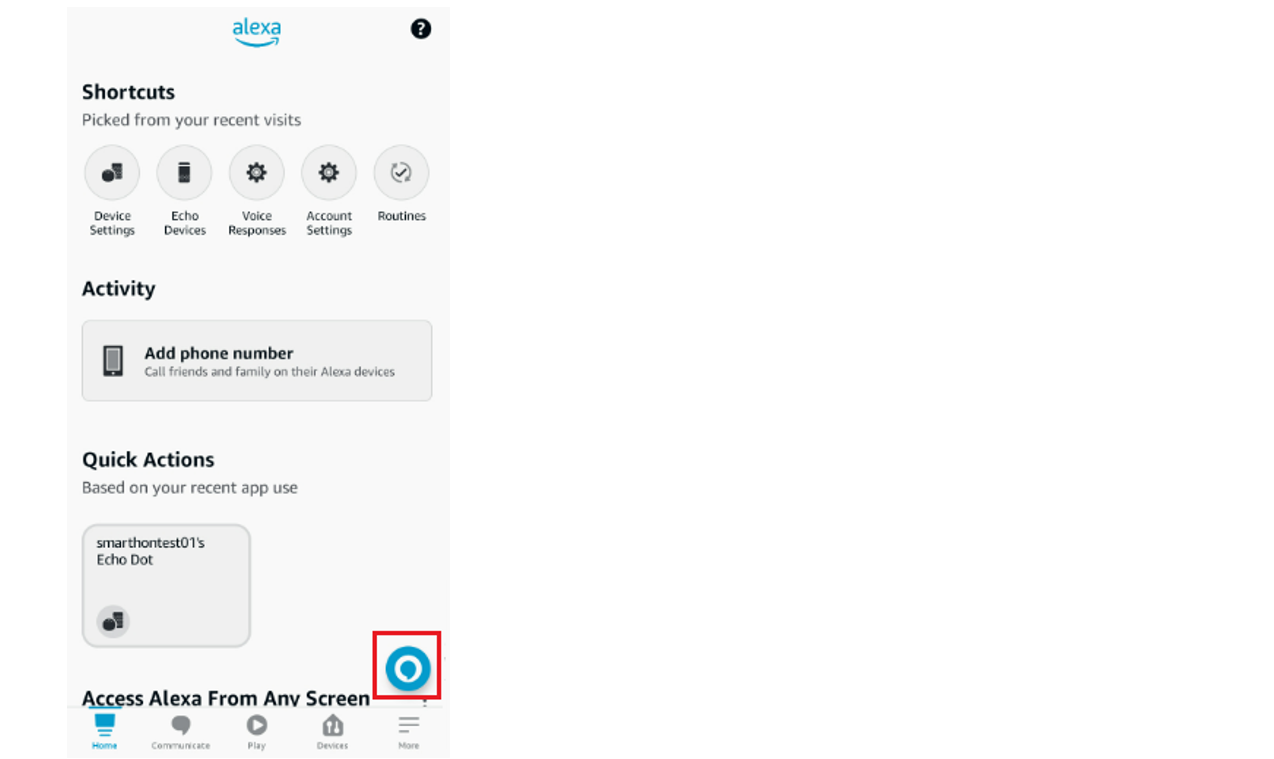
Open the Amazon Alexa App, switch to the alexa account which connected to IFTTT.
Talk to alexa with “Trigger turn on the fan” by pressing the button in the right bottom corner.
In the first time, it will ask you whether to turn on. Press turn on and say the phase. The phase should be trigger the IFTTT and send the command to Iot:bit.
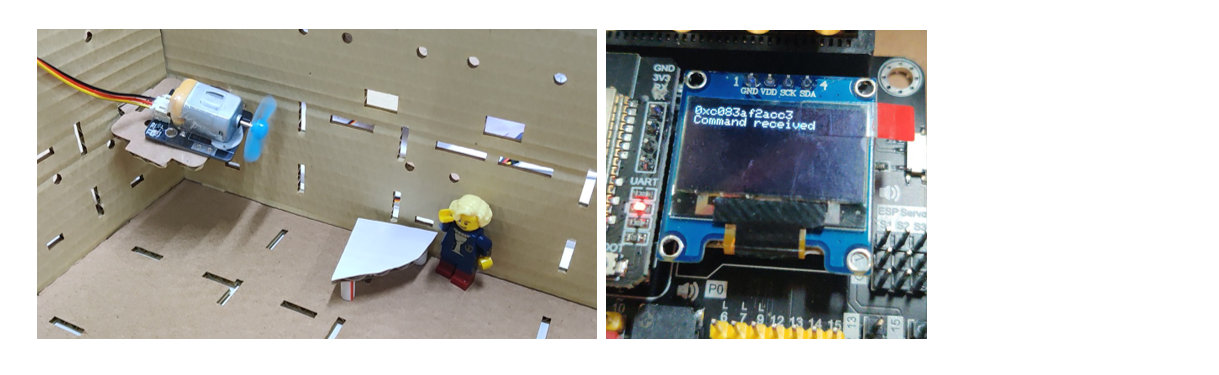
When say “Alexa trigger turn on the fan”, the fan will be turn on; When say “ Alexa trigger turn off the fan”, the fan will be turn off.
Optional:
You can connect the real device Amazon echo dot to the app so that you can do the voice control with a real voice controller.
16.8. IoT (Google Assistant)
Part 1. Setup Google Home and Google Assistant App
Install Google Home and Google Assistant app.
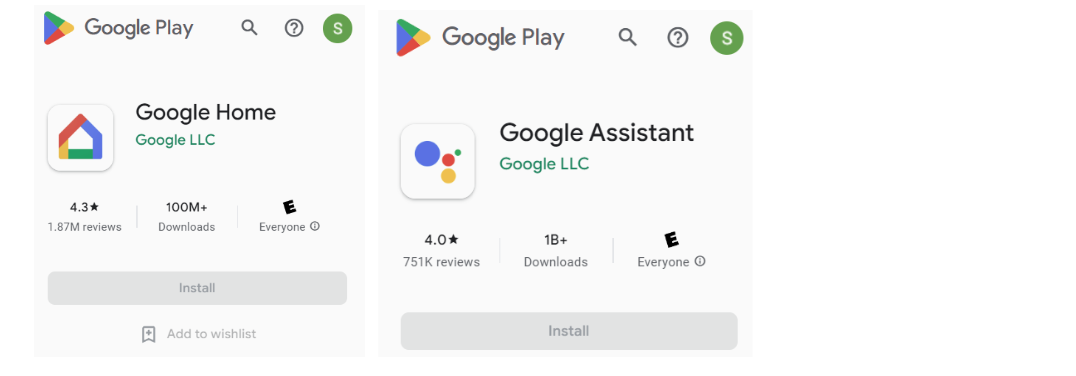
Login with your google account.
Open the google home app, switch to your google account.
Press the settings button, choose “Works with Google”.
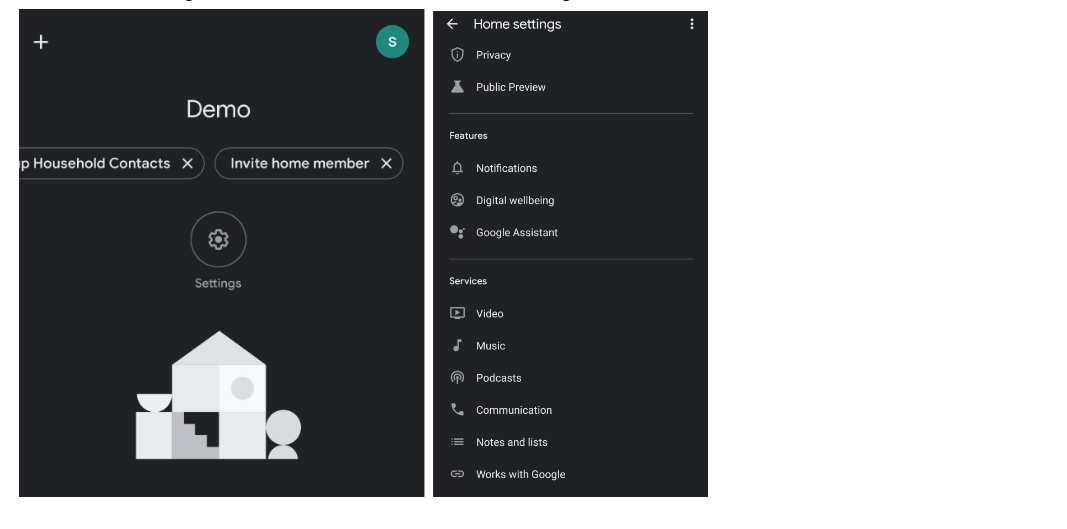
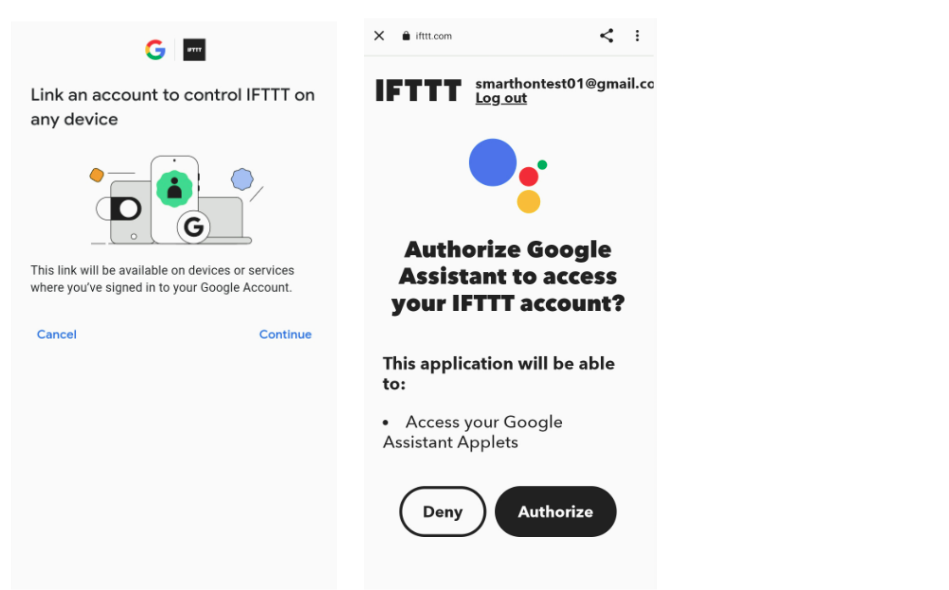
Search and select IFTTT, provide authorize of Google to access the IFTTT service.
After linked, the IFTTT will show on the list.
Part 2. Setup IFTTT
Install IFTTT from Google Play Store.
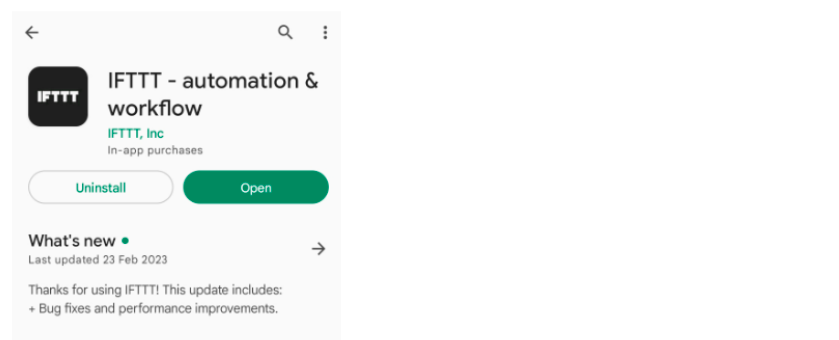
Open and login to IFTTT.
Press create to create the applet.
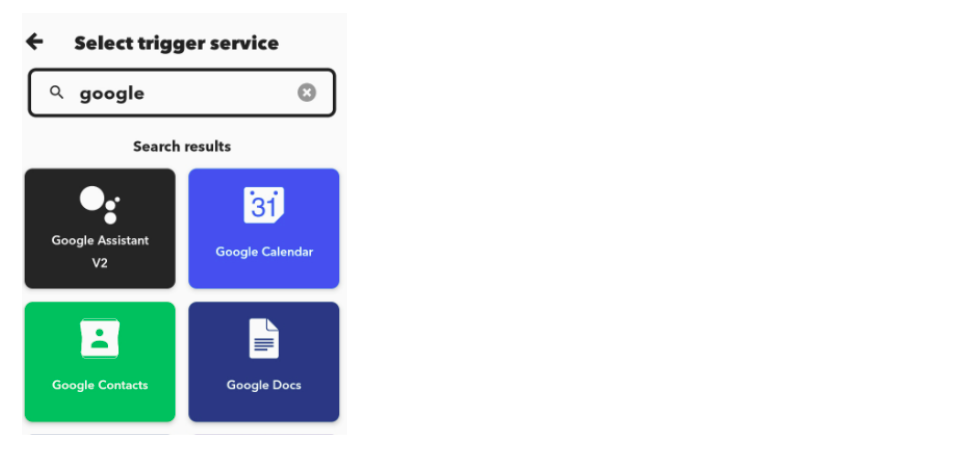
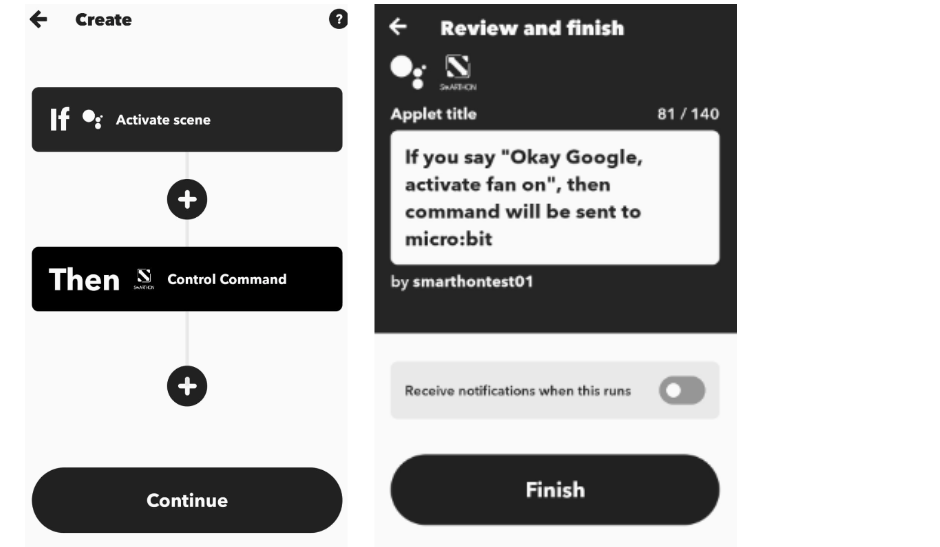
At the IF, search “google assistant “ and choose “Google assistant V2”.
In “Activate scene” input the phase for trigger the command. In this case, we input “fan on”.

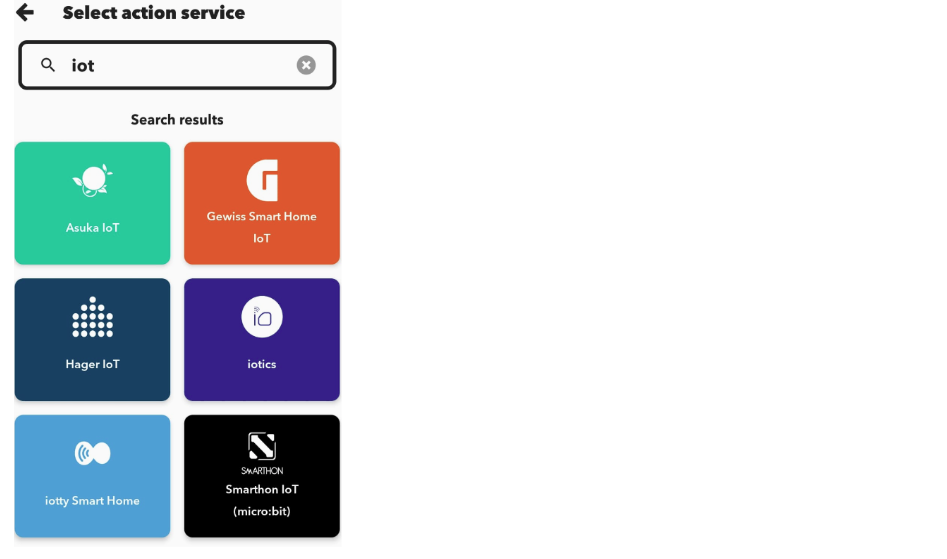
At the THEN, search “iot” and choose “Smarthon IoT (micro:bit)”.
Press the “Control Command”, input the device ID of Iot:bit and the command “turn_on_fan”.
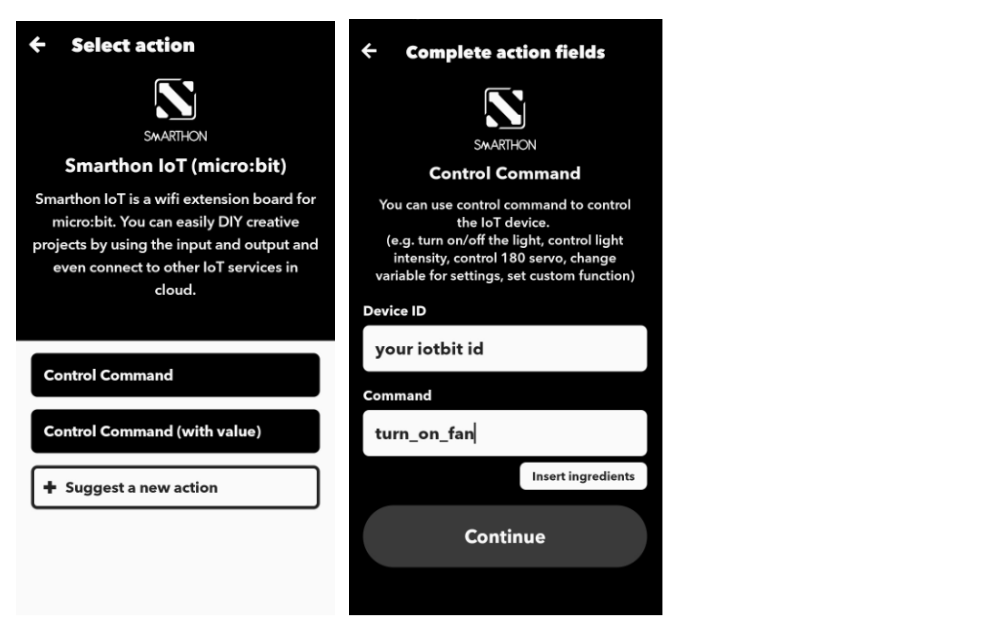
Then click continue and finish button to save the applet.
Result
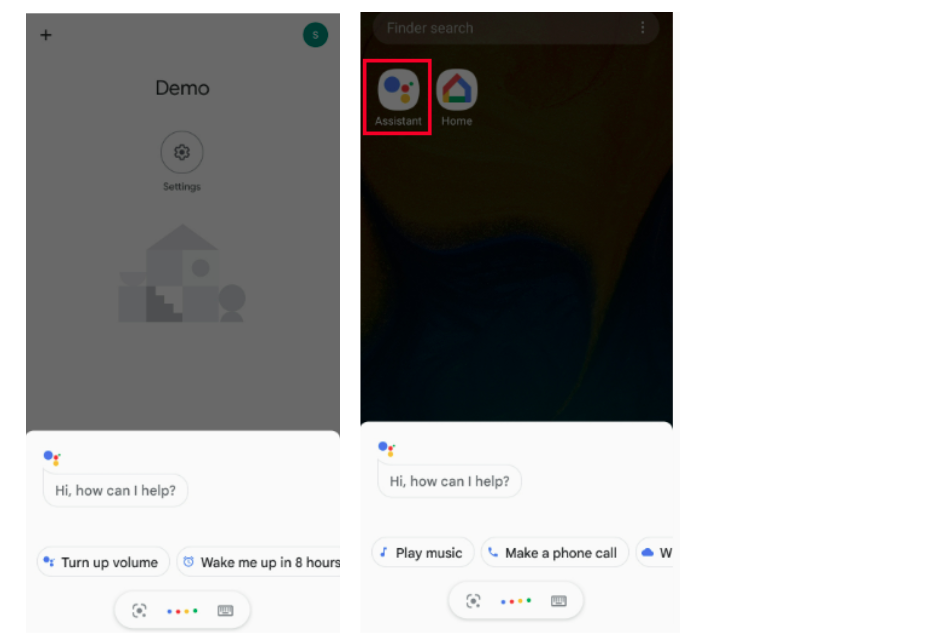
Open the Google Home App or Google Assistant App. Make sure the login google account is connected to IFTTT in the previous setup on Google Home App.
Say “Hey google, activate (your phase)” or press the button and say “activate (your phase)”.
The phase should be trigger the IFTTT and send the command to Iot:bit.
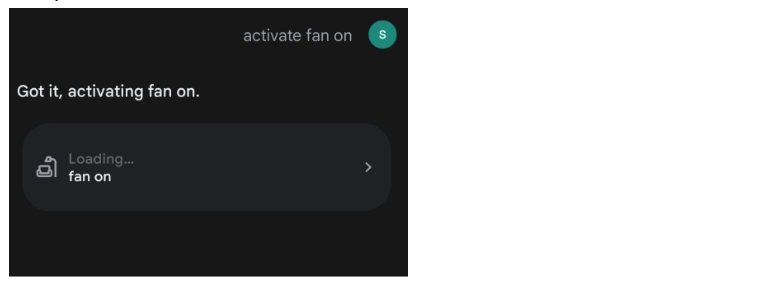
The fan will be turned on.
(Optional):
You can connect the real device Google Nest Mini or Google Home to the app so that you can do the voice control with a real voice controller.
16.9. IoT (Apple’s Siri)
Part 1. Setup IFTTT
Install “IFTTT” App from Apple store.
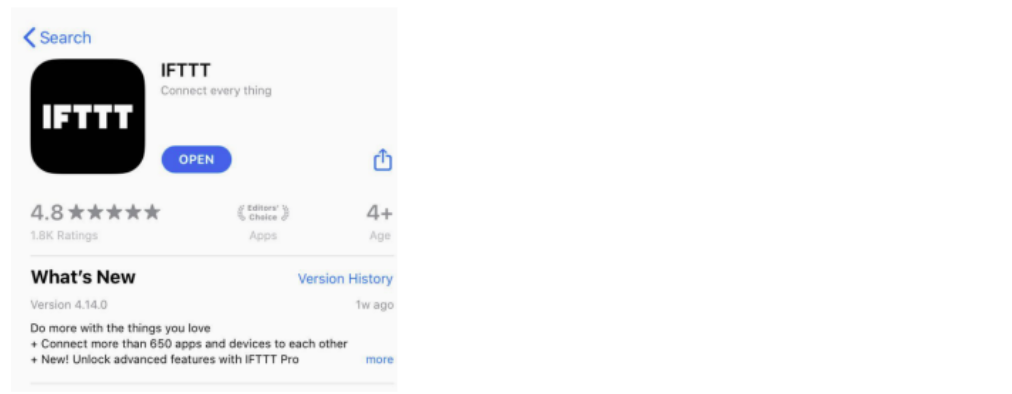
Open the APP, login into IFTTT.
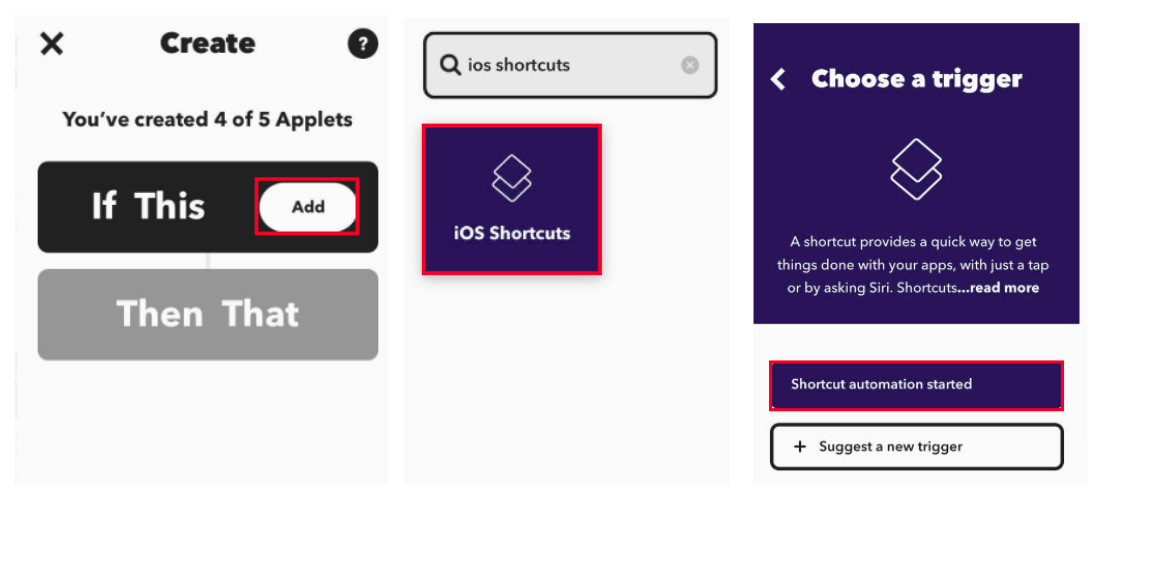
Tap “Create” to create an applet.
Click If This “Add” button. Select the “iOS Shortcuts” and click “Shortcut automation started”.
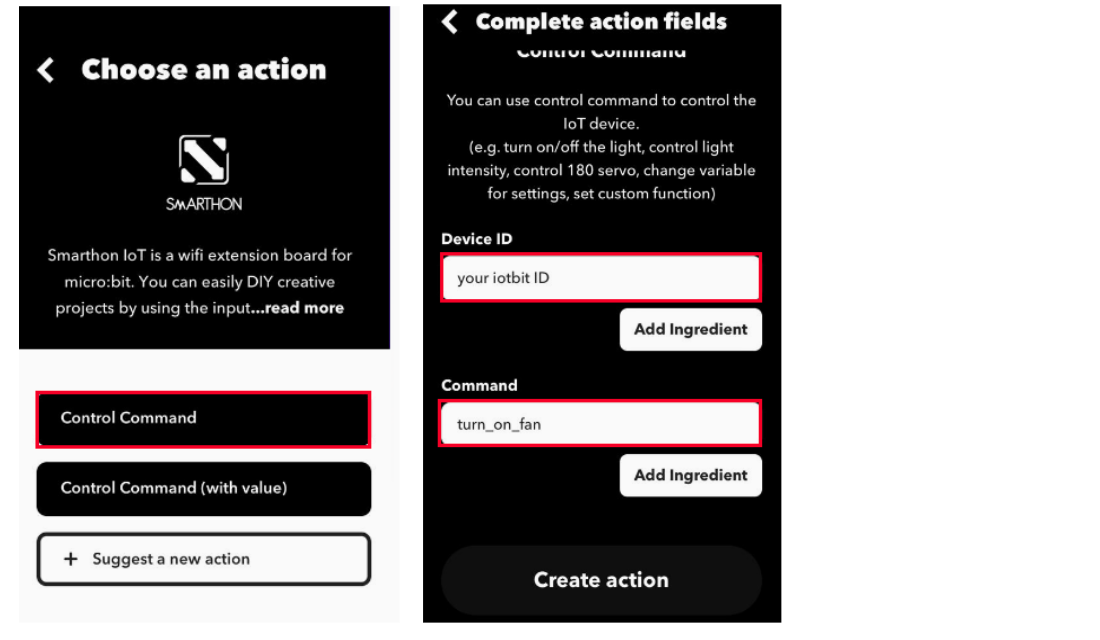
Click Then That “Add” button, search “Smarthon IoT” and select the “Smarthon IoT (mirco:bit)”.
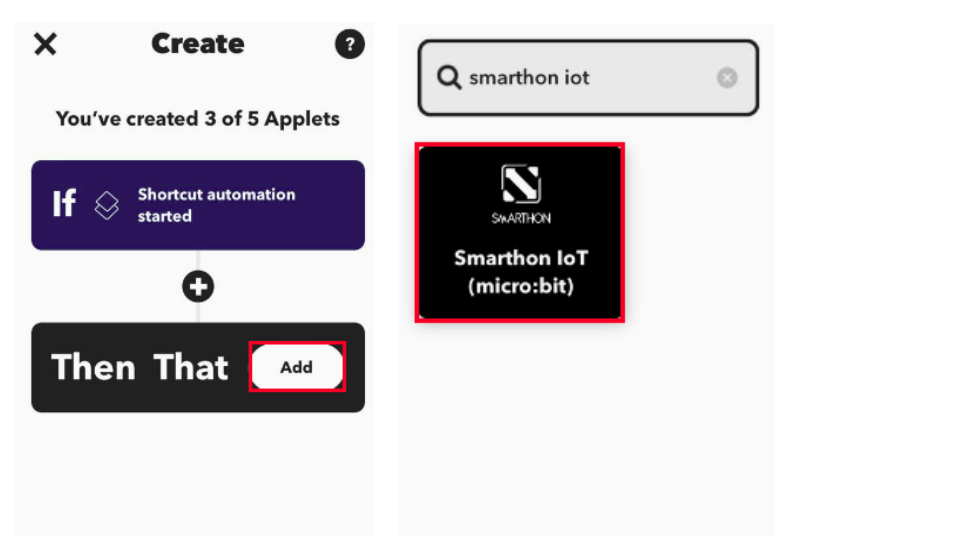
Choose the “Control Command”, and fill in the Device ID, and the command name that can read from the Micro:bit, and click “Continue”, then save the applet.
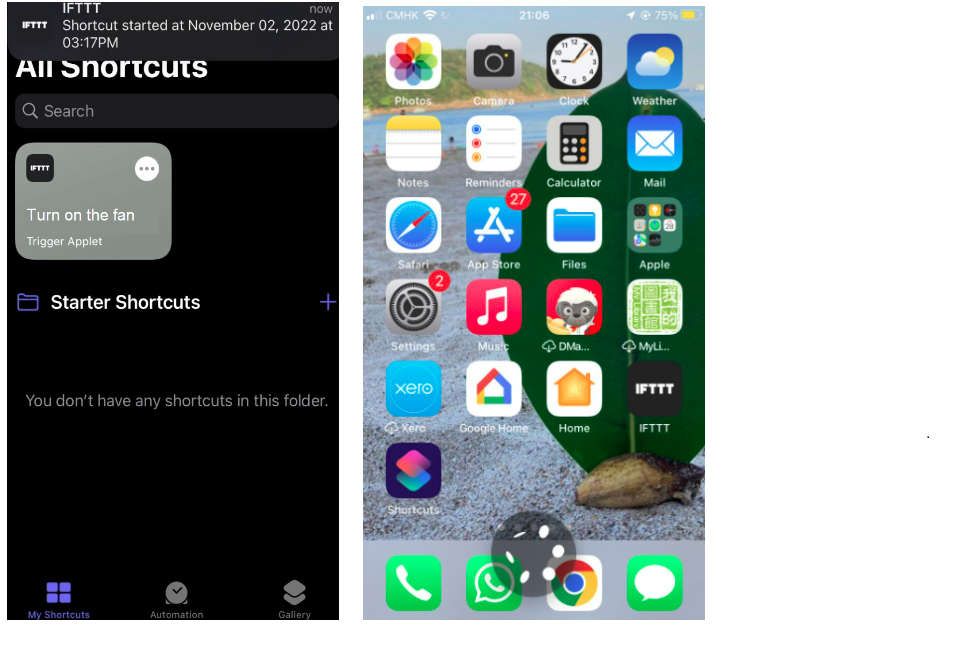
Part 2. Setup IOS ShortCut on Iphone
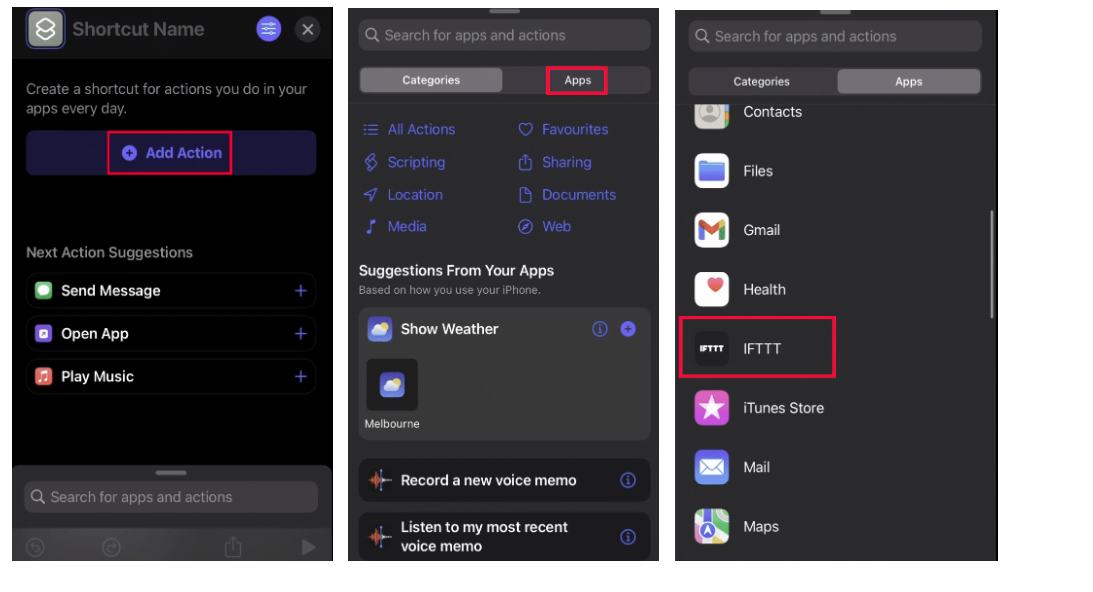
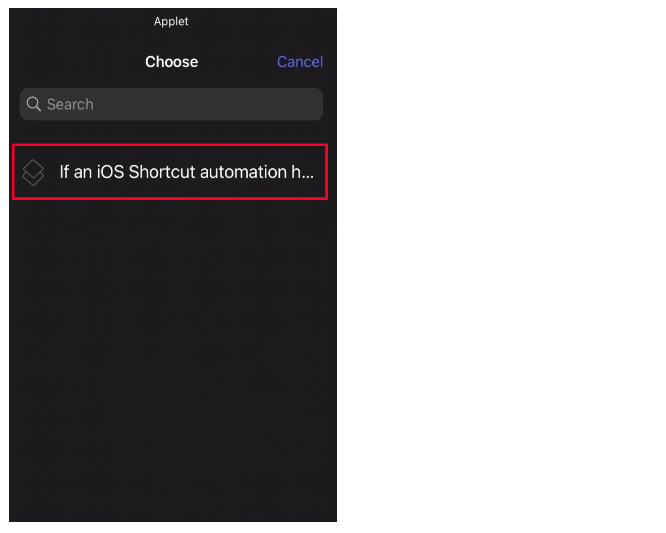
Open the Shortcuts app and tap the plus button ( + ) in the top right corner.

Tap Add Action > Apps > IFTTT.
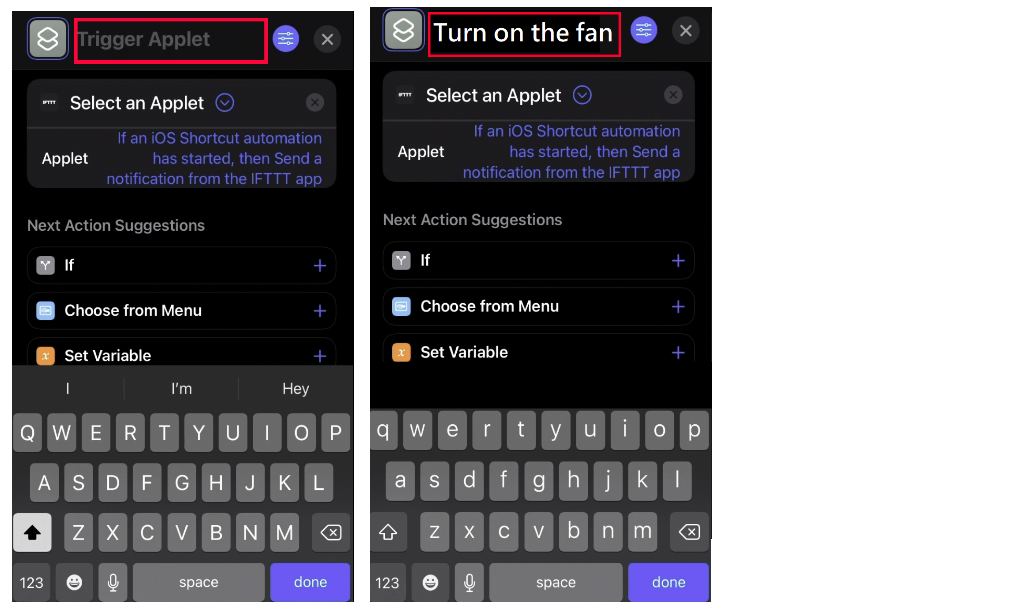
Select Trigger Applet, Tap the blue arrow ( > ) next to ‘Select an Applet’, then tap Choose.
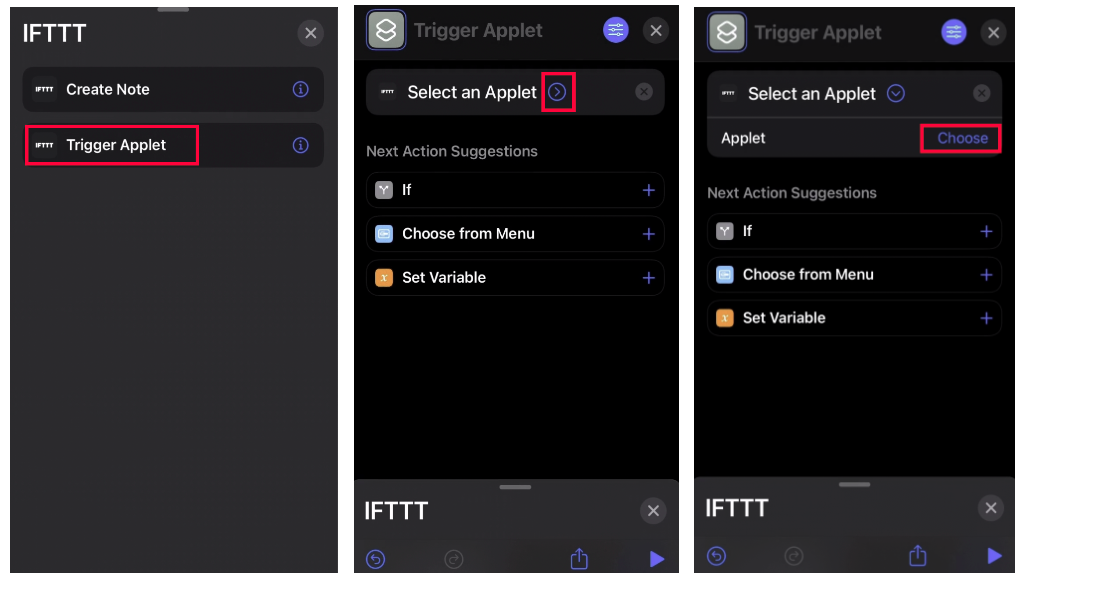
Select the Applet you’d like this Shortcut to run (please note that only Applets that use the iOS Shortcuts - Shortcut automation started trigger will appear in this list).
Name your Shortcut by tapping Trigger Applet at the top of the screen. This will be the custom phrase you will use to trigger your Applet.
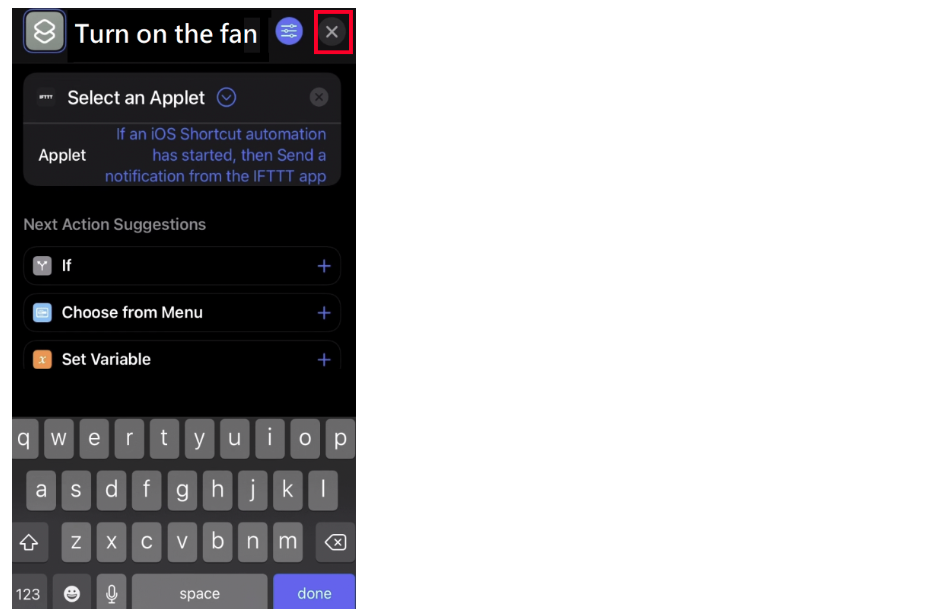
Save the shortcut.
Results
Click the shortcut or Hold the button on iphone. Say “turn on the fan” or “Siri turn on the fan”.
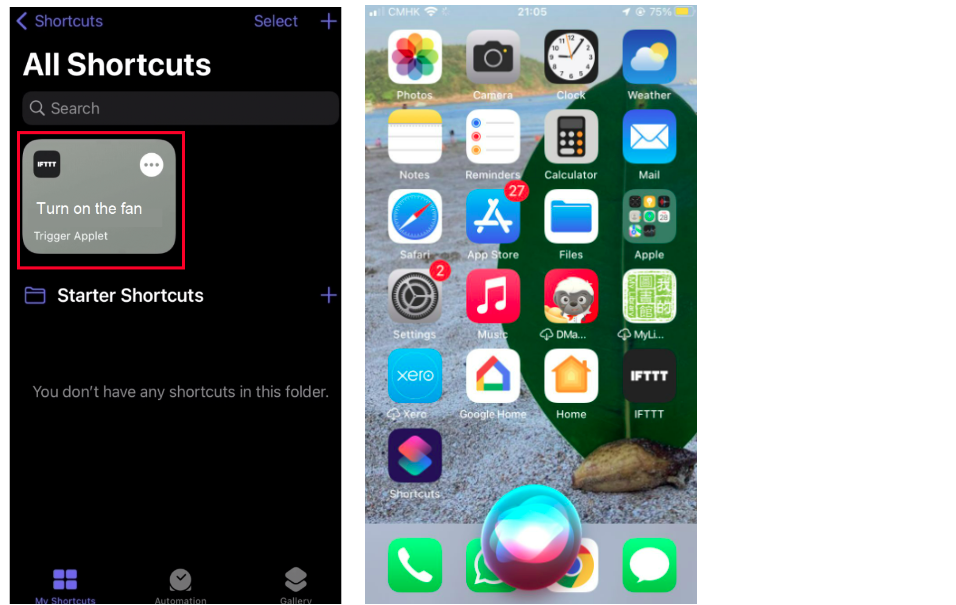
The applet will be triggered.
(Optional)
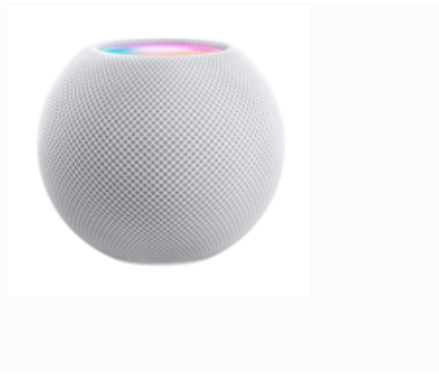
You can connect the real device Apple Homepod to the Apple Home App so that you can do the voice control with a real voice controller.
16.10. Think
Apart from “Say a specific phrase” Alexa IFTTT trigger, any other Alexa trigger can use in case?