15. IoT Case 12: Room Smart Colourful Light App Control
Level: 
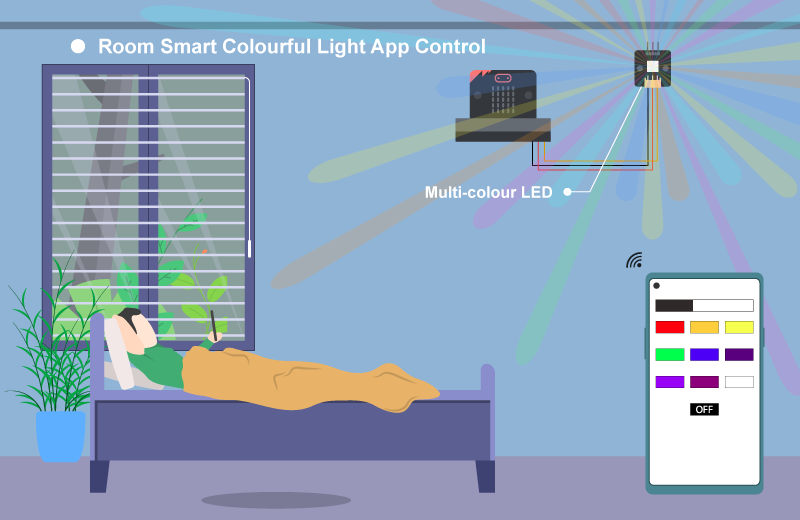
15.2. Background
What is Smart Colorful Light?
A smart colorful light is a multi-color LED light that allows switching color of light, usually being requested through remote control, for example a mobile app. The user can adjust the color based on different needs. For instance, the user might need dark light when he/she is sleeping, baby feel comfortable when the room in warm color, and user may pick a good color when he/she is reading the book.
Smart Colorful Light Principle
The micro:bit will connect to the Internet to get the device ID. In the mobile app, it will send the different color command name to the micro:bit. In the micro:bit program, when it receives the command, it will show the corresponding color based on the command name.
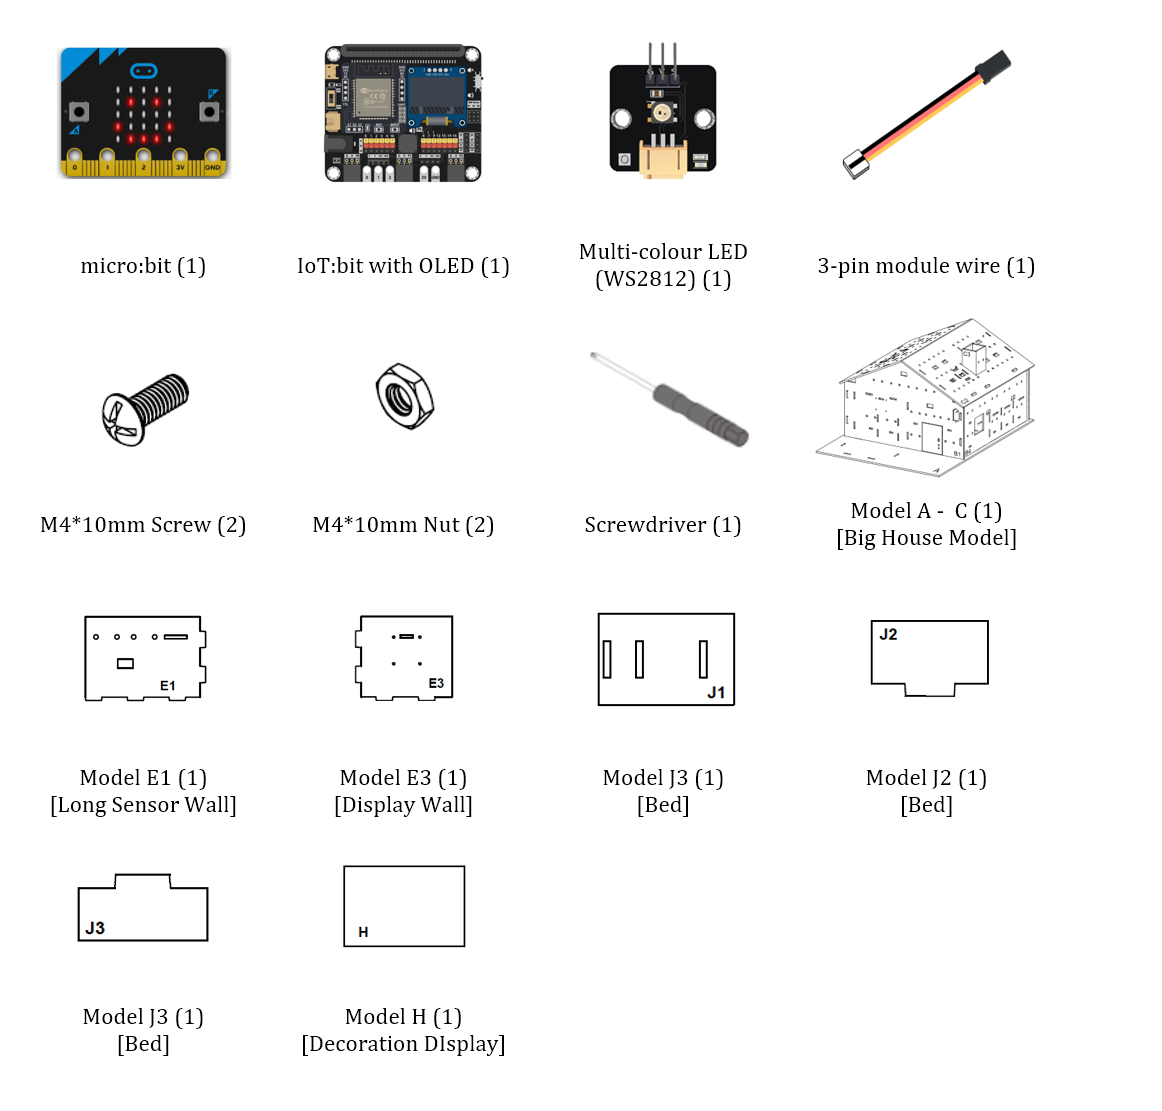
15.4. Assembly step
Step 1
In this case, build the “Big Style Model” as a home base.
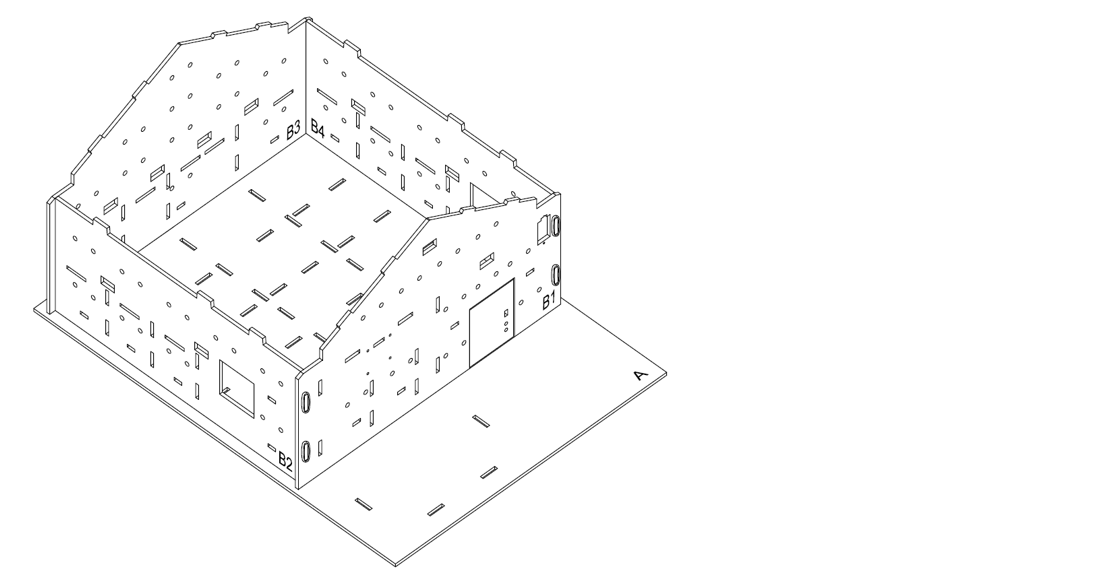
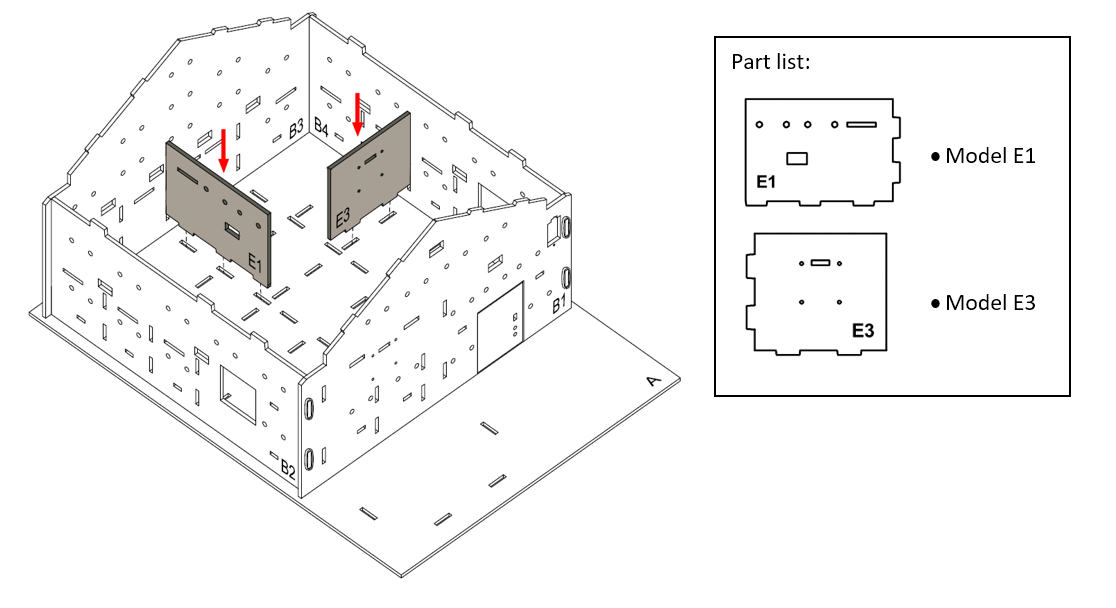
Step 2
To build a room, insert the model E1 and E3 on model A, align with holes on model A, B3 and B4.
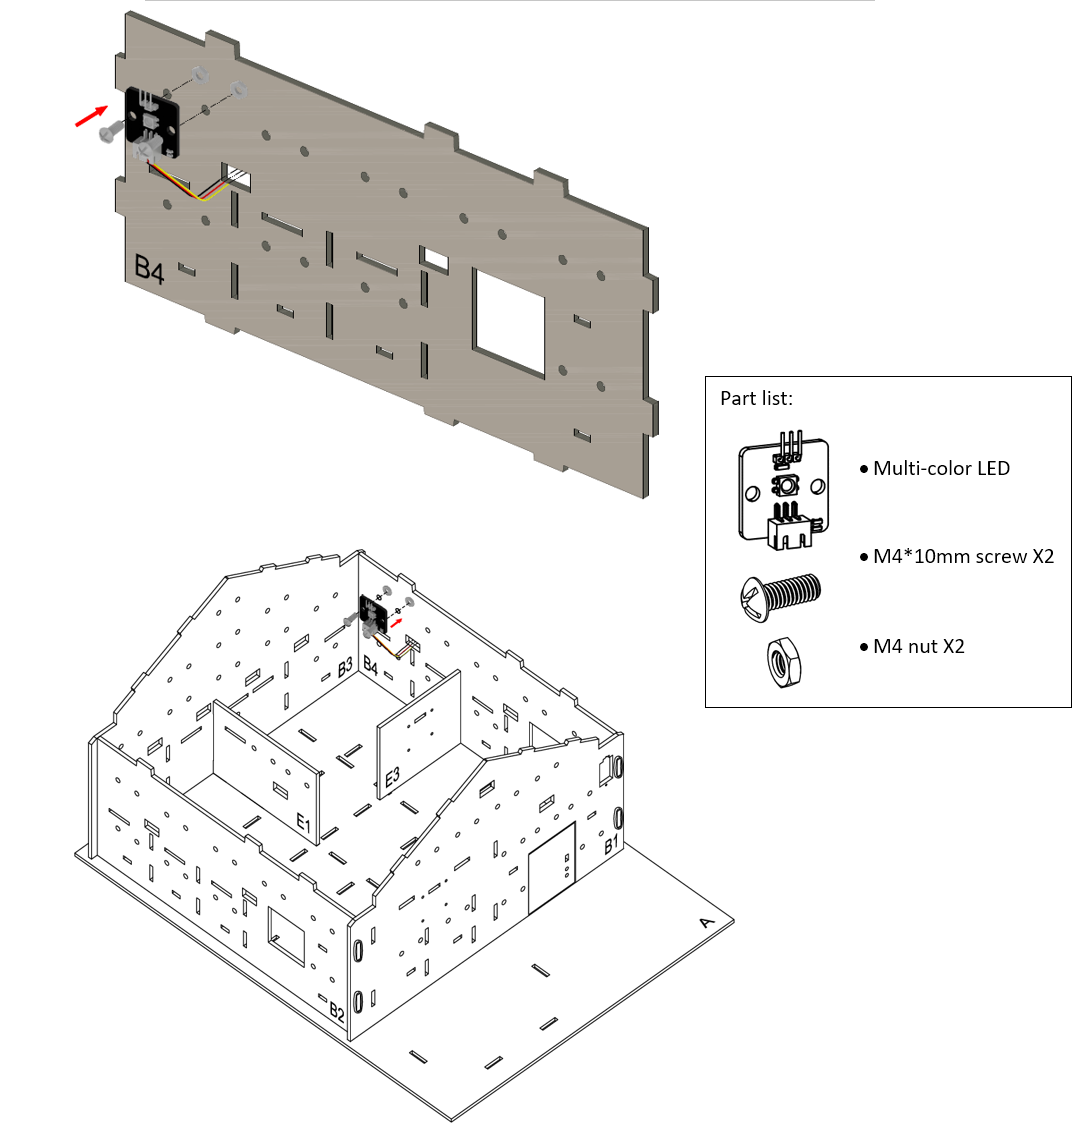
Step 3
Attach the Multi-color LED to model B4 using M4 * 10mm screws and nuts.
Step 4
To build a bed. Put model J2 onto the model J1, then put together all the cardboard parts (J1-J3).
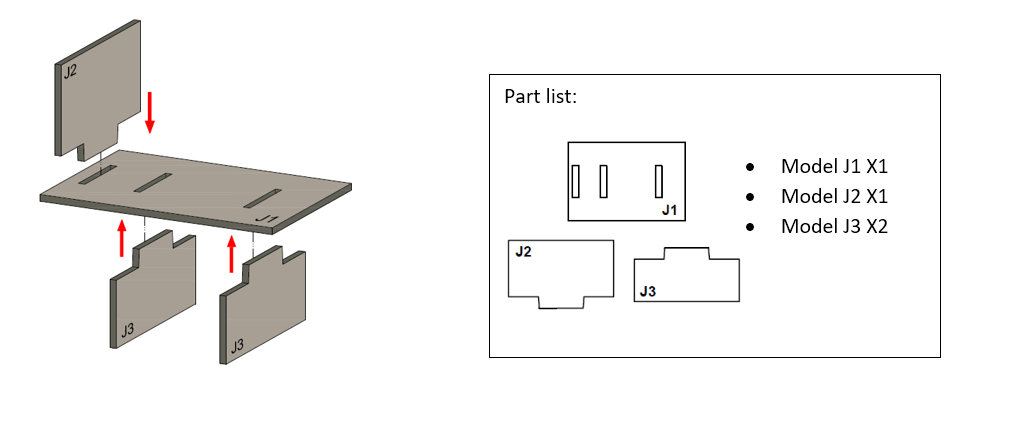
Step 5
The bed completed!

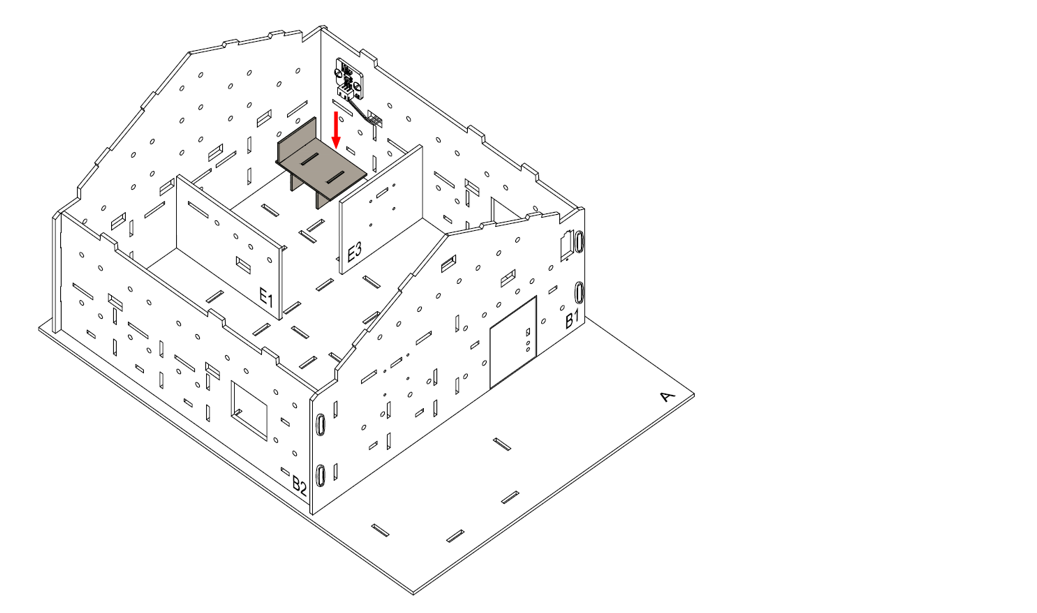
Step 6
Place the bed inside the bedroom.
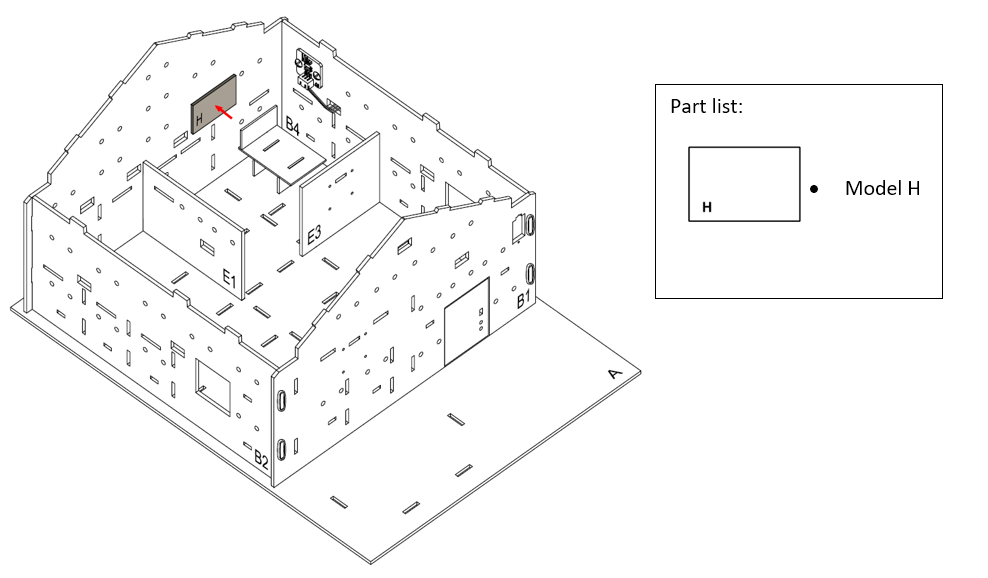
Step 7
Place the decoration board (Model H) on model B3.
Step 8
Assembly Completed!

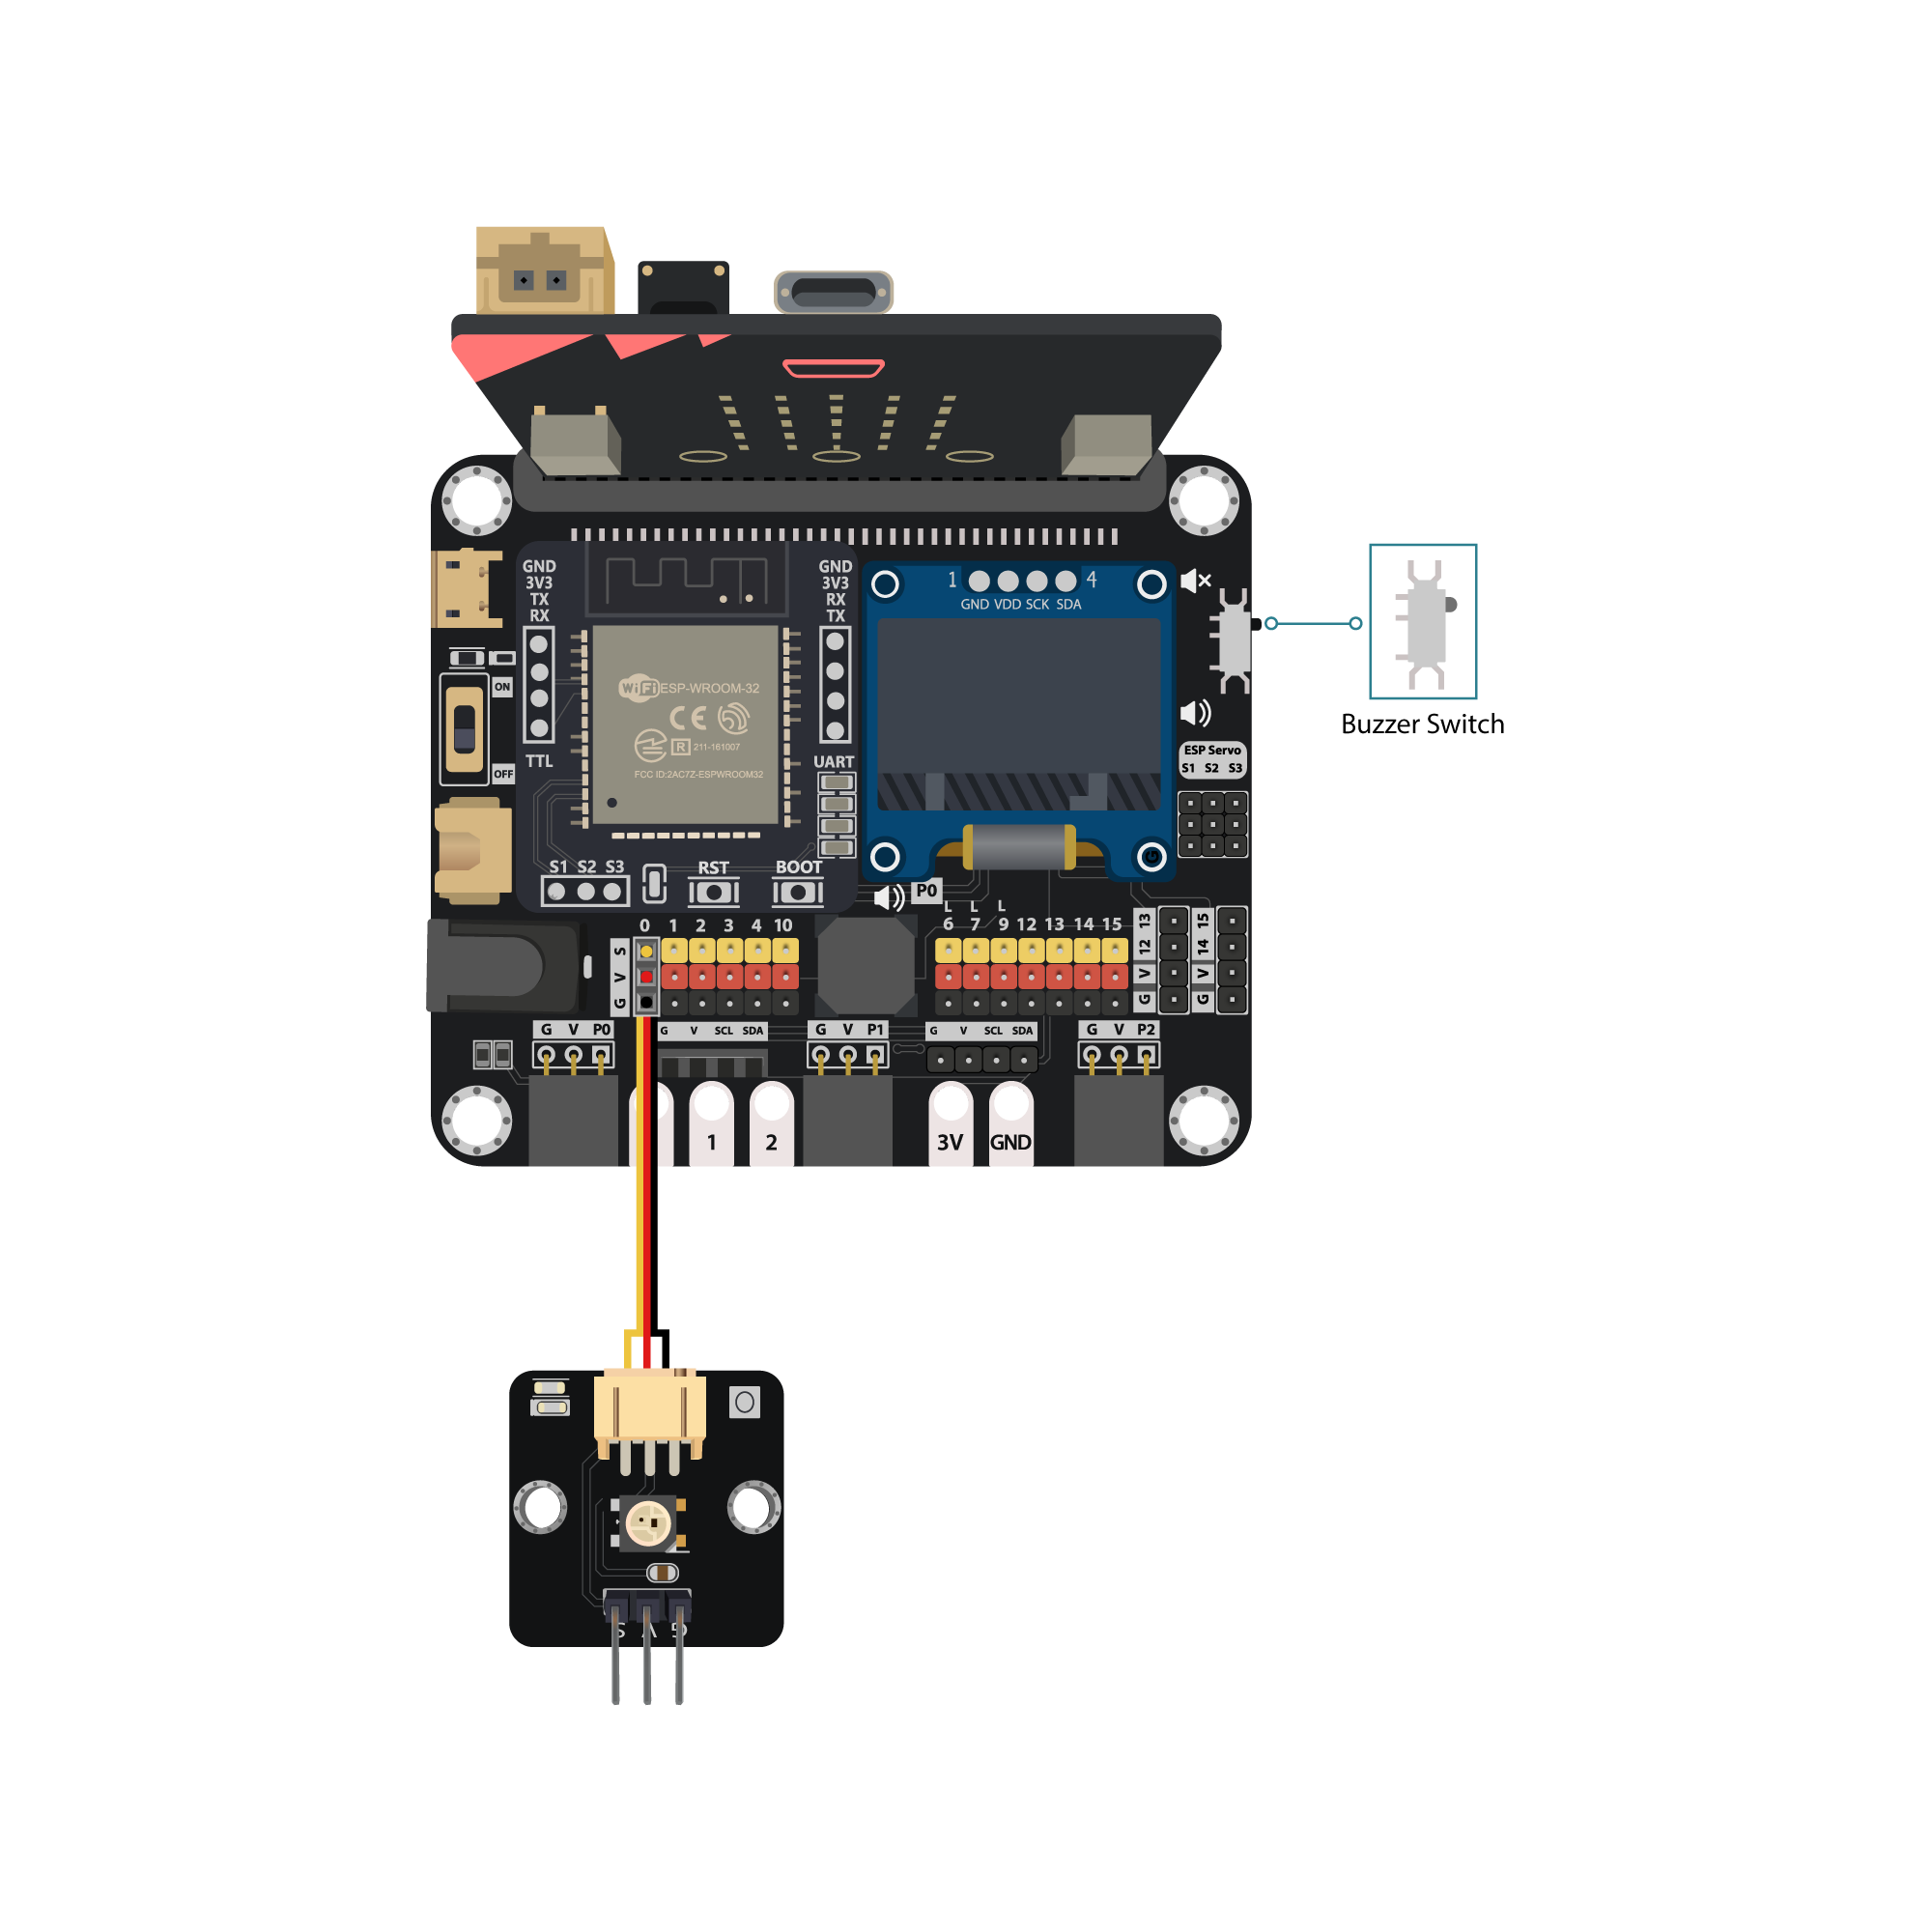
15.5. Hardware connect
Connect the Multi-color LED (WS2812) to P0
Pull up the buzzer switch to disconnect the buzzer
15.6. Programming (MakeCode)
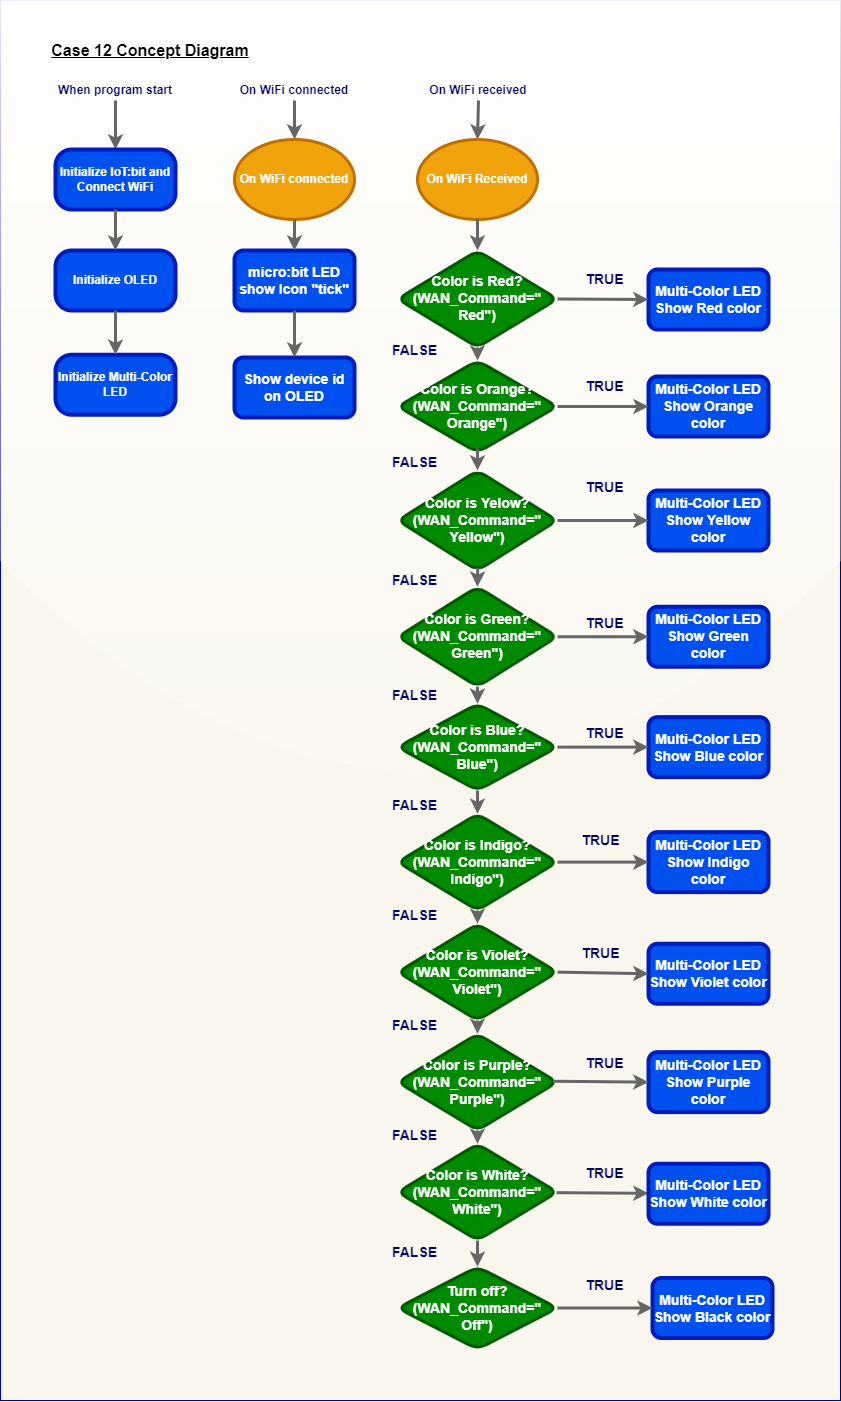
Step 1. Initialize OLED, IoT:bit and connect to WiFi, initialize the Multi-color LED
Snap
Initialize OLED with width:128, height: 64toon startSnap
Initialize IoT:bit TX P16 RX P8fromIoT:bittoon startSnap
Set Wi-Fi to ssid pwdfromIoT:bitEnter your Wi-Fi name and password. Here we set
smarthonasSSIDand12345678aspasswordSnap
set strip to NeoPixel at pin P0 with 1 leds as RGB(GRB format)from Neopixel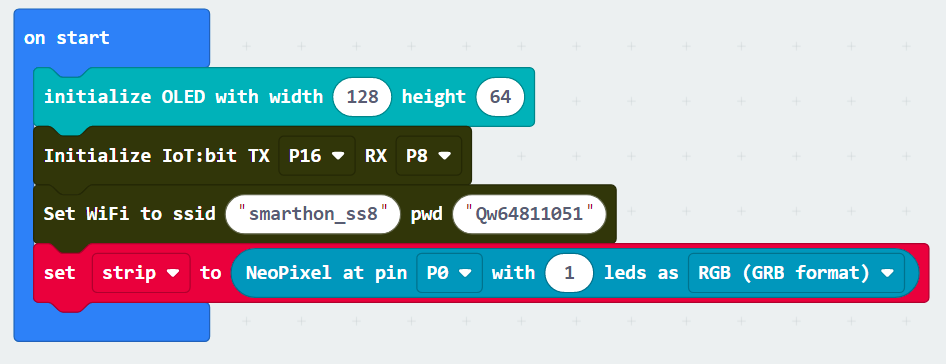
Step 2. Show icon “tick” and Device ID after WiFi connection
Snap
show iconfrombasictoOn WiFi connectedand select icontickDraw the
Device IDvariable fromOn WiFi connectedto theshow stringblock placeholder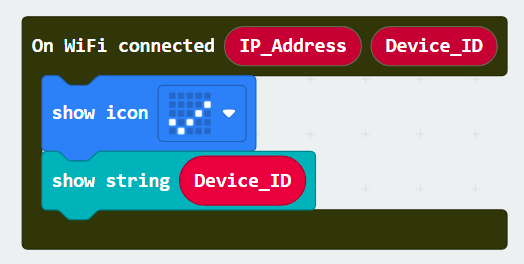
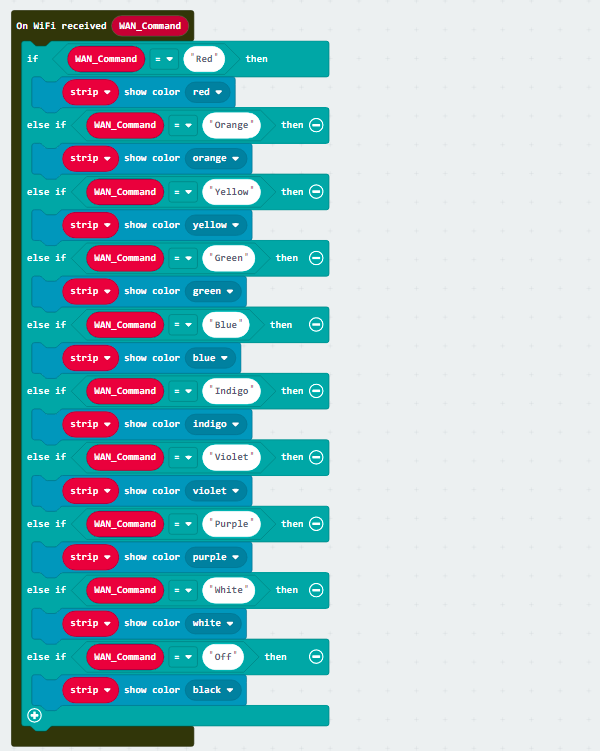
Step 3. Receive Command
Inside the
On WiFi Received, put a nestedif-elsestatement with different conditionsSet the first condition as
WAN_Command = RedIn the
ifsegment, perform the change color action bystrip show color redIn the next
ifcondition, useWAN_Command = OrangeSet the color to Orange by
strip show color orangeRepeat the previous steps, with changes on the Color, to finish the setup of responding to each color.
Full Solution
MakeCode: https://makecode.microbit.org/S06366-85821-99722-81571
You could also download the program from the following website:
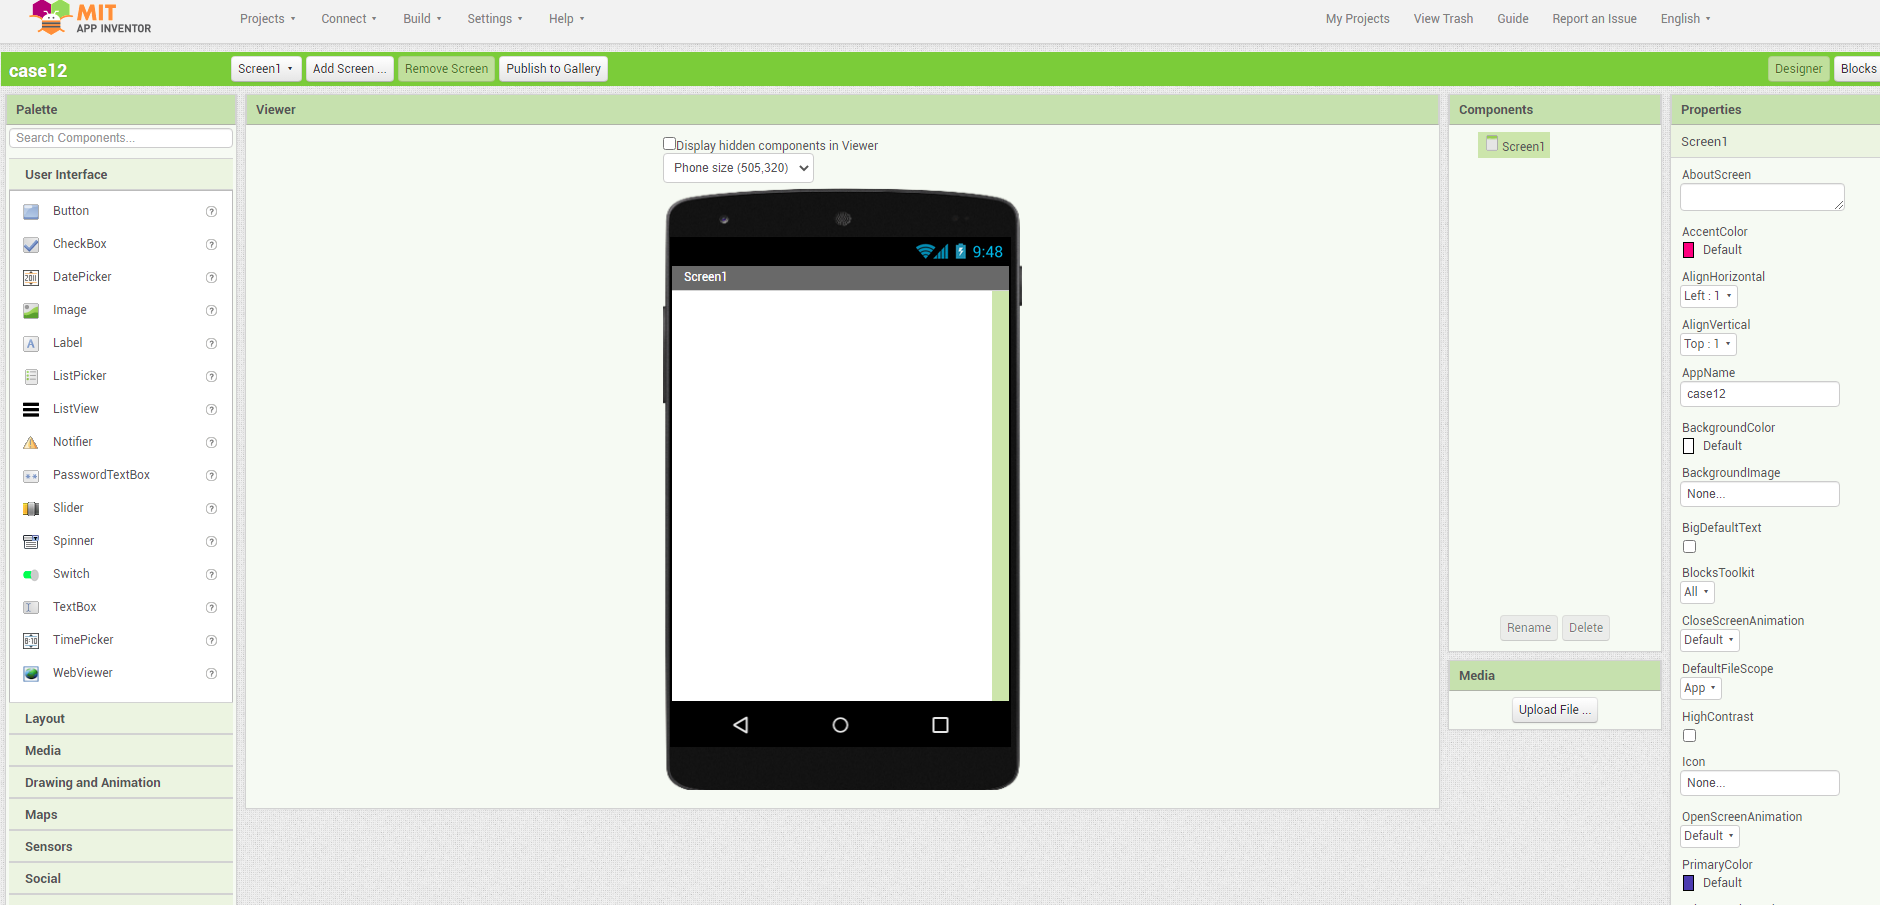
15.7. IoT (App inventor 2)
Step 1. Create an APP project Create a APP inventor account at http://ai2.appinventor.mit.edu/ Create a new project Step 2. Design the layout of APP In the designer page, pull the layout element from the left side to the editor In this example case, using different Place the element in your way For each element has their own property, you may change it in your mind, such as the Remember to put Step 3. Programming the elements in APP Switch to Blocks page by click the button at top right corner According to the catalog of function needs, find it at the left side and put to editor Go to Go to Go to Control API is: The program need to replace the Use You may hard code the But, you can also use Use After complete the API URL, use For example After finish the function for
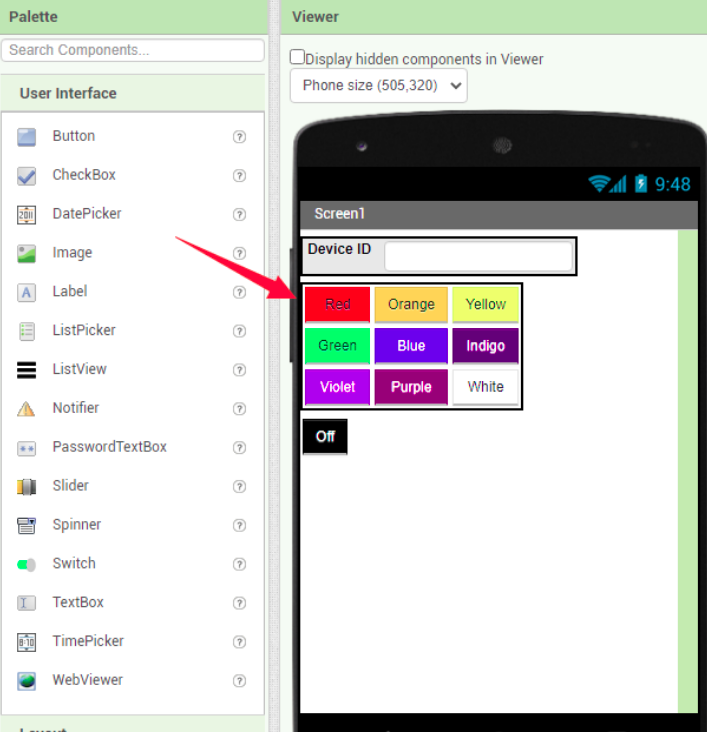
button, textbox, label and layout controlbackground color, font size, width, height, align.
In this example, you are required to change the Text to the Color that button representing to get the same result as documentation. For example, button who send “Red” command need to be “Red” as TextpropertyWeb element to editor, it will used for sending command
buttonX element, find the when buttonX.Click do function, put it to editor ( X represent the number of button)Web1 element, find the set Web1.URL to, put it inside to the when buttonX.Click doText catalog, find the join and " " element to start build the control APIhttps://control.smarthon.cc/publish?id=ID&msg=MSG , while ID and MSG means IoT:bit ID and Command respectivelyID and MSG according to different IoT:Bit and command in the APITextBox1.Text to get the ID input from userMSG with text commandButtonX.Text to get the Text property of button, which can used as the MSG in the example case, be careful you need to set up the Text property before you do thatjoin properly to concatenate the API from each partscall Web1.Get from Web1 to send the API Command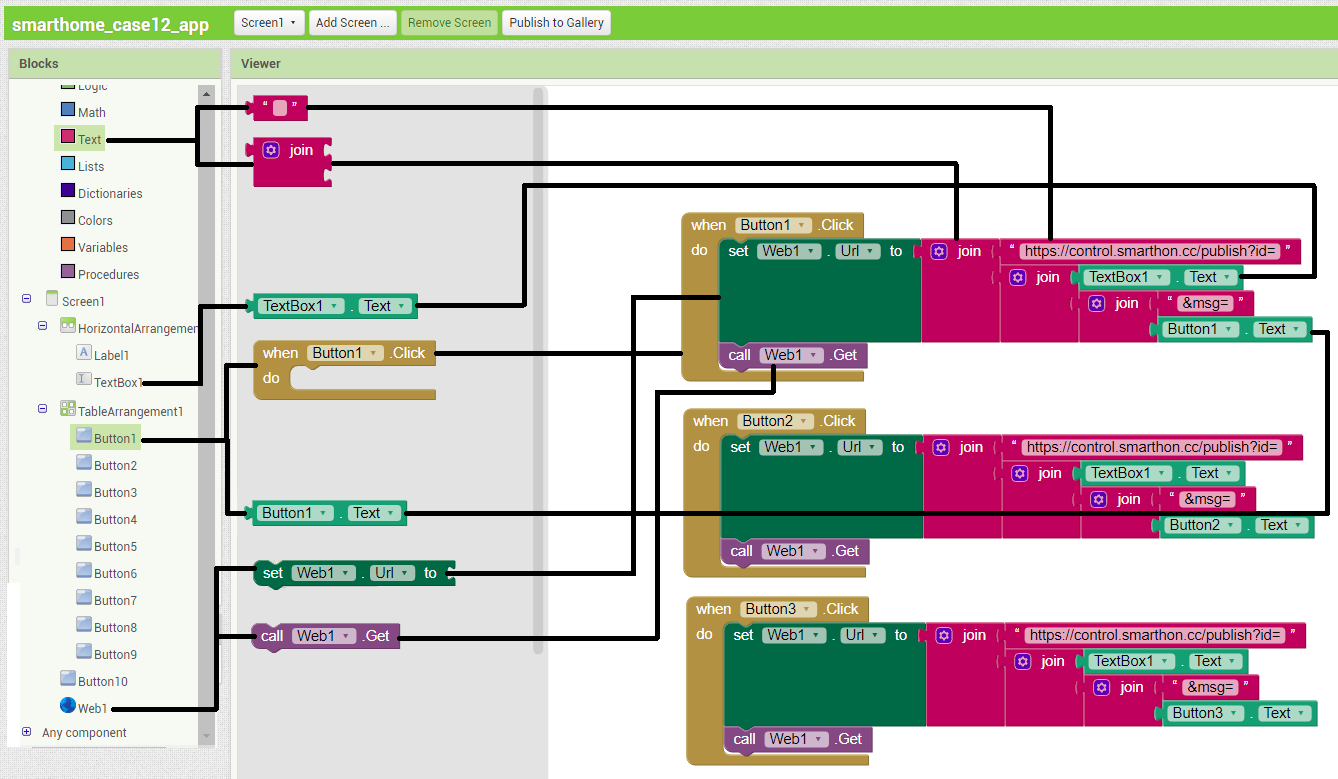
button1, repeat the steps for other buttons, with changes on target button element ( from button1 to button2, button3, … )
15.9. Think
Can you think of a suggestion to make the colorful light even smarter?
(e.g. add automatic decision rather than always wait for command)Can you try to add some buttons on the app for more complex action?