13. IoT Case 10: Home Health Data Monitoring
Level: 
13.1. Goal
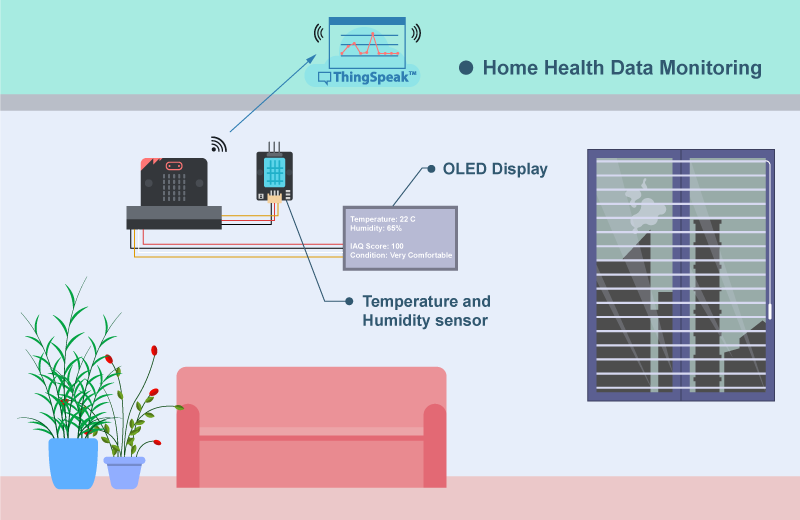
Make a home health data monitoring system by collecting data from the sensors inside the house. Also use the temperature and humidity value to calculate the IAQ Score as reference.
13.2. Background
What is home health data monitoring system?
Health monitoring is the concept of tracking the conditions of different parameters inside the user’s house. For indoor, the important parameters to analyze the home comfortability are temperature, humidity, pm2.5, CO2 and VOC. In this system, we can base on temperature and humidity to measure the comfortability of the home. With the too high temperature or too low humidity will also affect the comfortability.
Home health monitoring system Principle
In this case, integrated temperature and humidity sensor DHT11 is used. It will keep track of room temperature, humidity and IAQ value, display to the OLED and upload to the Thingspeak platform for further analysis.
Know more: What is an IAQ?
Indoor Air Quality (IAQ) refers to the air quality within and around buildings and structures, especially as it relates to the health and comfort of building occupants. Understanding and controlling common pollutants indoors can help reduce your risk of indoor health concerns. The important parameters are temperature, humidity, pm2.5, CO2 and VOC.
Know more: How to determine the IAQ Score?
In Smarthon Smart Home IoT Maker Kit, we use 2 parameters (temperature and humidity) to determine the comfortability (IAQ Score) of the room. Below is the chart to show most comfortable value of temperature (20-22) with humidity (40-70).
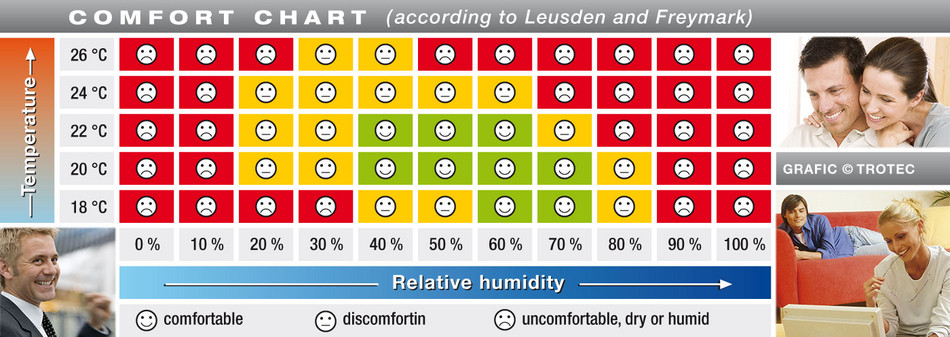
Therefore, better range of temperature will have higher score of IAQ; Better range of humidity will have higher score of IAQ. Thus, the average value of IAQ score from temperature and humidity can determine the comfortability of the room. In other words, for the used of block on pxt from Smarthon, it will return the average value of temperature and humidity IAQ score.

13.4. Assembly step
Step 1
In this case, “Open Style Model” is used as a home base to start with.
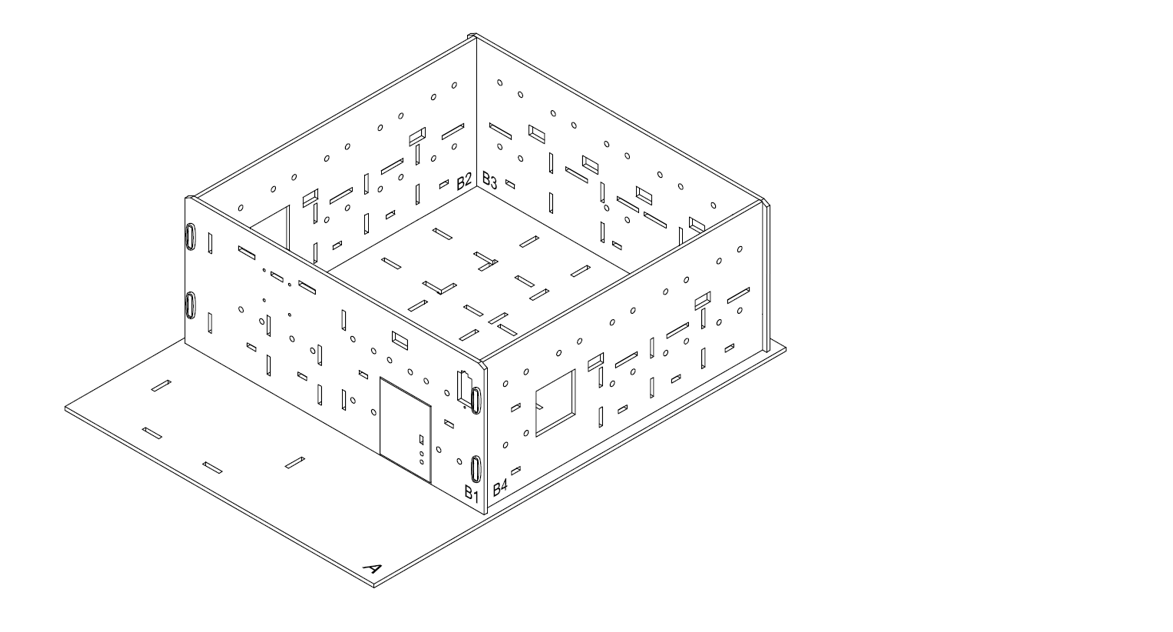
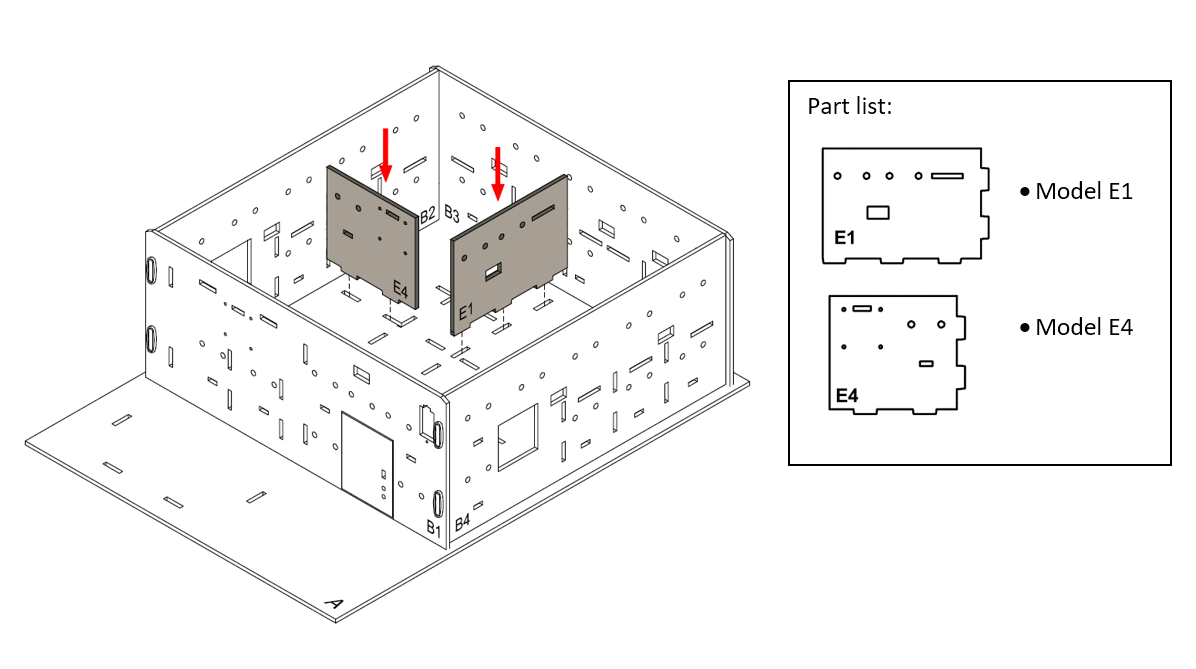
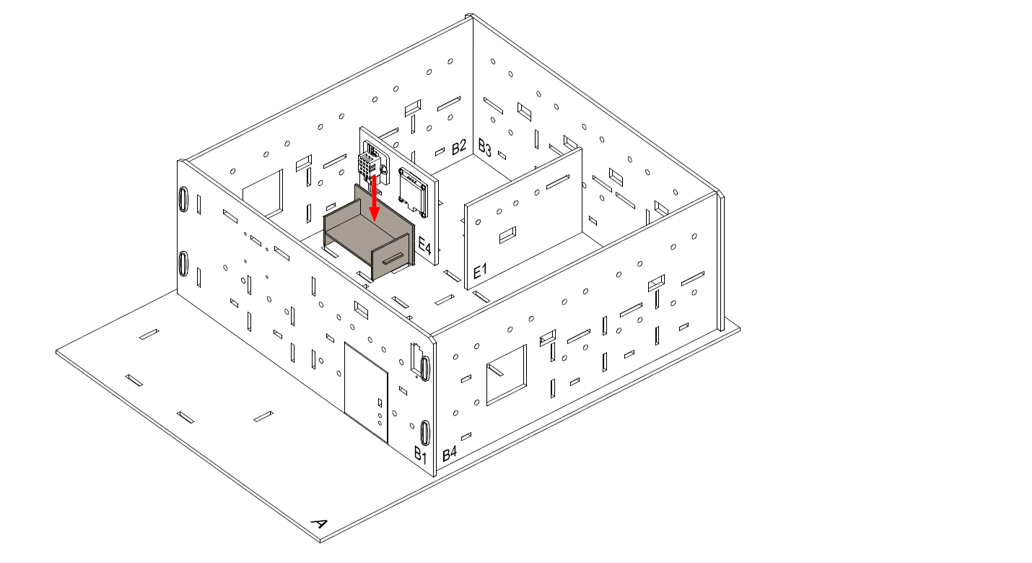
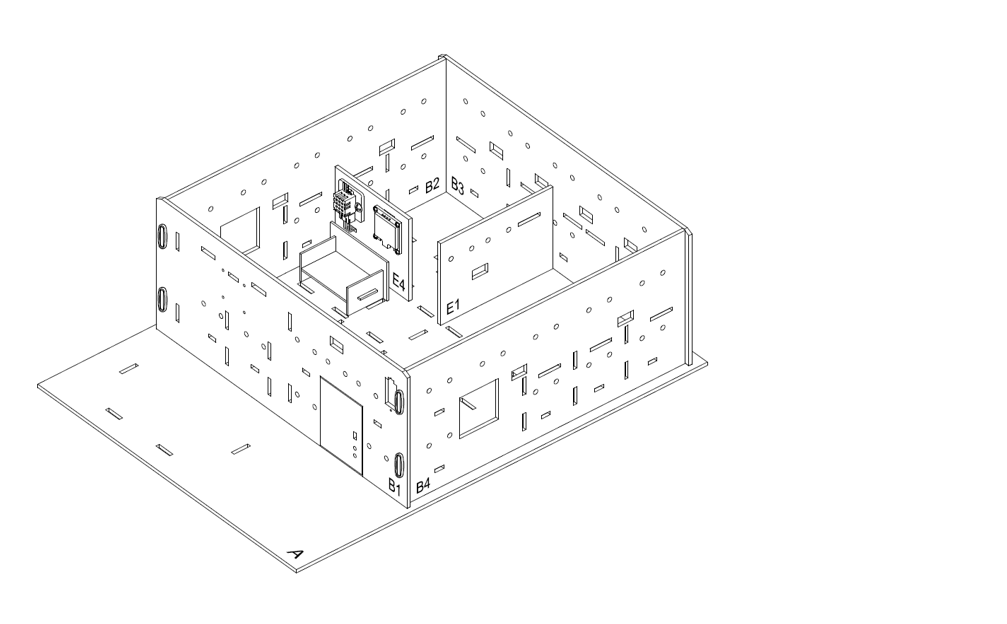
Step 2
Put the model E4 & E1 onto model A, align with holes at model A, B2 and B3.
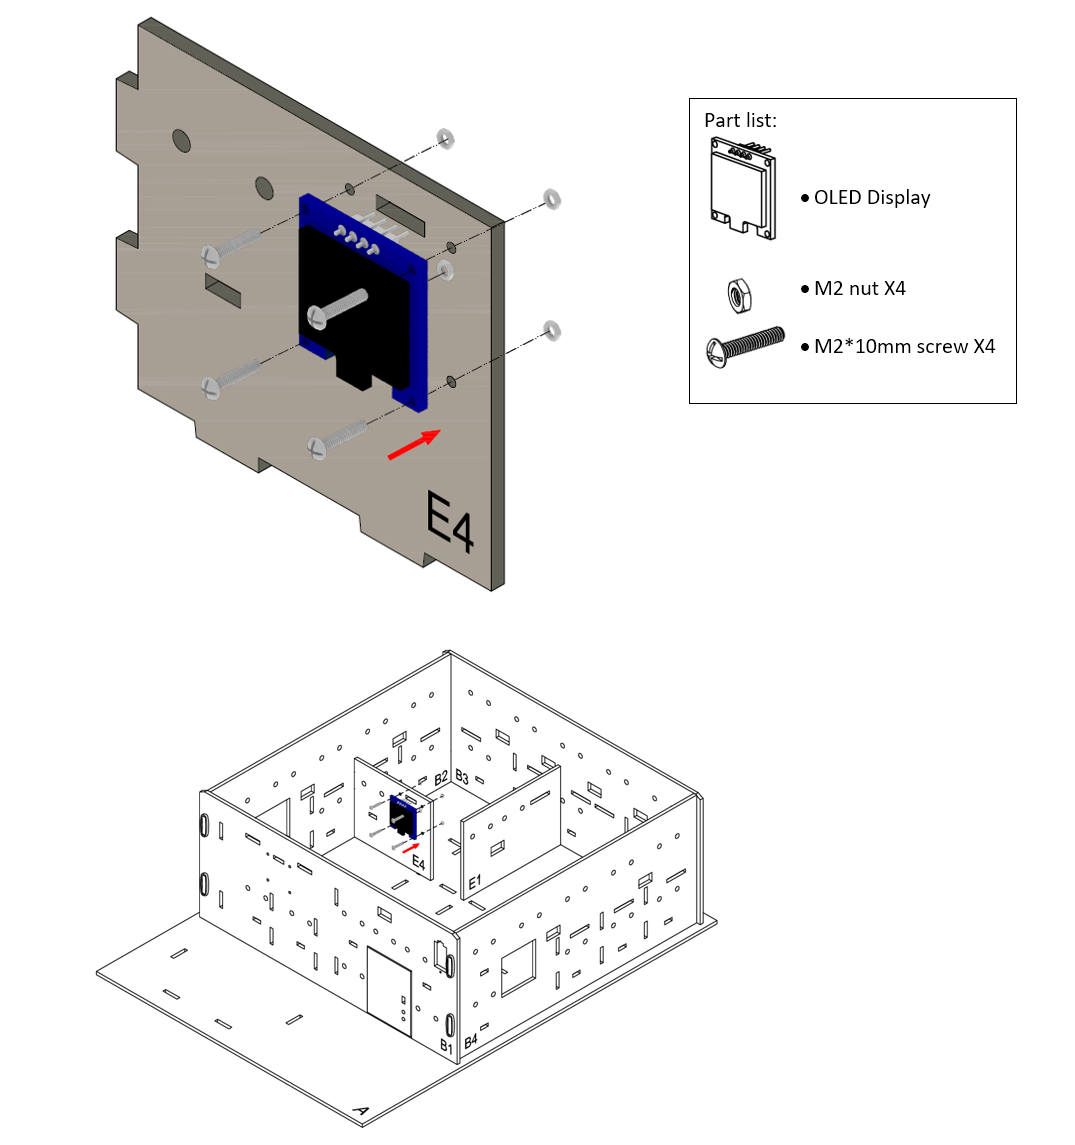
Step 3
Attach the OLED display onto model E4 using M4 * 10mm screws and nuts.
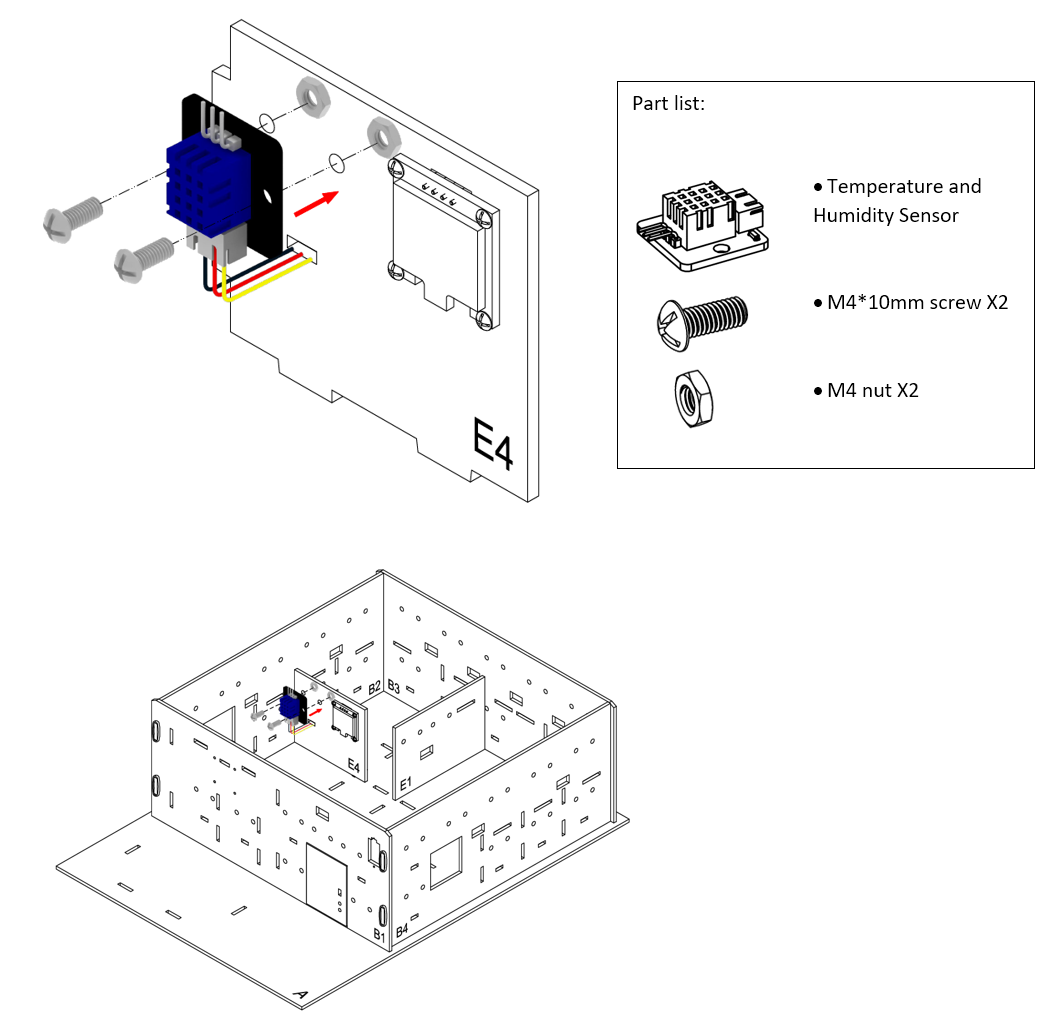
Step 4
Attach the DHT11 temperature and humidity sensor onto model E4 using M2 * 10mm screws and nuts. And the connecting wire should be bended to the hole below it.
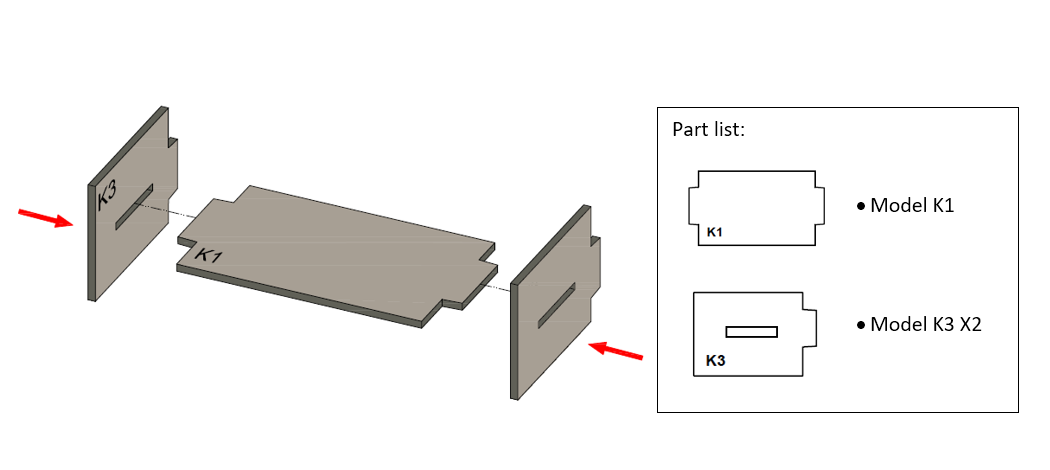
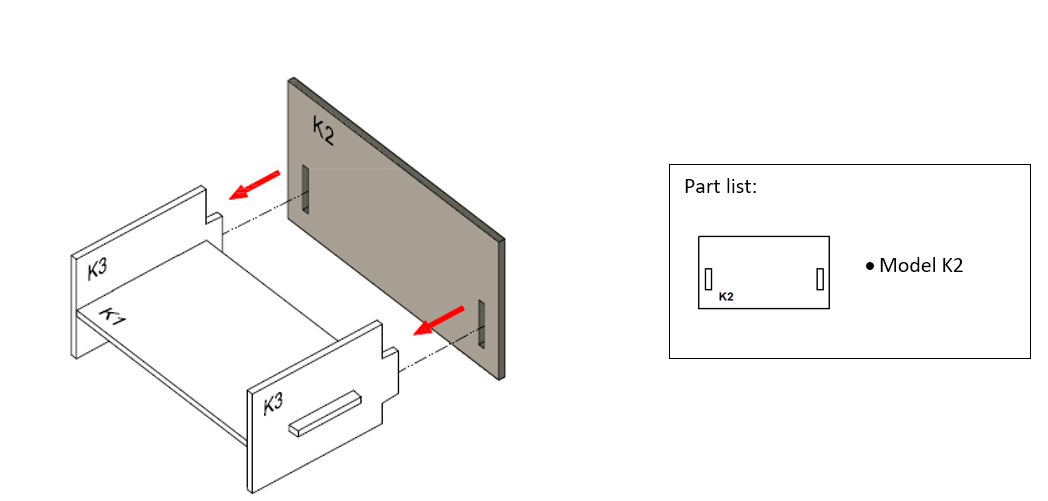
Step 5
To build a sofa model. Put the model K3 to the two sides of model K1.
Step 6
Put model K2 all together to the cardboard parts (K1-K3).
Step 7
Plase the sofa model behind the model E4.
Step 8
Assembly Completed!
13.5. Hardware connect
Connect the temperature and humidity sensor DHT11 to P0
Pull up the buzzer switch to disconnect the buzzer
Connect the OLED display to IoT:bit I2C port with extend cable

13.6. IoT (Thingspeak)
Step 1. Create Thingspeak channel
Go the Thingspeak create an account and create a channel
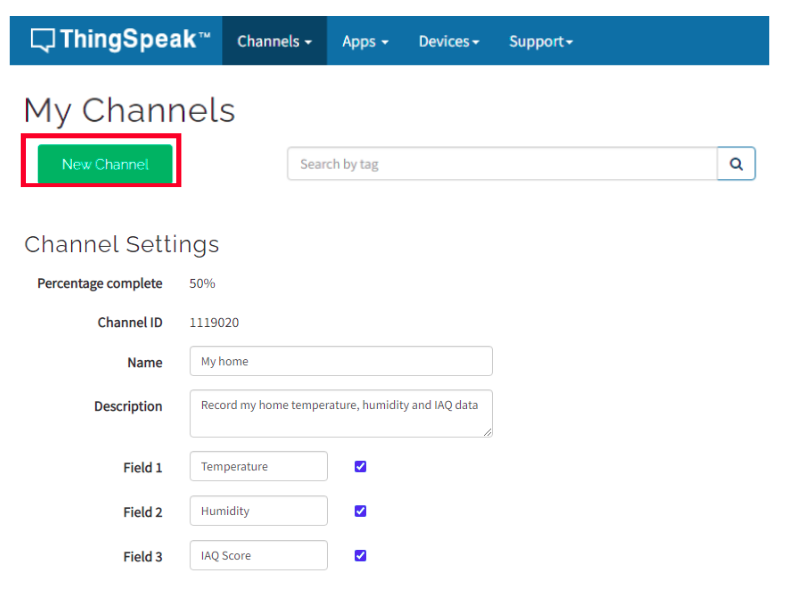
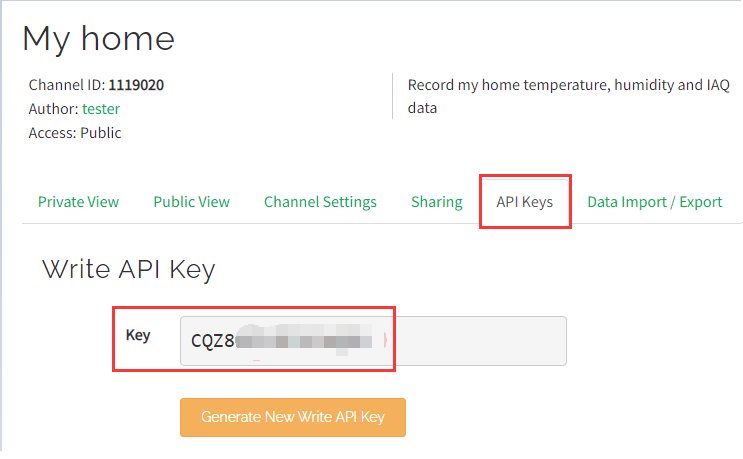
Step 2. Get channel API
After created a new channel, get the write in API
13.7. Programming (MakeCode)
Step 1. Initialize OLED, IoT:bit and connect to WiFi, create and initialize variables
Snap
Initialize OLED with width:128, height: 64toon startSnap
Initialize IoT:bit TX P16 RX P8fromIoT:bittoon startSnap
Set WiFi to ssid smarthon pwd 12345678toon startCreate and initialize the variables
temperature,humidityandiaq_scoreto0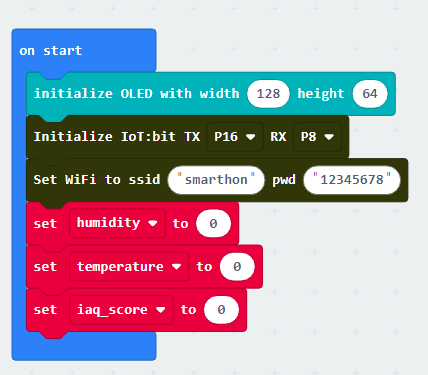
Step 2. Show icon “tick” after WiFi connection
In
On WiFi connected, put ashow icon tickget notice after WiFi is connected.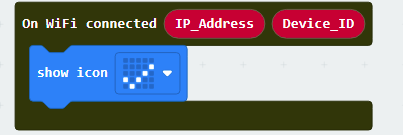
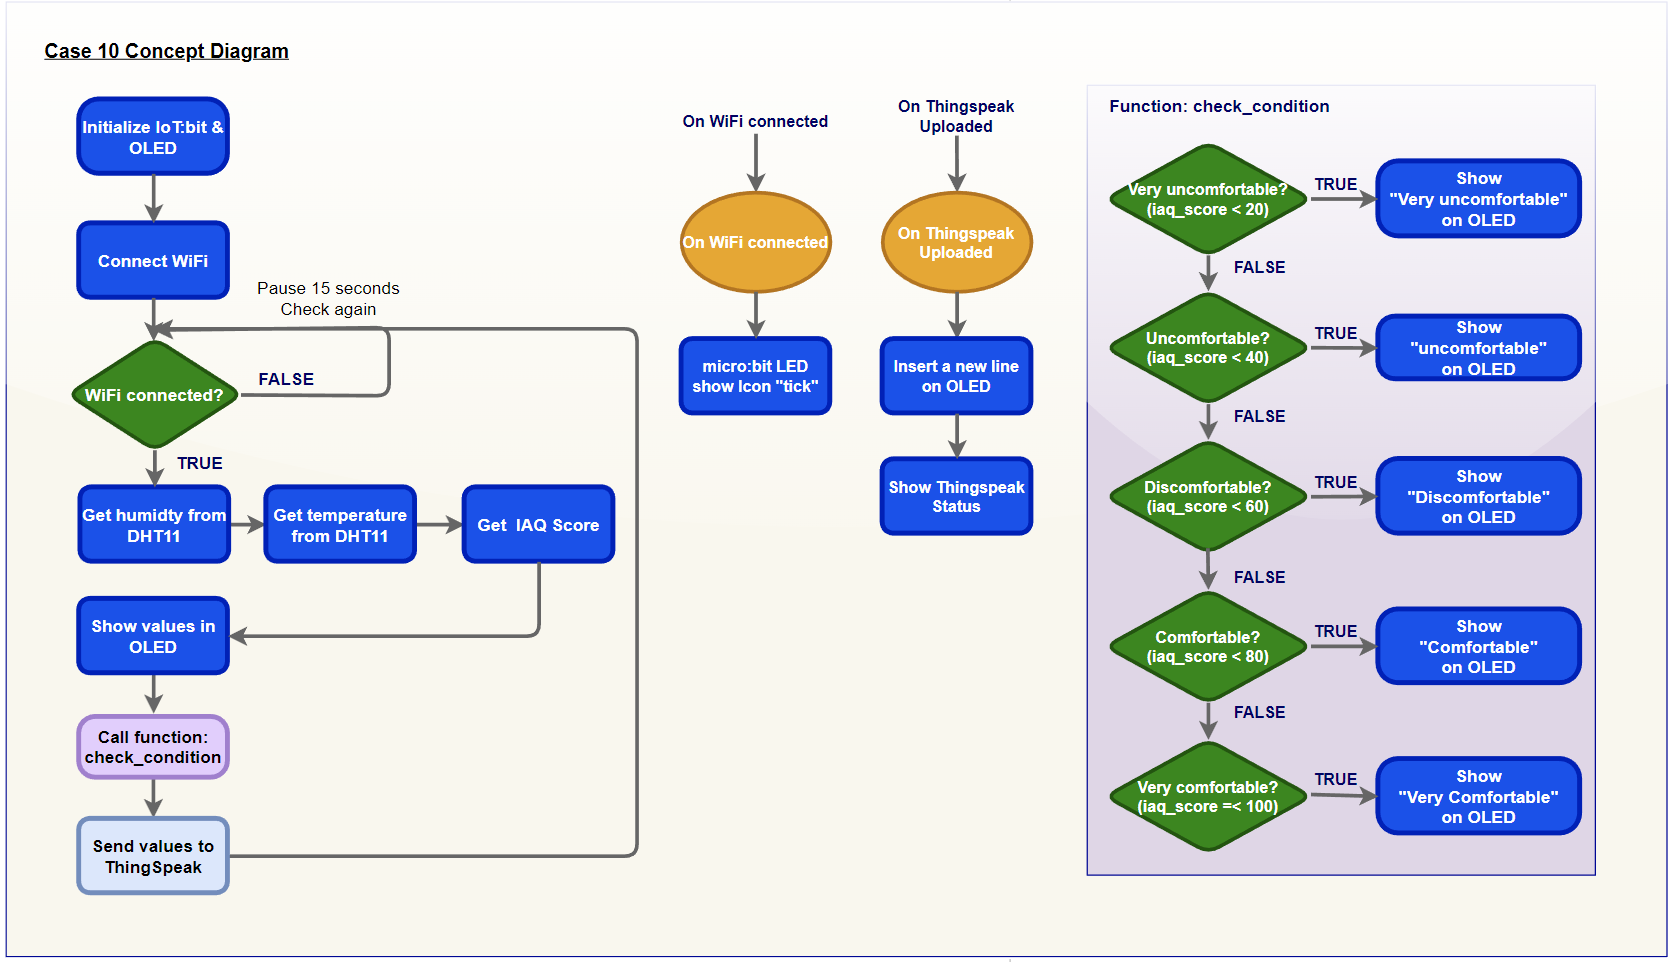
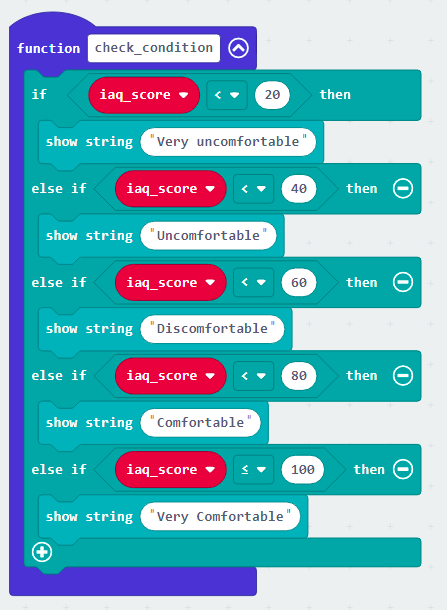
Step 3. Create the function check_condtion
Create a new function
check_conditionPut nested
if-elsestatement inside the functionThe first condition is
iaq_score < 20, thenshow string Very uncomfortablein the segmentThe second condition is
iaq_score < 40, thenshow string Uncomfortablein the segmentThe third condition is
iaq_score < 60, thenshow string Discomfortablein the segmentThe fourth condition is
iaq_score < 80, thenshow string Comfortablein the segmentThe fifth condition is
iaq_score <= 100, thenshow string Very comfortablein the segment
Step 4. Read the Temperature and Humidity sensor data
In
Forever, put aifstatement with conditionWiFi connected?to make sure connected to interent before uploading to thingspeakUse
Read Temperature & Humidity sensor at pin P0to read the data from DHT11 Temperature and Humidity SensorAfter read the DHT11 data, use the three functions to get the result and set to the variable
Set temperature to Get Temperature °Cfor temperatureSet humidity to Get Humidityfor humiditySet iaq_score to Get IAQ Scorefor iaq_score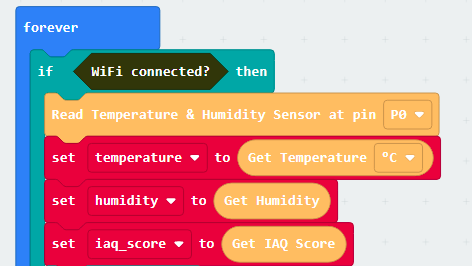
Step 4. Show the data on display
Clear the display before each times update by
clear OLED displayShow the three variables respectively, with some text explanation
show string join Temperature: temperaturefor temperatureshow string join Humidity: humidity %for humidityshow string Join IAQ Score: iaq_scorefor iaq_score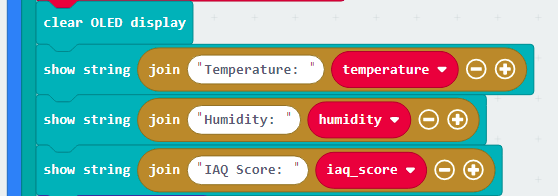
Step 5. Analyst the environment status
Run the
check_conditionfunction to summarize the IAQ Score result

Step 6. Upload to Thingspeak
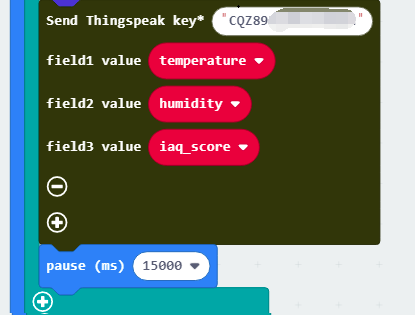
Send the data to Thingspeak by
Send Thingspeak key XXXX field1 value XXX ..., fill in thewrite API keyfrom the Thingspeak channel and thevaluesneed to be uploadAfter uploading the data to Thingspeak, wait for 15 second to avoid upload too frequently by
pause(ms) 15000, then start another Reading and uploading.
Step 7. Check Thingspeak upload status
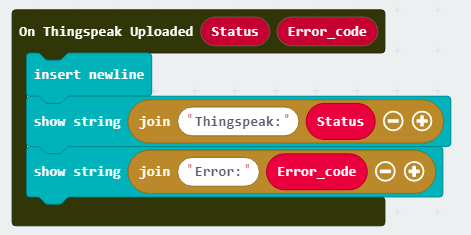
To check the uploading status, use
On thingspeak Uploadedto get the uploading resultInsert newlinefor better visual effectUse the
StatusandError_codefrom block placeholder respectively to showing some text explanation
show string join Thingseak: Statusfor Upload statusshow string join Error: Error_codefor Error code if upload failed
Full Solution MakeCode: https://makecode.microbit.org/S55831-49484-48805-49171
You could also download the program from the following website:
13.8. Result
The OLED show the temperature, humidity, IAQ Score and the environment condition based on IAQ Score. After upload, show the uploading information
13.9. Think
Apart from temperature and humidity, what elements do you think are essential to be included in a home health monitoring system? (E.G CO2 level? PM2.5 value?)
What function do you think the system can also include if it is to be used in a real home? (E.G Alert when the condition is too bad for health?)