12. IoT Case 09: Smart Digital Morning Clock
Level: 
12.1. Goal
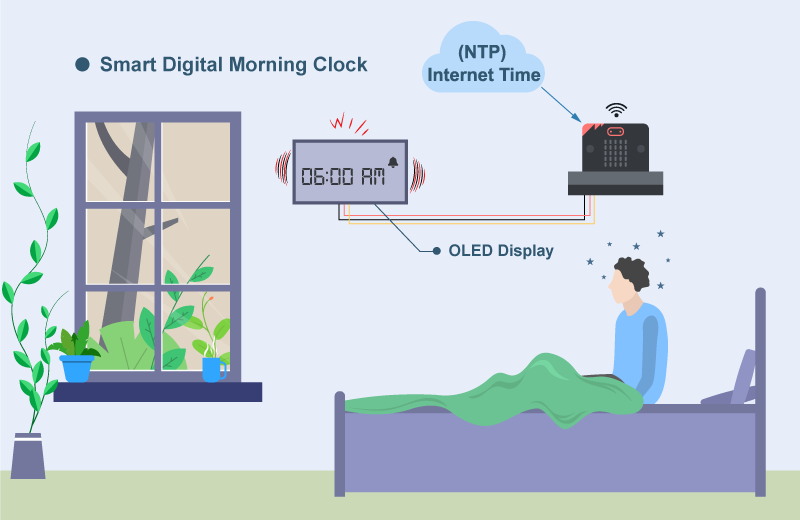
Make a digital clock that performs a normal clock function with auto-synchronizing Internet time, and alert at specific time.
12.2. Background
What is Smart Digital Clock?
Smart digital clock is a clock that shows time as accurate as to atomic clock by connecting to the Internet.
Smart Digital Clock Principle
NTP protocol ensures devices synchronize their time with an accurate time internet provider. With connecting to the Internet, the digital clock can show the time close to atomic clock in millisecond .
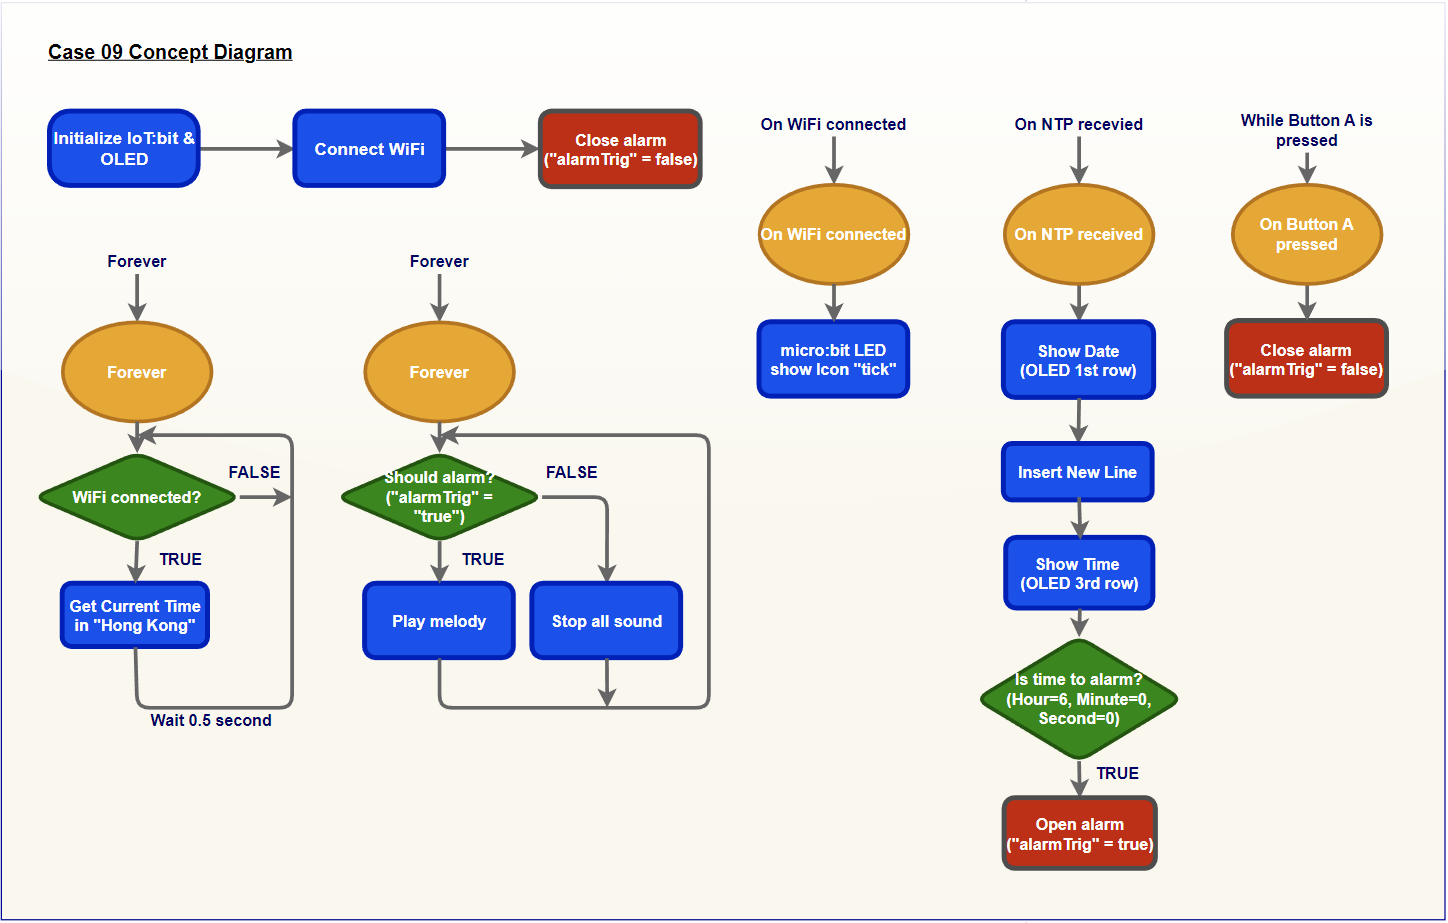
In the program, it will get the internet time every 0.5 second to show the time on the OLED. When the time is arrived to specific time (e.g. 06:00:00), it will turn on the alert. Otherwise, it will turn of the buzzer. When the user pressed the button A, the alarm can be closed.
12.4. Assembly step
Step 1
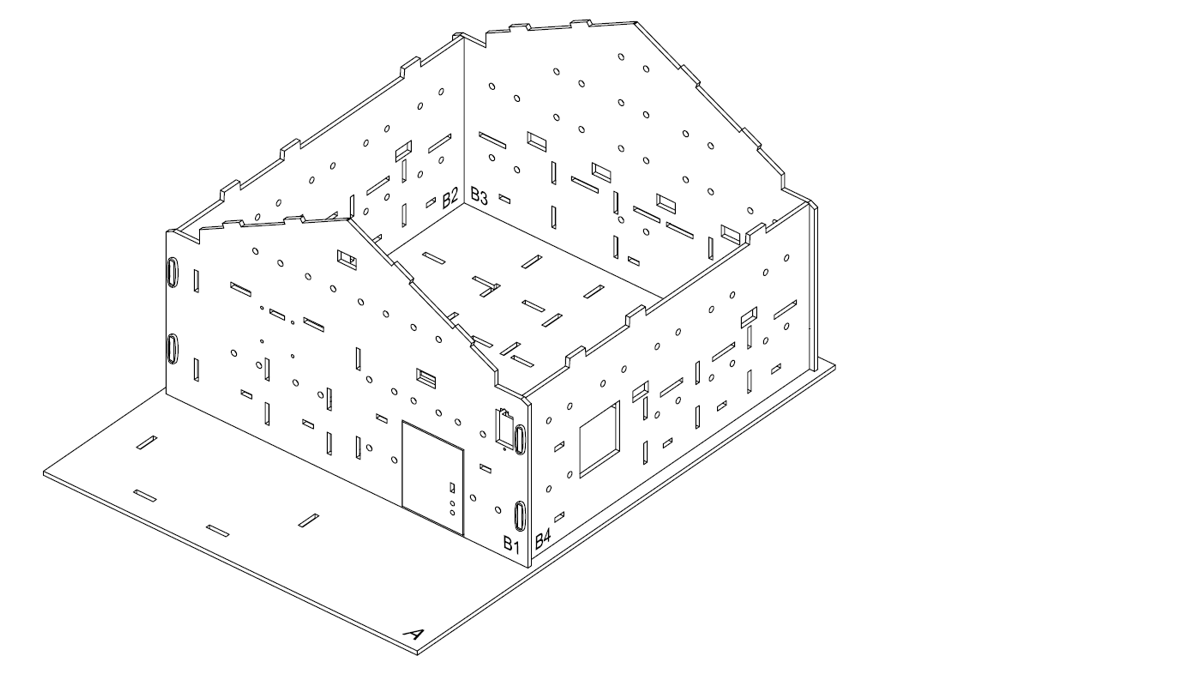
In this case, build the “Big Style Model” as a home base.
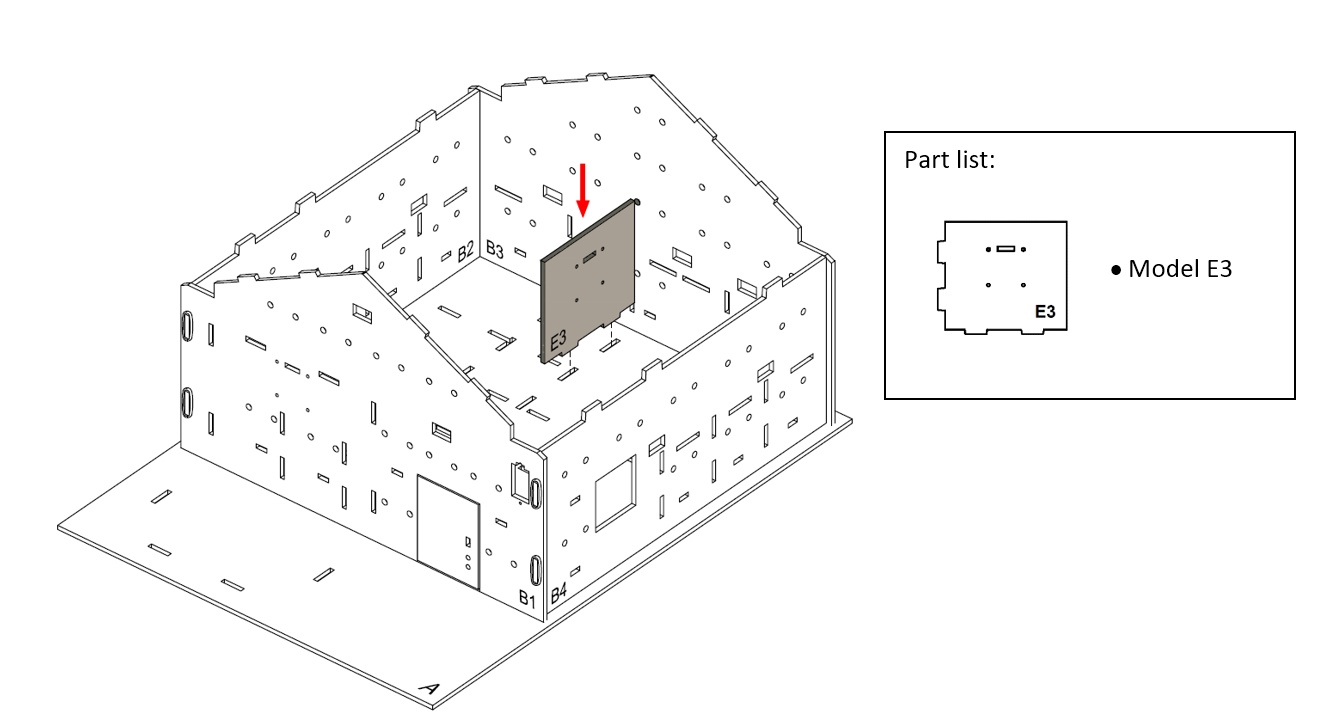
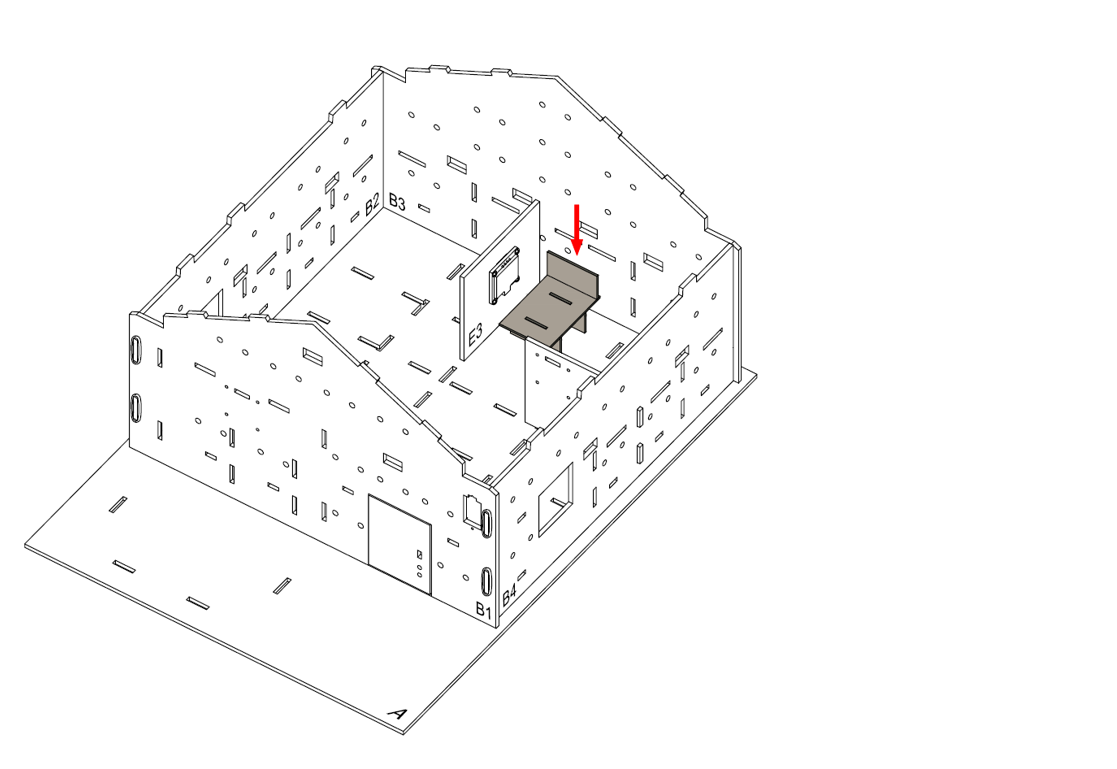
Step 2
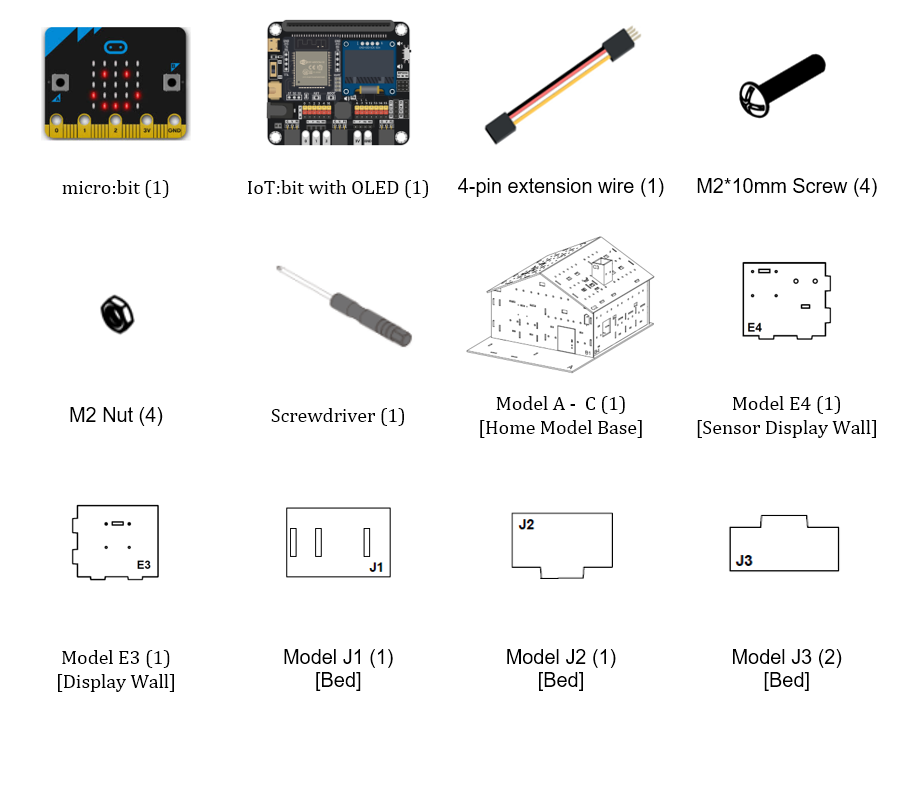
Let’s build a bed room to install a digital clock. Put the model E3 onto cardboard A, align with the holes at model A and B3.
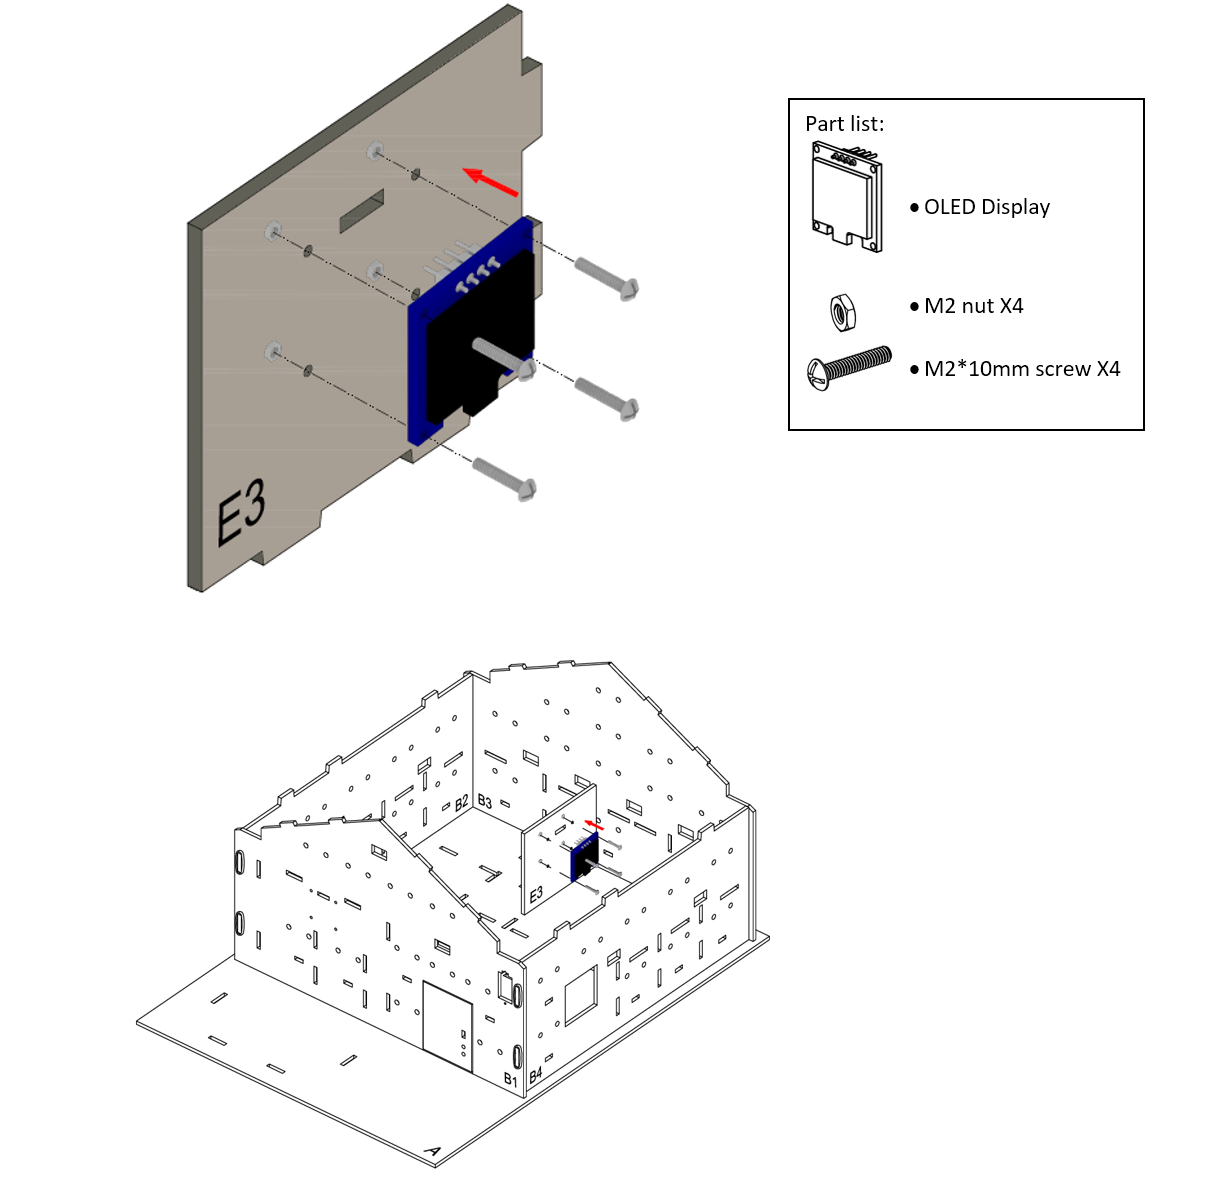
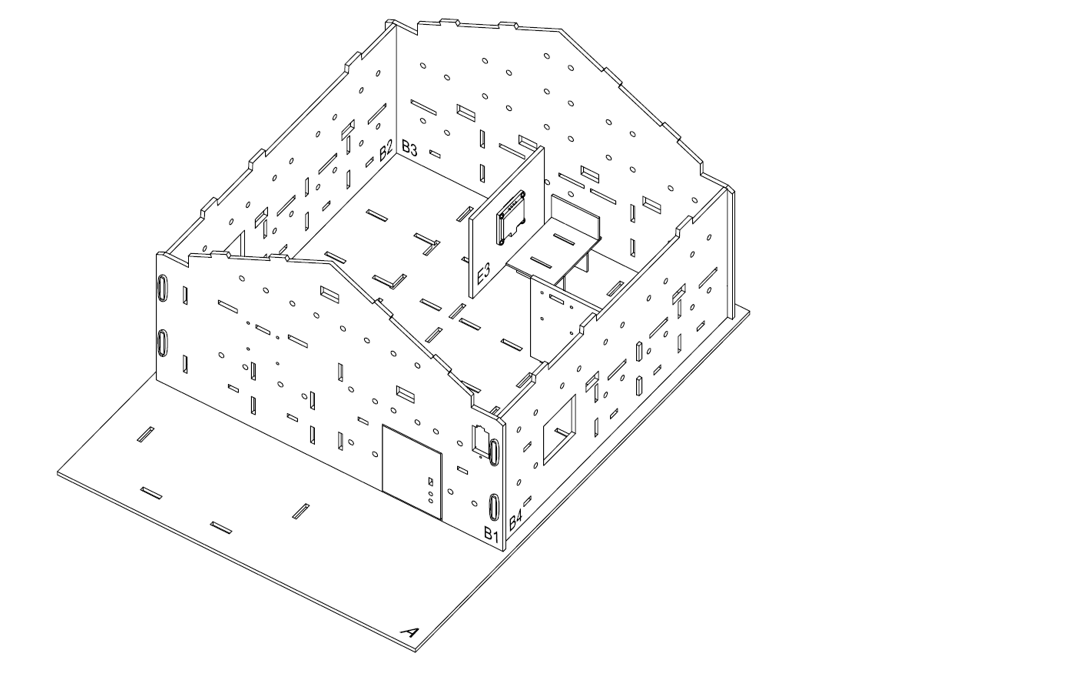
Step 3
Attach the OLED display as a digital clock to the model E3 using M2 * 10mm screws and nuts.
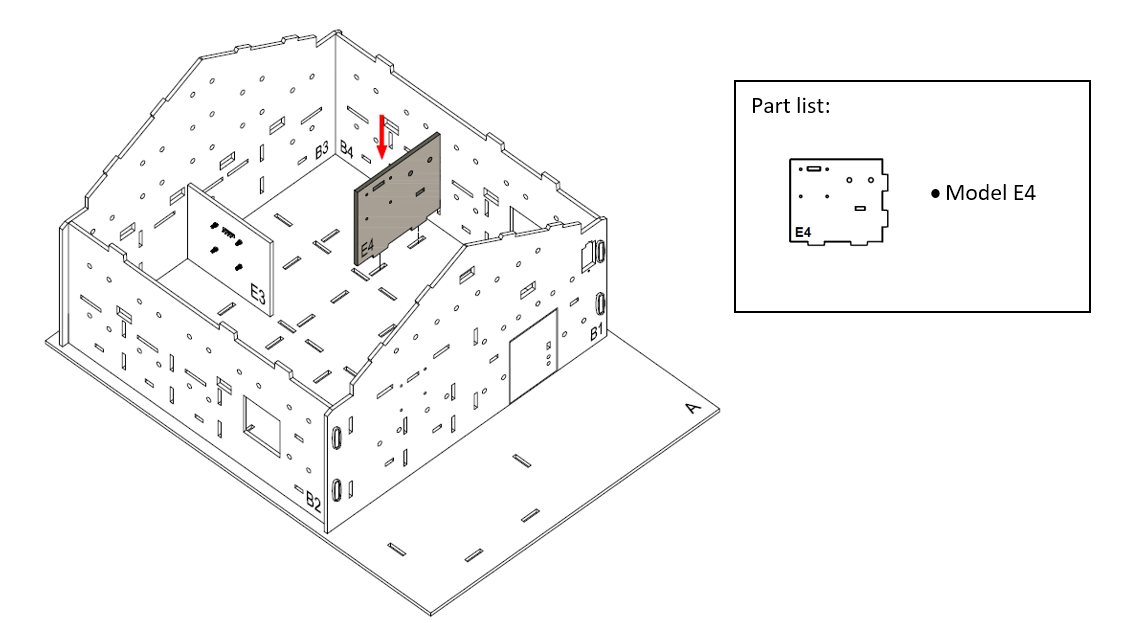
Step 4
Put the model E4 onto cardboard A, align with the holes at model A and B4.
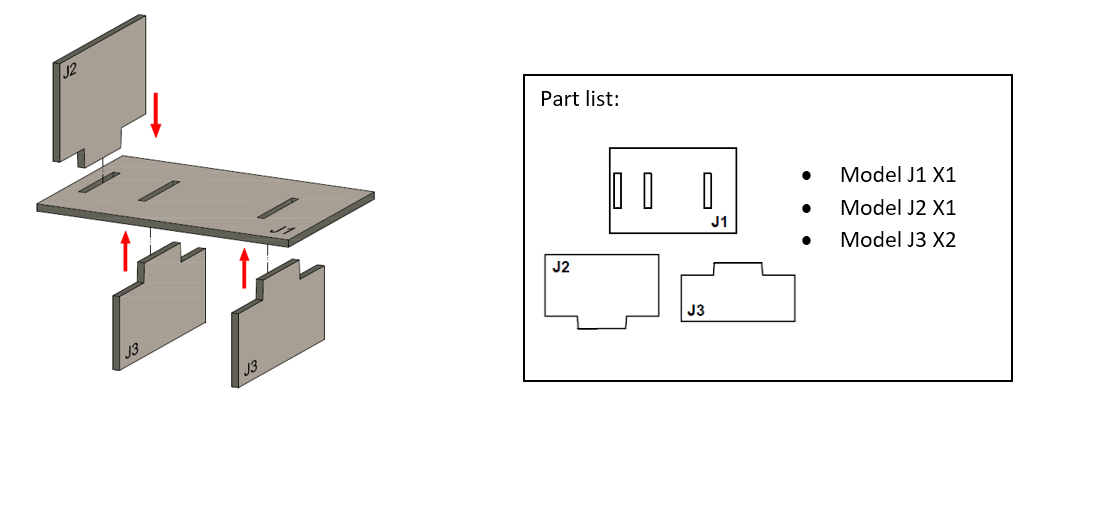
Step 5
To build a bed. Put model J2 onto the model J1, then put together all the cardboard parts (J1-J3).
Step 6
The bed completed!

Step 7
Place the bed next to the digital clock at the room.
Step 8
Assembly Completed!
12.6. Programming (MakeCode)
Step 1. Initialize OLED, IoT:bit and connect to WiFi, create the variable
Snap
Initialize OLED with width 128, height 64toon startSnap
Initialize IoT:bit TX P16 RX P8toon startSnap
Set Wi-Fi to ssid pwdtoon startand enter the SSID and passwordCreate the variable
alarmTrigSet the
alarmTrigvariable tofalse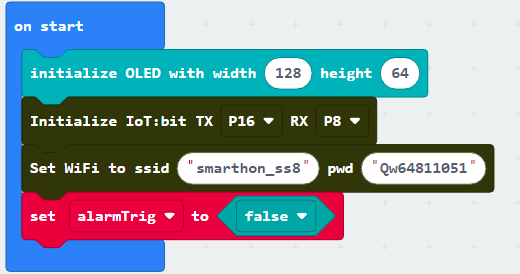
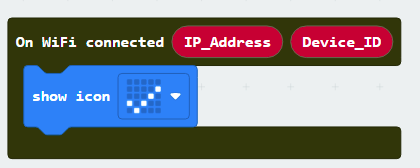
Step 2. Check Wi-Fi connection state
Snap the
On WiFi connectedblock to editorPut a
show icon tickinside the block to show tick icon after connected
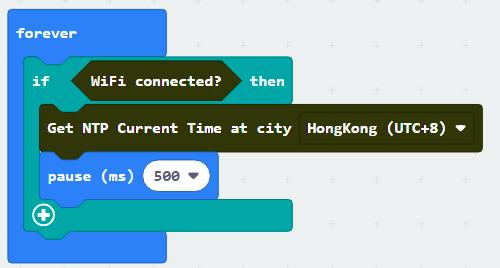
Step 3. Get the NTP time
Put a
ifstatement inForeverUse
WiFi connected?as conditionIn
ifsegment, putGet NTP Current Time at city HongKong(UTC+8)to get NTP timePause 500msto get the NTP time with each 0.5 second
Step 4. Show the NTP time on display
Put
On NTP receivedto editorWhen get the NTP time, the program in this block will running
Clear the display before each update by
Clear OLED displayShow the formatted time string with
show string join Date: day.Month.YearShow the formatted time string with
show string join Time: Hour:Minute:Second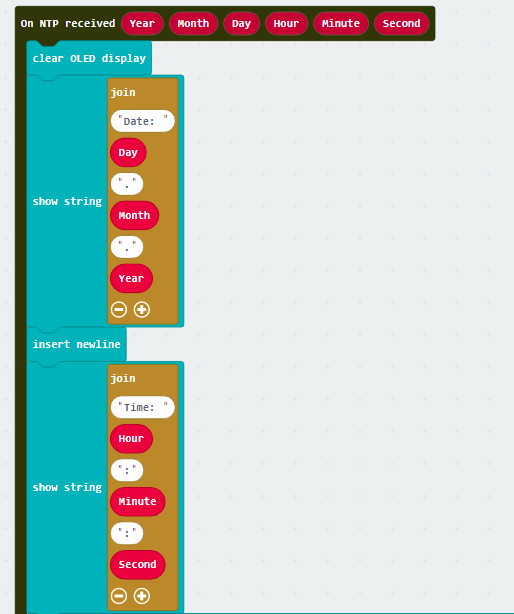
Step 5. Set the alarm
Put a
ifstatement with multiple conditionsHour = 6andMinute = 0andSecond = 6Put
set alarmTrig to trueinifsegment
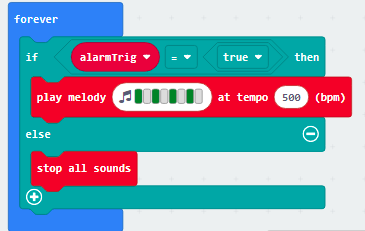
Step 6. Set up the sound
Put another
Foreverto editorPut a
if-elsestatement inside theForeverUse
alarmTrig = trueas conditionPlay the alarm by melody at tempo 500 bpm
Otherwise, stop the alarm
Step 7. Turn off alarm
Put
on Button A pressedto editorPut
set alarmTrig to falseinto the block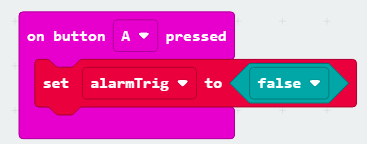
Full Solution
MakeCode: https://makecode.microbit.org/S77738-06496-37751-47481
You could also download the program from the following website:
12.8. Think
Q1. Apart from showing the time and alarm, any other tasks can be done when we know the time?